Jacket Sewing Pattern: The Cropped Cape Jacket, Step by Step
A cape jacket with a capelet, collar and welt pockets, to sew in sizes XS to 5XL with our free construction guide.
By Marie · Updated
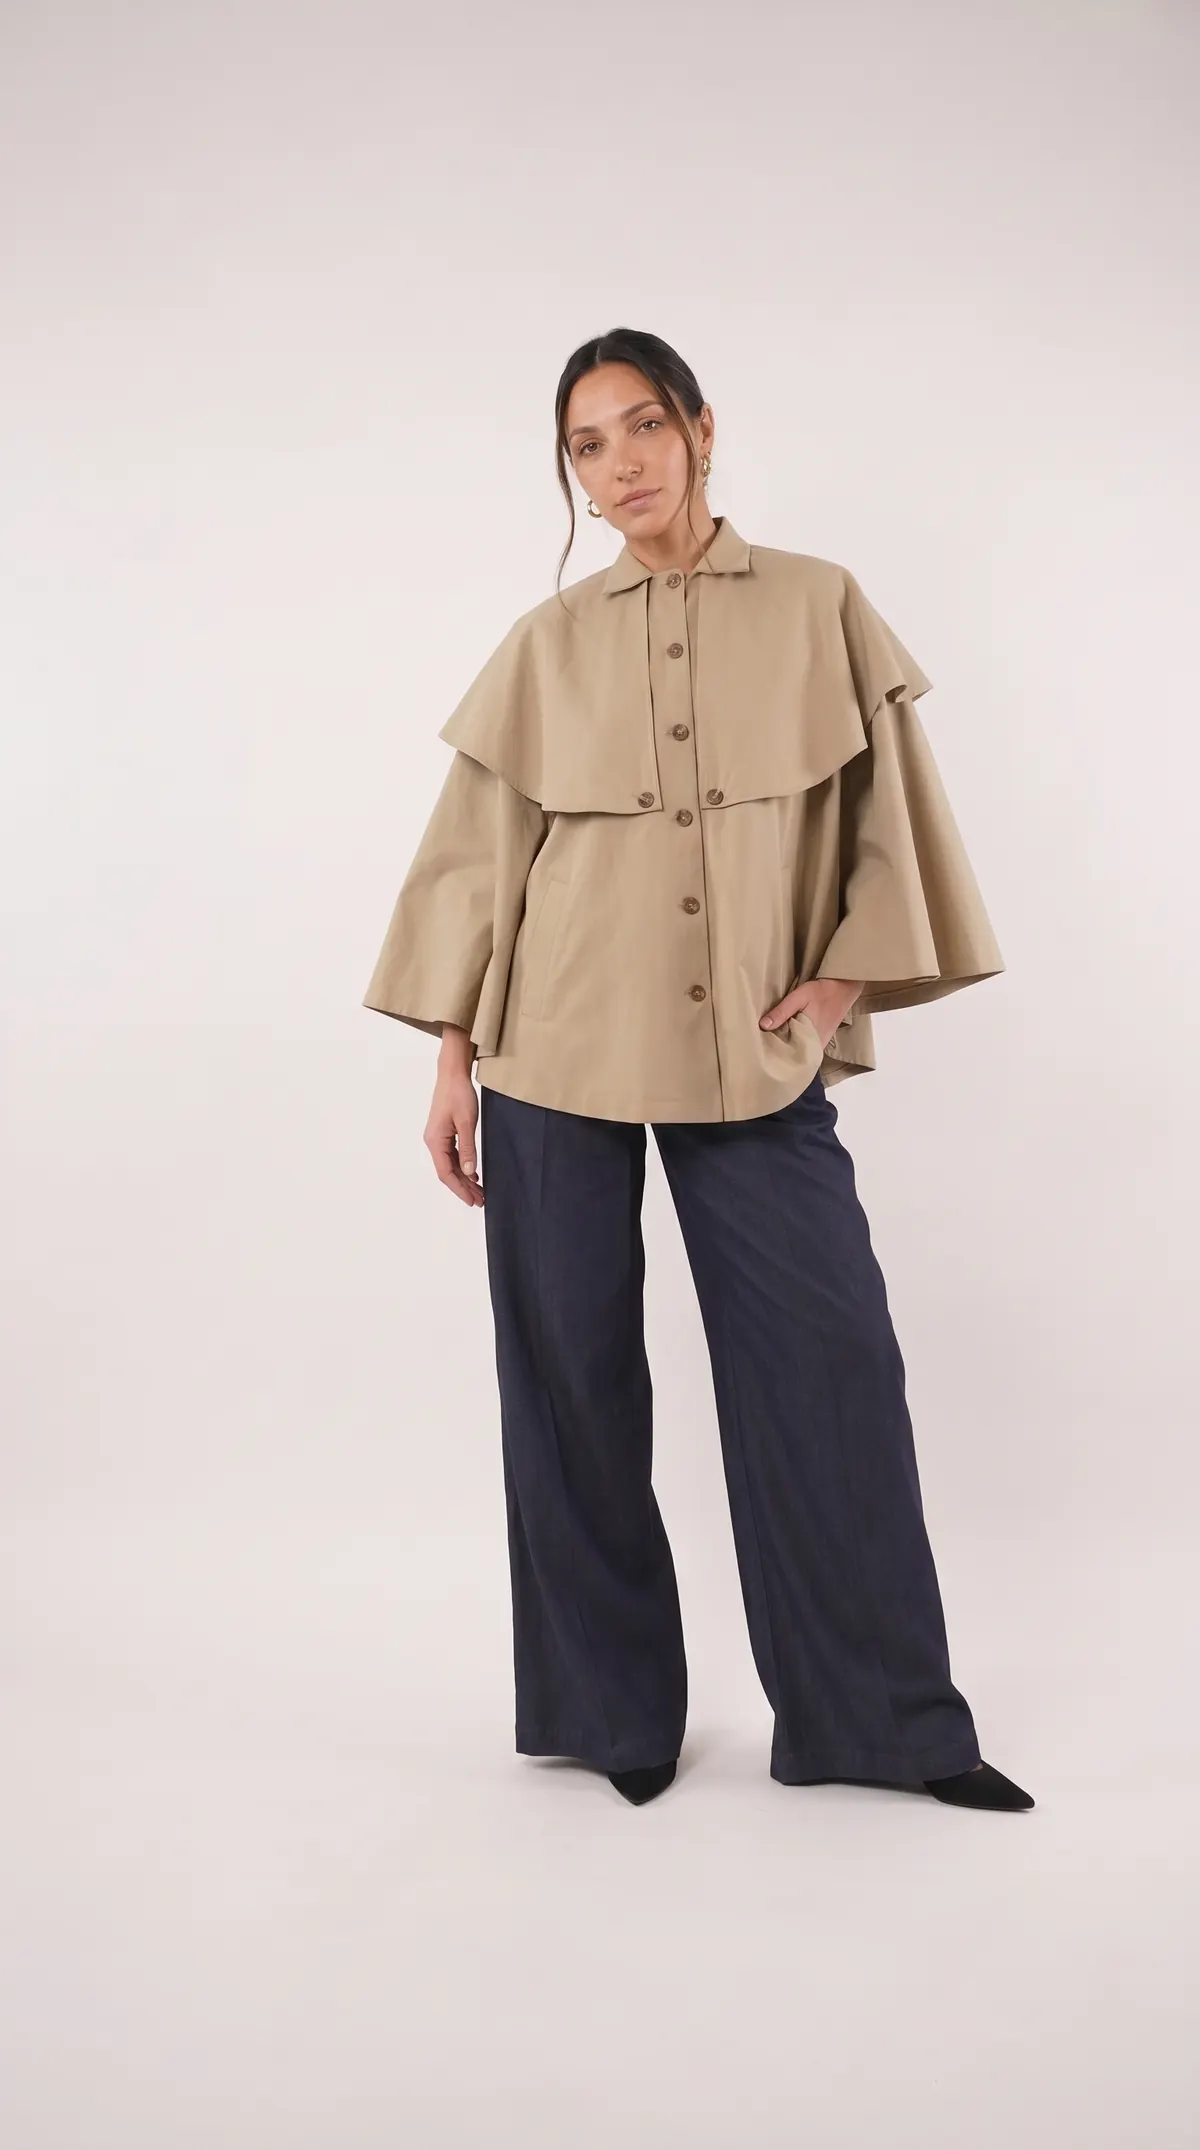
This jacket sewing pattern lets you make a cropped cape jacket in the spirit of a trench coat, with a capelet, collar, welt pockets and button placket, in every size from XS to 5XL. It's a sleeveless, unlined jacket: the cape falls over the shoulders and flares over the body. The free tutorial below includes the full construction guide: size charts, supplies, pattern pieces, then the 12 steps with photos.
The cropped cape jacket, a women's jacket sewing pattern inspired by the trench coat
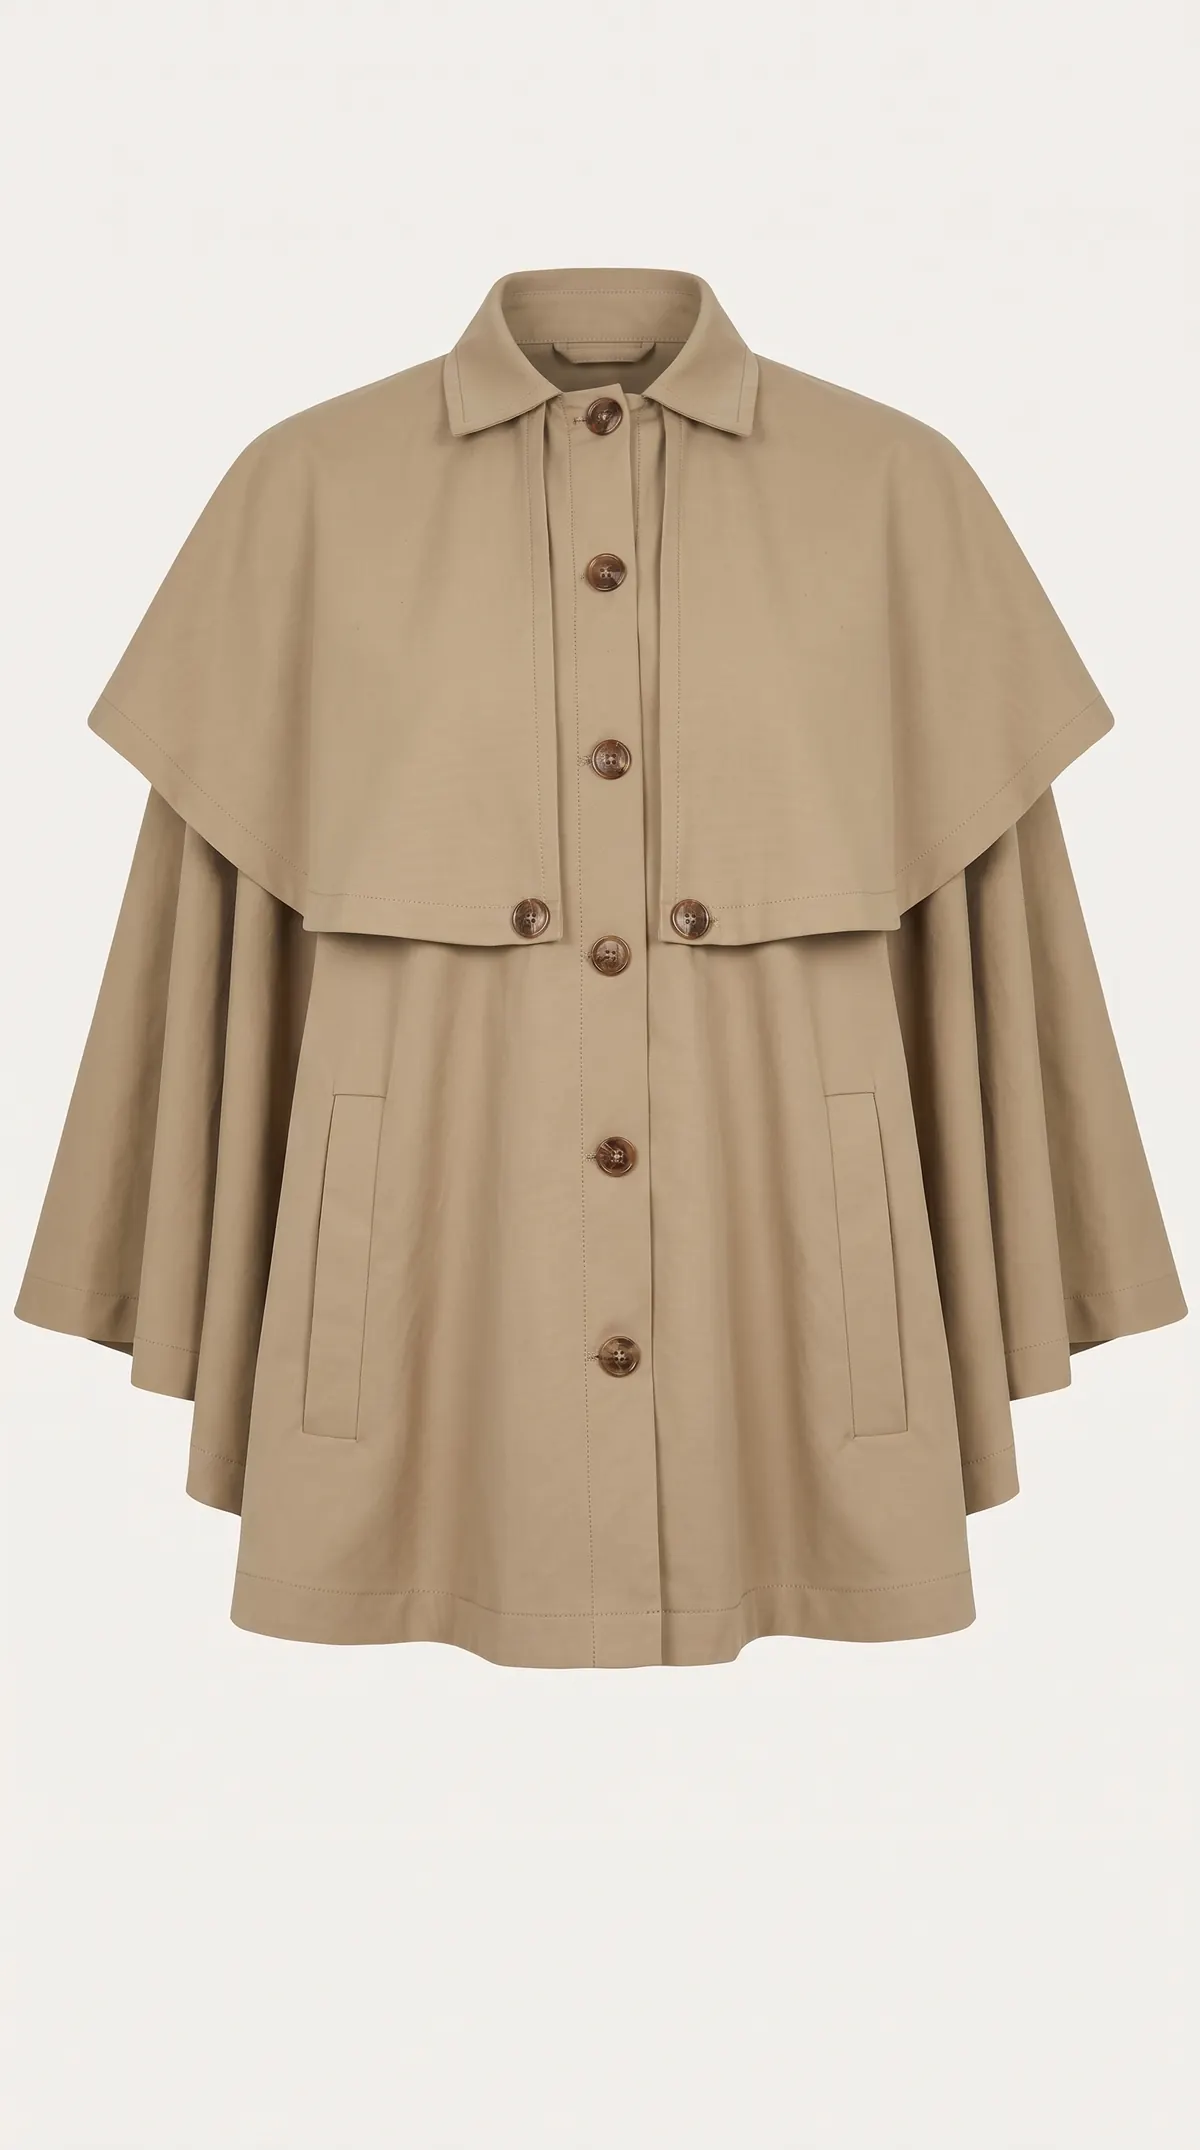
Here is what you'll be sewing: a cropped cape jacket, meaning a jacket with no sleeves to set in, that borrows the classic details of a trench coat. The whole construction is explained for free on this page, and you can find our other designs on the free sewing tutorials home page.
The trench-inspired details feel reassuring and familiar, but the cape jacket silhouette gives them a fresh look. Beige is a classic. The crisp structure of the cotton herringbone twill gives the tiered capelet, sharp collar and flared silhouette a clean, architectural drape, without heaviness.
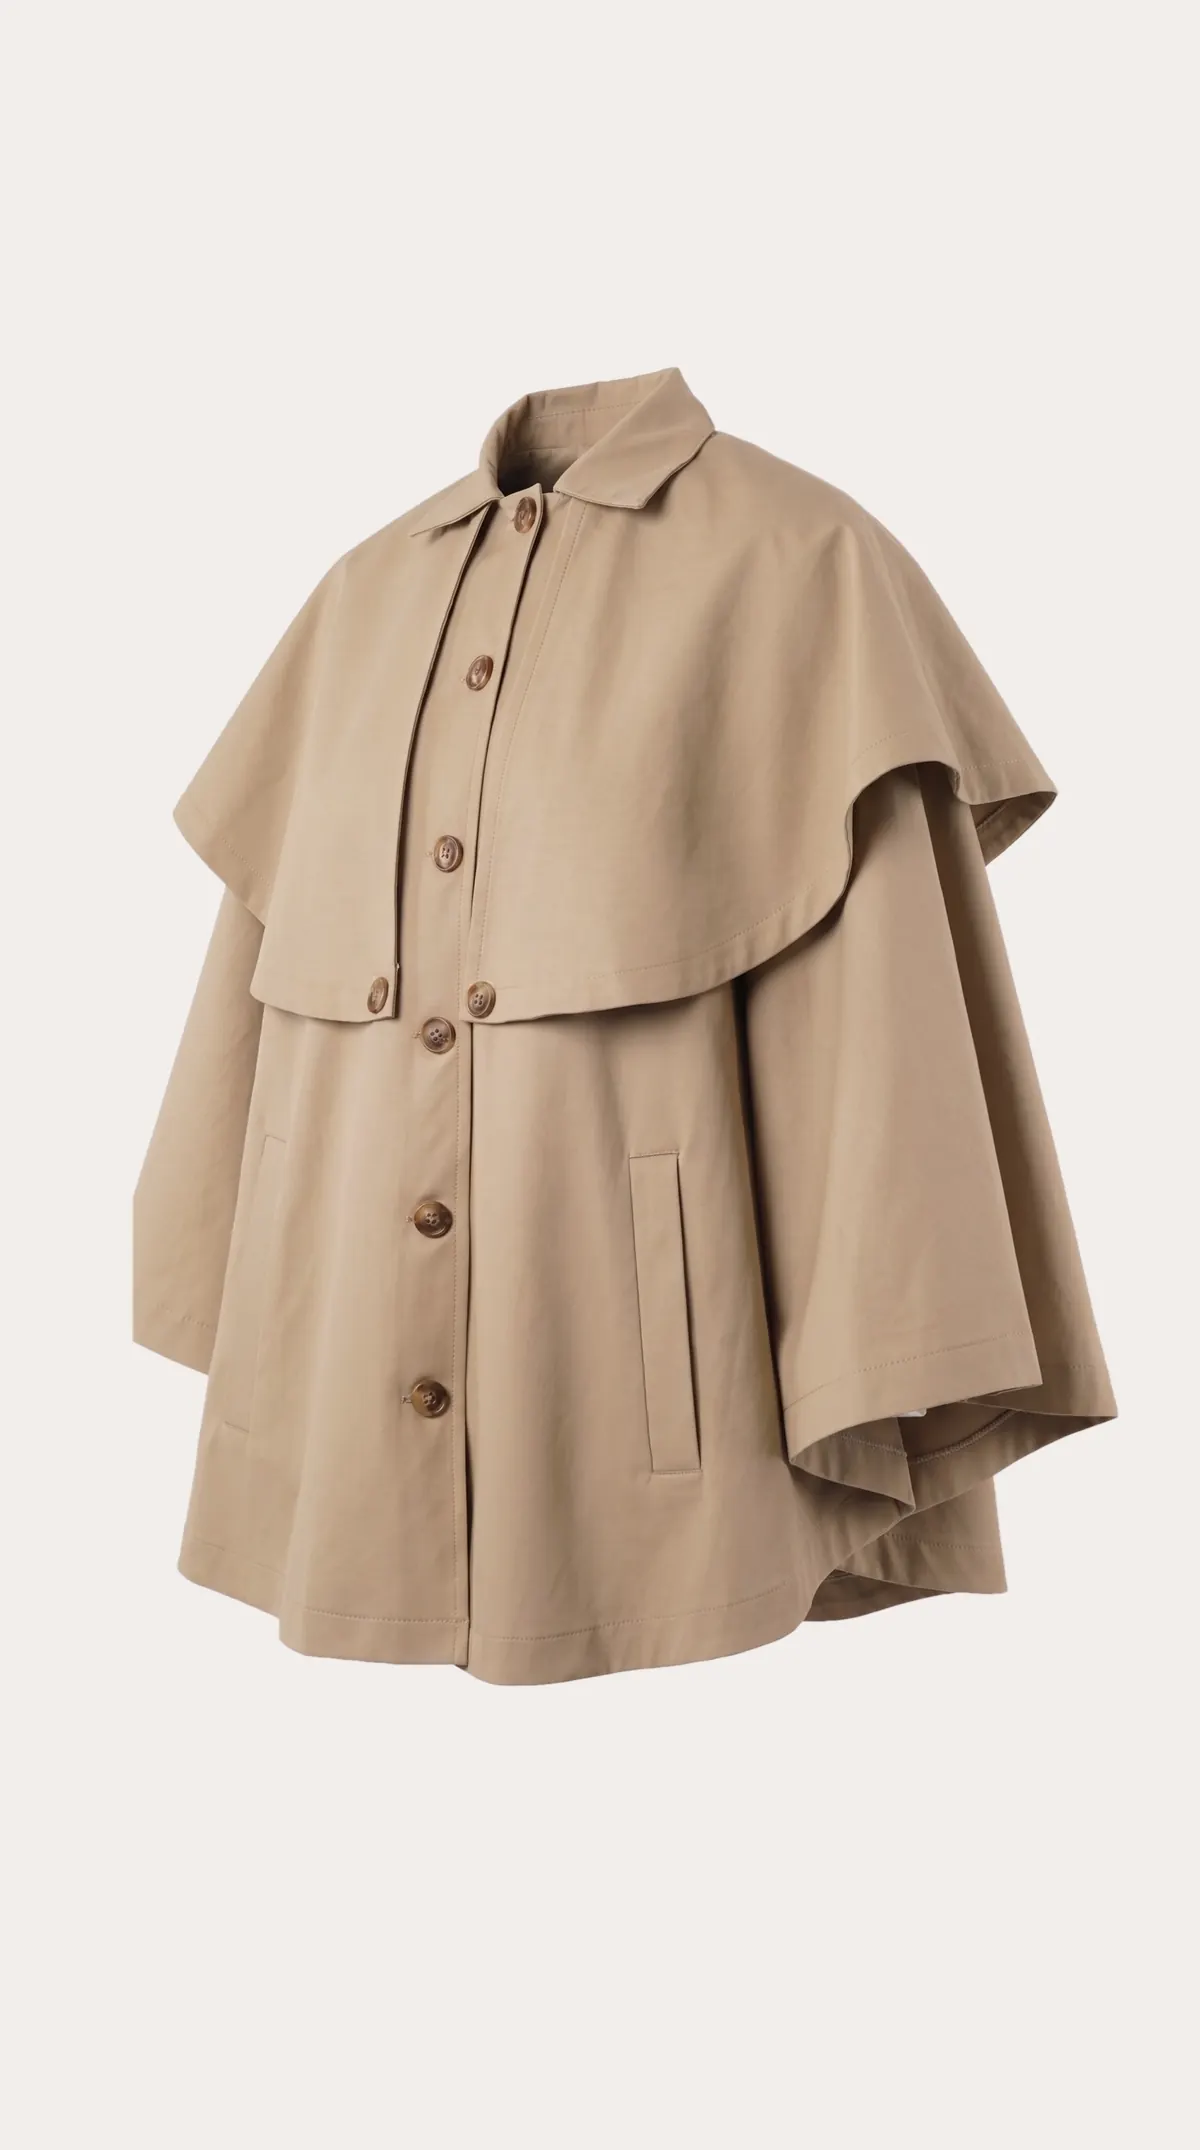
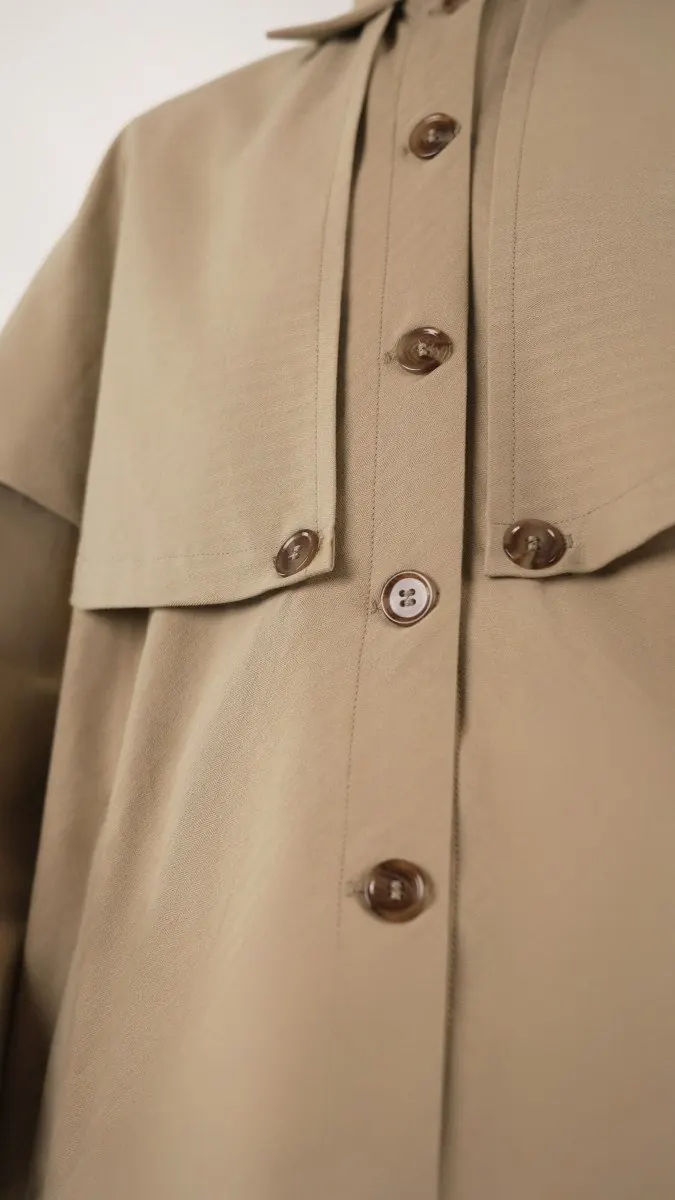
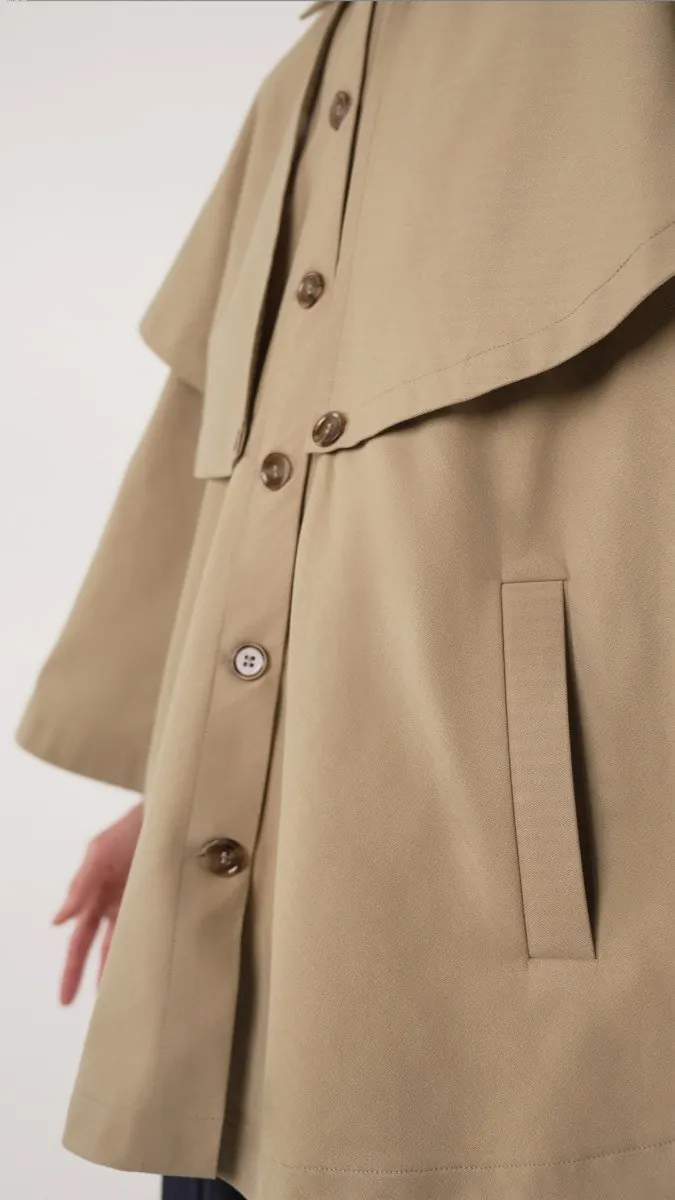
The details. A poncho-style cape silhouette with no separate sleeves: the fabric falls over the shoulders and flares over the body. The front has deep welt pockets for your hands, your phone and anything you need to shield from wind and rain. The button placket and collar are simple yet refined: they keep the style classic without taking away from the strength of the silhouette.
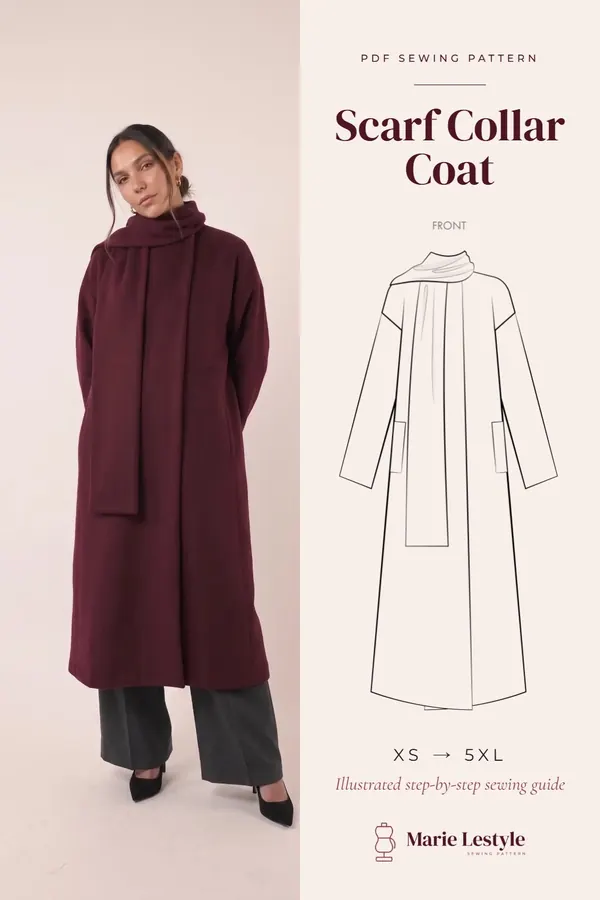
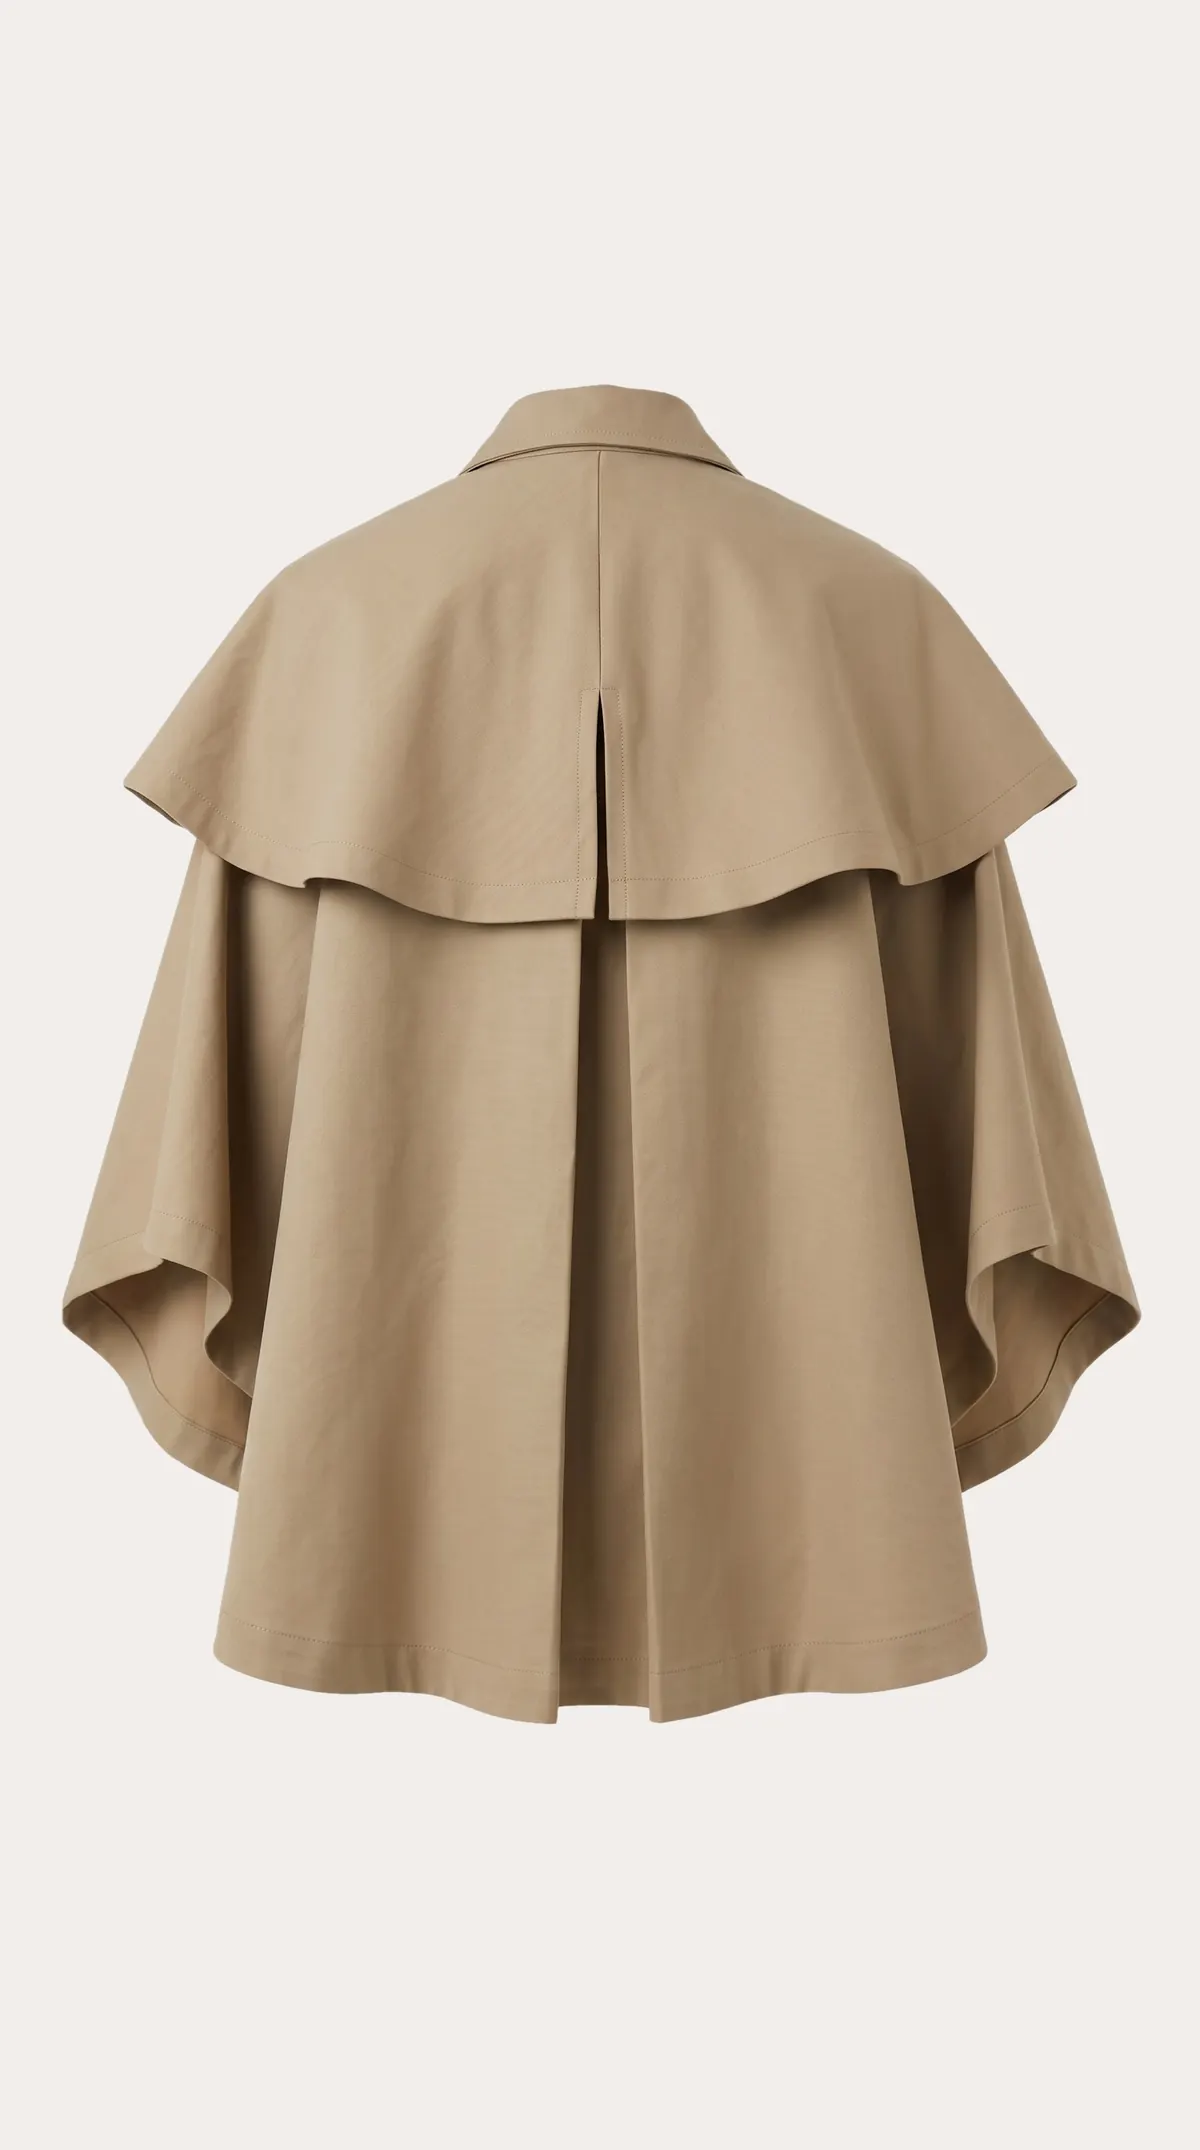
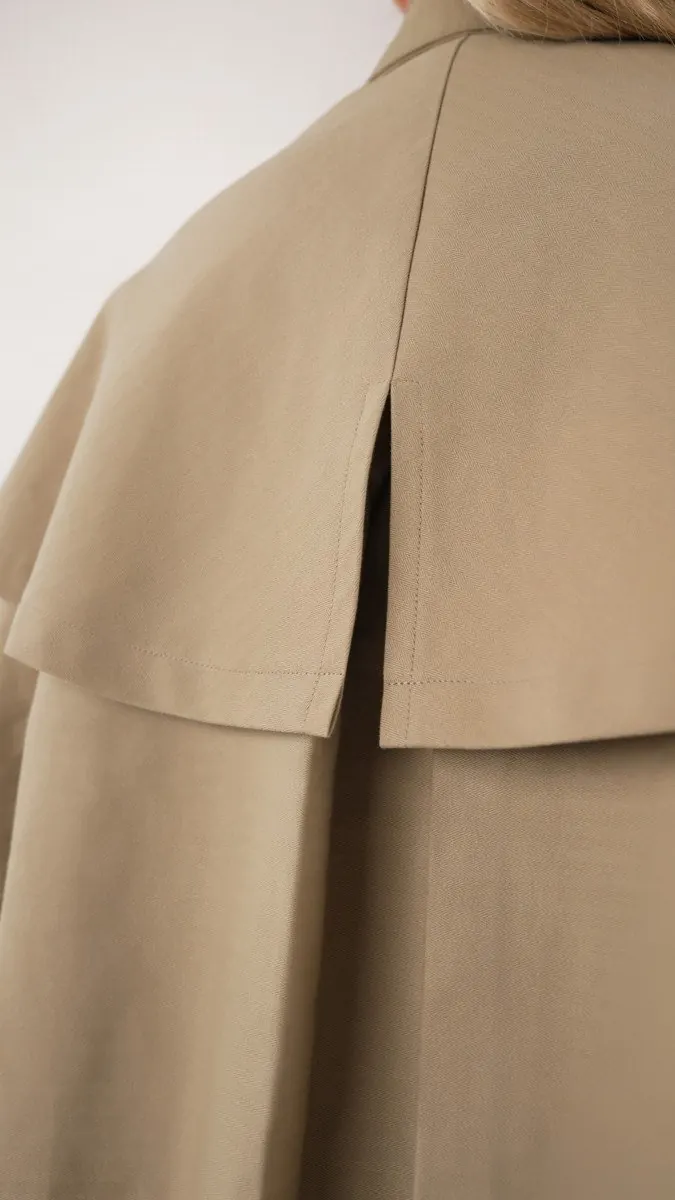
At the back, the capelet slit echoes the box pleat on the lower layer of the cape: it adds movement and ties the two tiers together. A wide hem and tortoiseshell-look buttons complete the silhouette. It's a cape made for rainy days, with a chic equestrian, "dark academia" style. If you like these trench details, take a look at our sleeveless trench dress tutorial too.
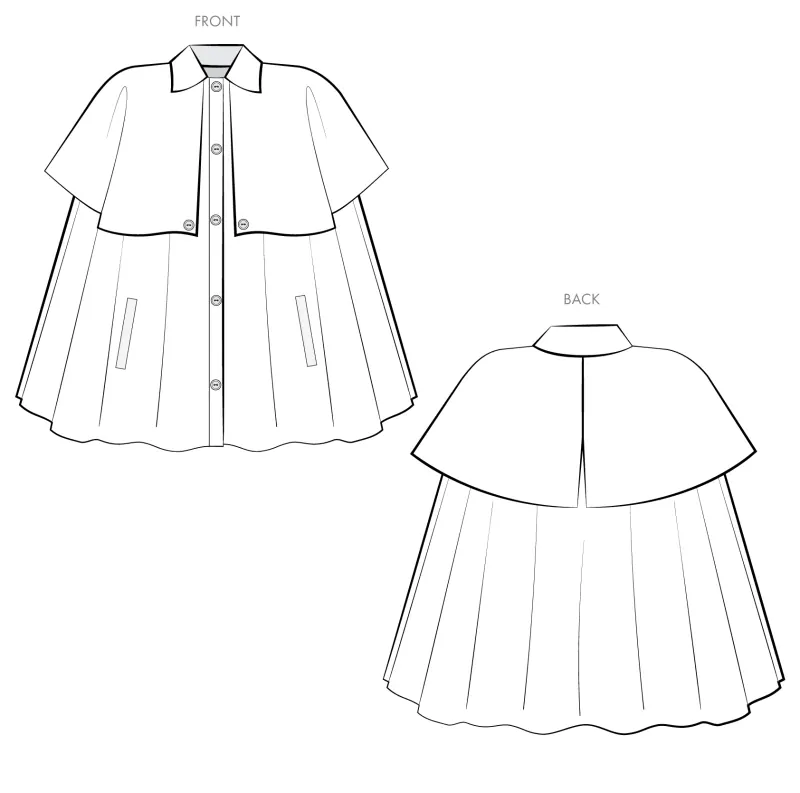
The cropped jacket once finished
These photos of the finished garment show the result to aim for from every angle.
Choosing your size, from XS to 5XL (plus sizes included)
Start by taking your bust and neck measurements, then compare them with the charts below: the pattern covers every size from XS to 5XL.
Measurements are in centimeters; inches are shown in small type below each value.
Table 1 — Body measurements (cm)
| Size | XS | S | M | L | XL | 2XL | 3XL | 4XL | 5XL |
|---|---|---|---|---|---|---|---|---|---|
| Bust | 78.7–81.3 31–32" | 83.8–86.4 33–34" | 88.9–91.4 35–36" | 94.0–99.1 37–39" | 101.6–109.2 40–43" | 111.8–119.4 44–47" | 121.9–129.5 48–51" | 132.1–139.7 52–55" | 142.2–152.4 56–60" |
| Neck | 34.3 13.5" | 35.6 14" | 36.8 14.5" | 38.4 15.125" | 40.0 15.75" | 41.6 16.375" | 43.5 17.125" | 45.4 17.875" | 47.3 18.625" |
Table 2 — Approximate finished garment measurements (cm)
| Size | XS | S | M | L | XL | 2XL | 3XL | 4XL | 5XL |
|---|---|---|---|---|---|---|---|---|---|
| Finished neckline | 39.4 15.5" | 40.6 16" | 41.9 16.5" | 43.5 17.125" | 45.1 17.75" | 46.7 18.375" | 48.6 19.125" | 50.5 19.875" | 52.4 20.625" |
| Length ** | 68.6 27" | 68.6 27" | 68.6 27" | 71.1 28" | 71.1 28" | 71.1 28" | 73.7 29" | 73.7 29" | 73.7 29" |
** From the center front neckline to the hem.
Size guide
The size guide is based on the intended style and ease of this design. You can also choose your size from the finished garment measurements you want, grading between sizes if needed. Measure the printed pieces to check that they match the fit you want, and adjust if needed before cutting the fabric. For best results, sew a test garment in a similar fabric to fit your pattern.
Always read all the instructions before cutting your fabric!
Supplies and fabric for the cape jacket
Gather your fabric and notions before you begin: the list below gives the quantities used for size S.
Supplies used (quantities for size S)
| Item | Quantity |
|---|---|
| Cotton herringbone twill, beige | 3 yards = 2.74 m |
| Translucent 4-hole plastic buttons, brown, beige and white swirl pattern — 32L / 20 mm | 8 |
| All-purpose sewing thread, 250 m, beige | 1 spool |
| Non-woven fusible interfacing, extra white | 1 yard = 0.91 m |
| The PDF pattern (sheets to print) | — |
Other supplies used
- Hand sewing needles
- Seam ripper
- Point turner (tool for pushing out corners)
- Tailor's chalk
- Fusible interfacing
Which fabric should you choose?
This pattern works best with medium-weight apparel fabrics. Besides cotton twill, other recommended fabrics:
- Canvas
- Corduroy
- Denim
- Suiting wool
- Polyester gabardine
3 tips for sewing cotton twill
- Pre-shrink the fabric before cutting the pattern! The fabric WILL shrink in the washer and dryer.
- Choose a finish for the raw edges of your seam allowances before you start sewing. This jacket is unlined, and twill frays a little: serge, zigzag, or even bind the raw edges on the inside of the cape.
- Turn up the iron's heat and steam: cotton twill can take it, and your pressed seams will be crisp.
Option: lining the cape
Cut an extra layer of the longer cape (the lower cape) from the lining fabric of your choice, for example shearling for a cold climate. Join it to the outer layer, right sides together, along the hem and button placket. The lining is sewn directly to the collar, like the other pieces.
The pieces of the jacket sewing pattern
Cut pieces A to E from your fabric, following the table and the grainline.
| Piece | Name | Cut |
|---|---|---|
| A | Body (cape, lower layer) | Fabric — 1 on the fold |
| B | Capelet (upper layer) | Fabric — 2 mirrored |
| C | Collar | Fabric — 2 on the fold |
| D | Welts | Fabric — 4 |
| E | Pocket bags | Fabric — 2 mirrored pairs |
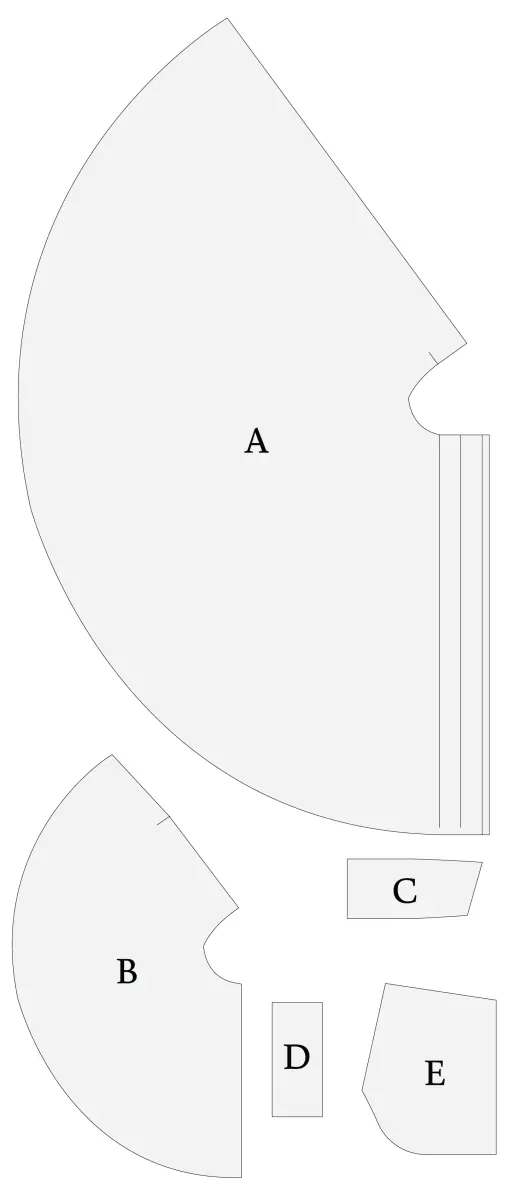
A seam allowance of 1.27 cm (½") is included in the pattern.
If your fabric is not wide enough to cut piece A on the fold, cut two mirrored pieces and join them with a center back seam. In that case, add 1.27 cm (½") of seam allowance to the center back edge before cutting.
Pieces D and E have only 3 cutting lines: XS-M, L-2XL, 3XL-5XL.
Place each piece with its "GRAINLINE" arrow parallel to the selvage.
Pattern markings used in construction
| Marking | Where on the pattern | Step |
|---|---|---|
| Pocket placement | piece A ("Pocket Placement") | 1 |
| Placket neckline notch | piece A, top of the placket | 3 |
| Box pleat notches | piece A, center back neckline ("Pleat") | 4 |
| Slit marking | piece B, center back ("Slit") | 5 |
| Shoulder markings | pieces A and B, neckline ("Shoulder") | 6 |
The PDF pattern to print
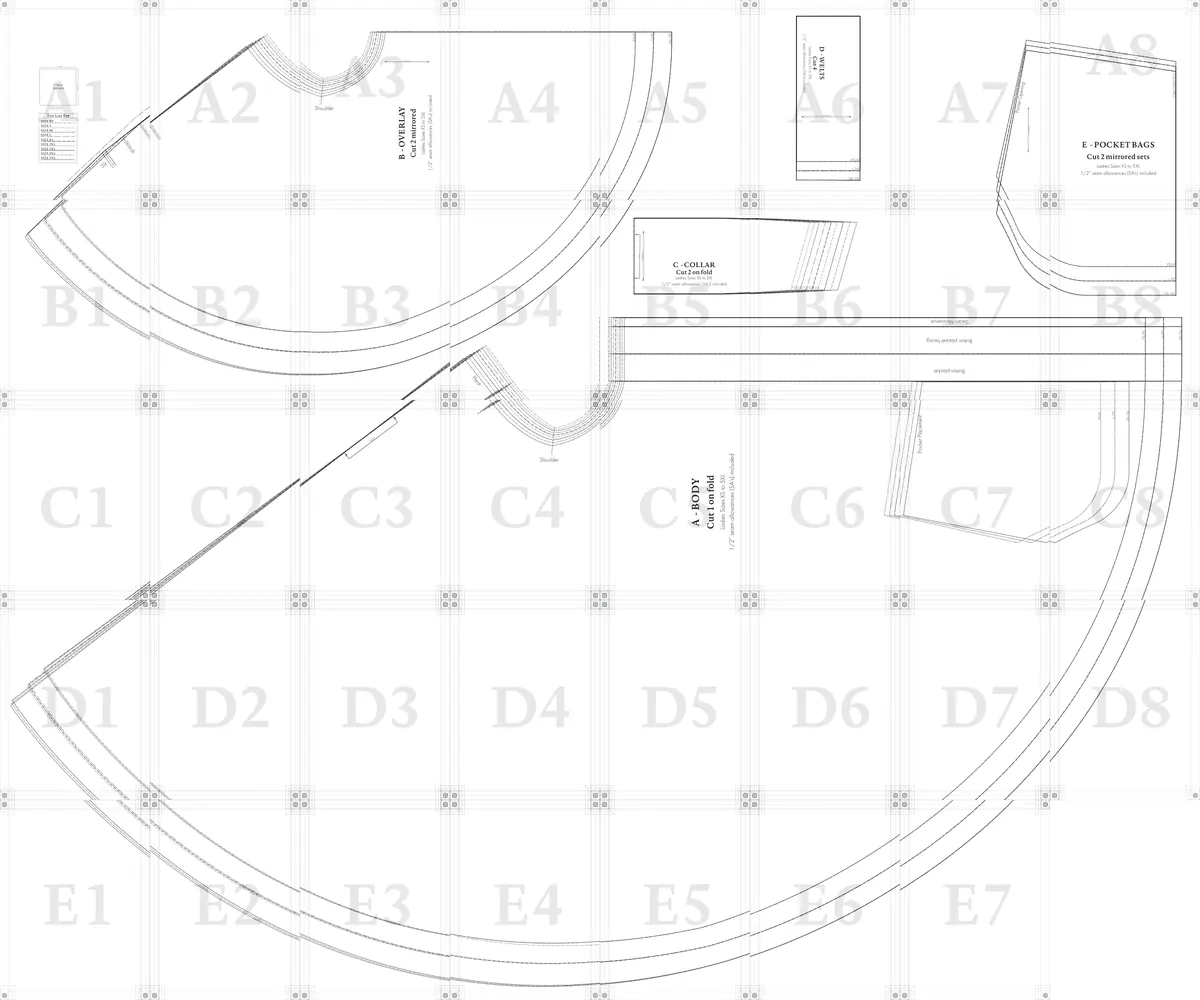 B · CapeletD · WeltsE · Pocket bagsC · CollarA · Body (cape)
The pieces for the cropped cape jacket come in the PDF pattern: you print it at home at actual size, then assemble the sheets. It covers every size from XS to 5XL and includes a test square so you can check the scale before printing everything. The construction tutorial itself stays free on this page.
Download the PDF patternSewing tutorial: how to sew the cape jacket step by step
Construction starts with the welt pockets and ends with the buttons.
Sew with a 1.27 cm (½") seam allowance for all seams, unless otherwise stated.
Under each step: the instructions, then the construction photos. The markings on the cutting mat are in inches.
Step 1 — Welts
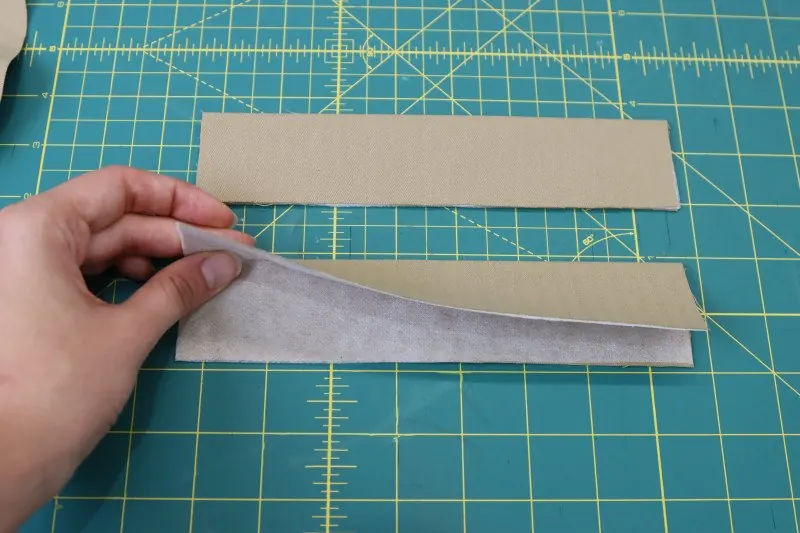
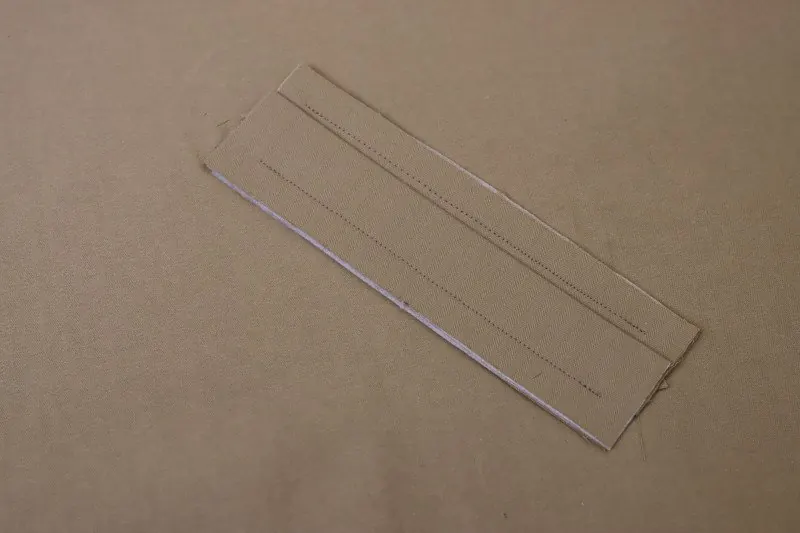
- Fuse the interfacing to the wrong side of the welt pieces (D).
- Press the welts in half lengthwise, wrong sides together.
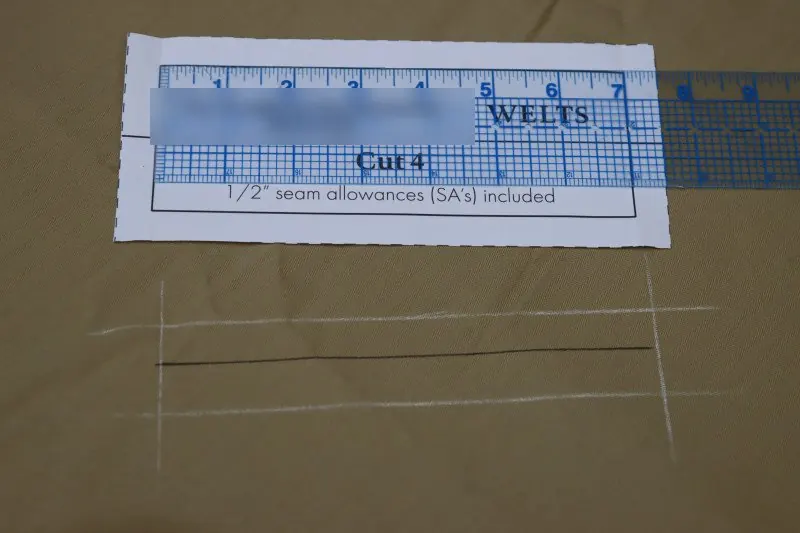
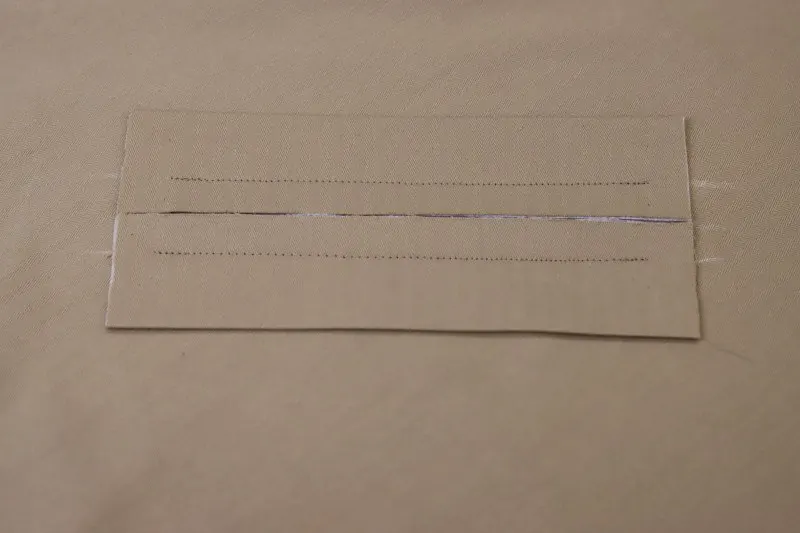
- Chalk a template for the welt pocket placement on the front of the cape, as marked on the pattern. The template matches the FOLDED welt, MINUS the seam allowance: 3.2 cm (1¼") high and 17.8 cm (7") wide, as in the photo with the ruler. Then draw another chalk line through the center.
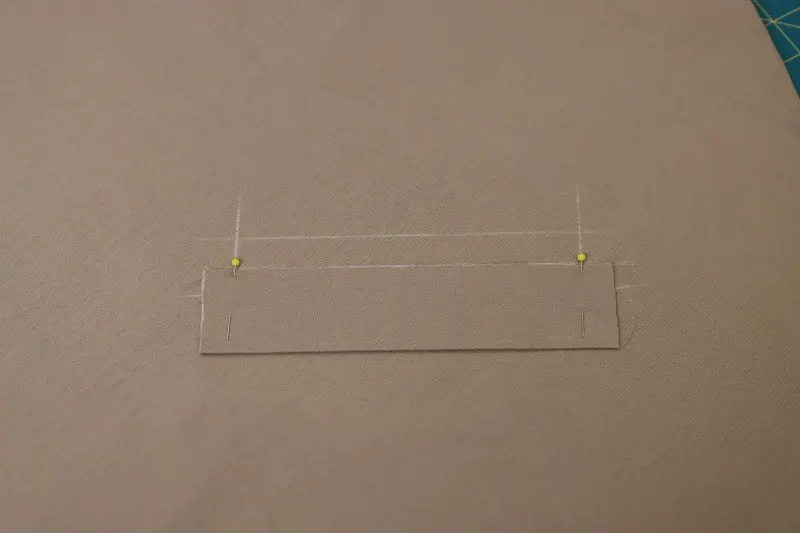
- Pin the welts to the template, with their long raw edges aligned with the center line.
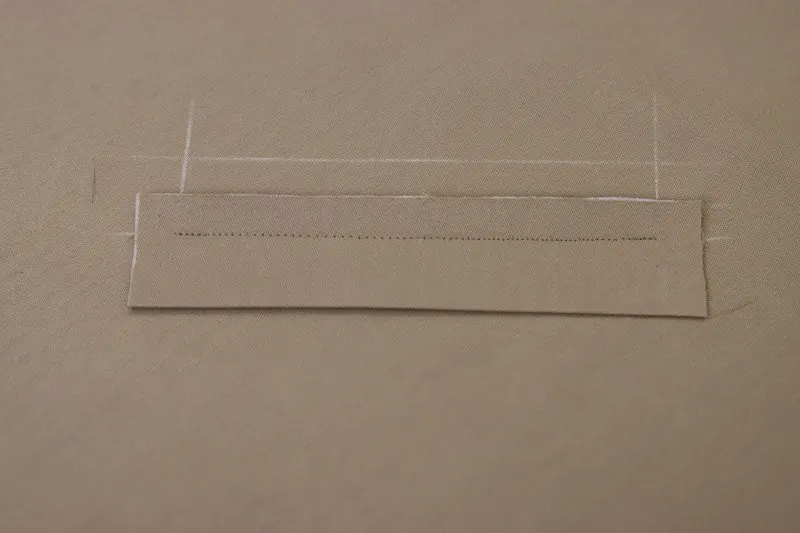
- Stitch the welts along the top and bottom chalk lines.
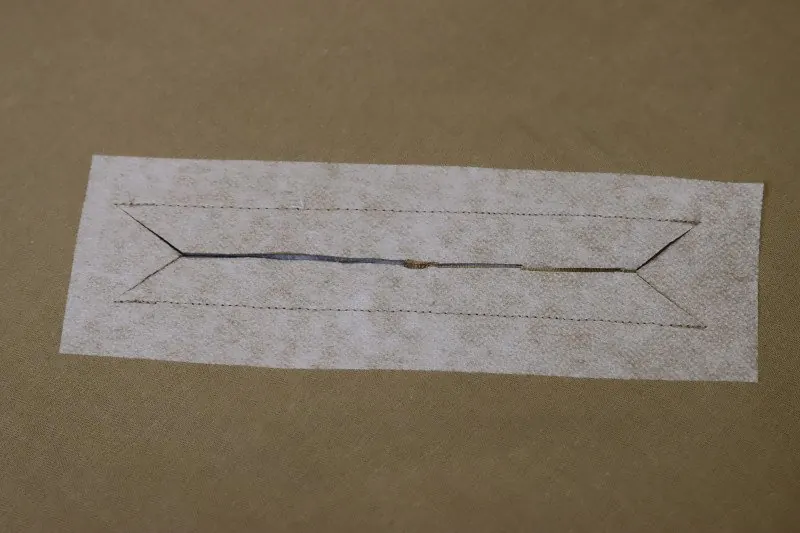
- Cut a long opening between the two raw edges of the welts, along the center line, then cut two triangles at the end of this slit, as in the photo. They let you turn the welts to the inside of the cape.
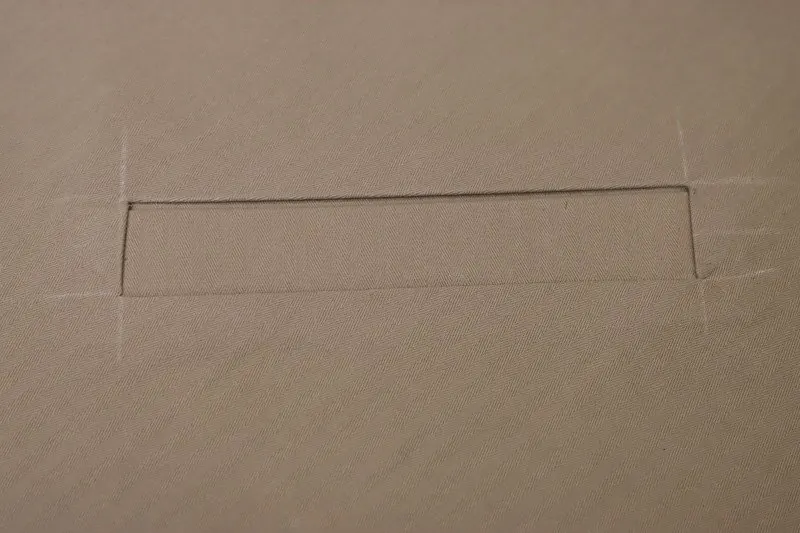
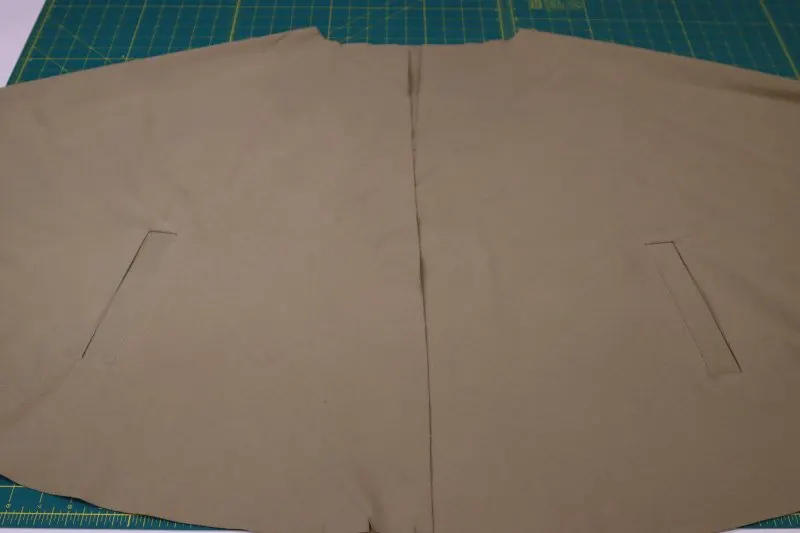
- Turn the welts to the inside of the cape, then press from the outside and the inside. Check that the triangles are also turned to the inside of the cape.
Step 2 — Pocket bags
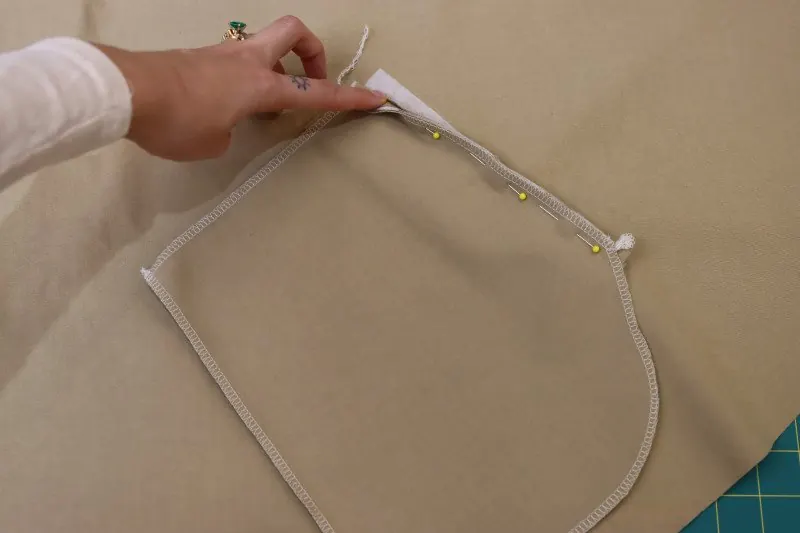
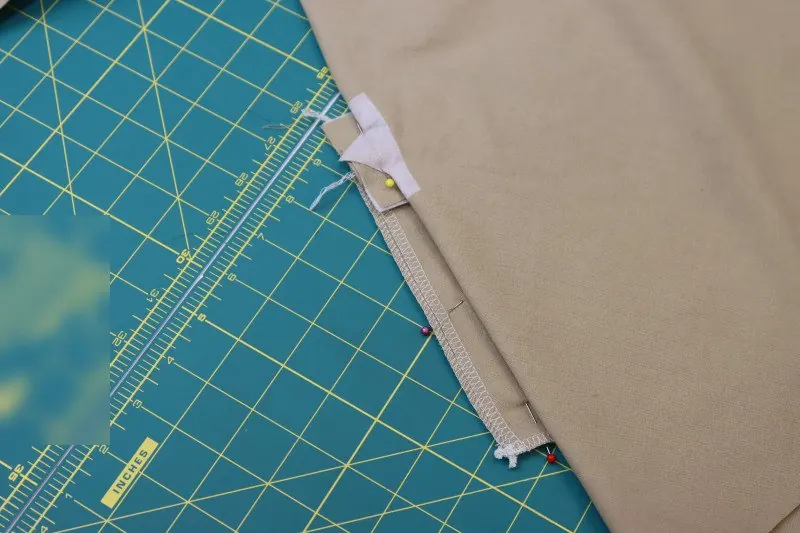
- Pin the flat side edge of the pocket bag (E) to the welt seam allowance. DO NOT pin it to the cape itself: only to the welt seam allowance.
- Sew the pocket bag to the welt seam allowance, with a 0.6 cm (¼") seam allowance.
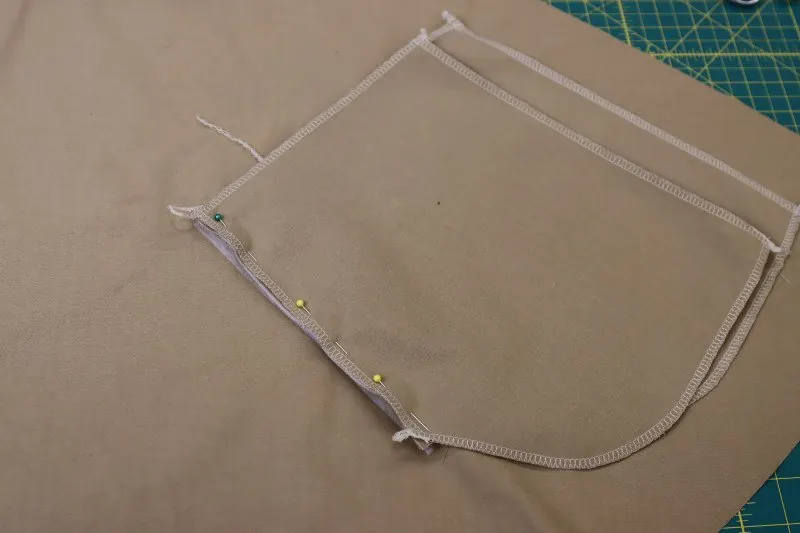
- Pin and sew the other pocket bag to the seam allowance of the other welt, opposite the first one.
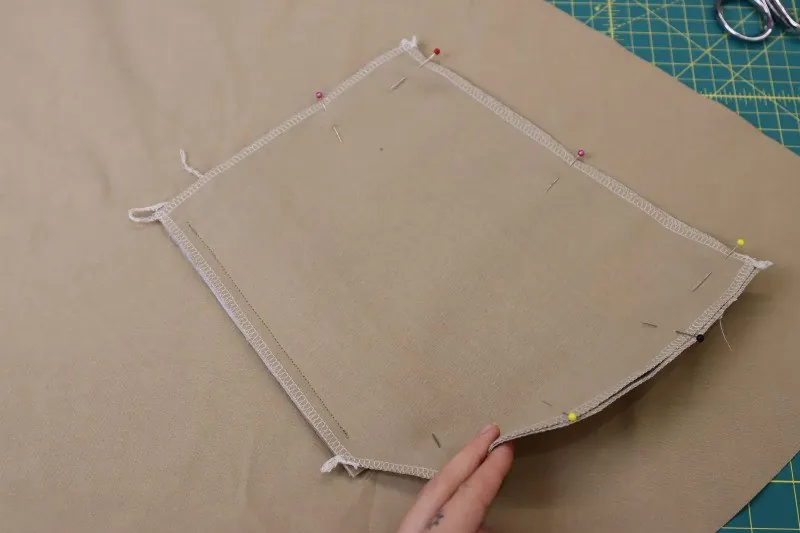
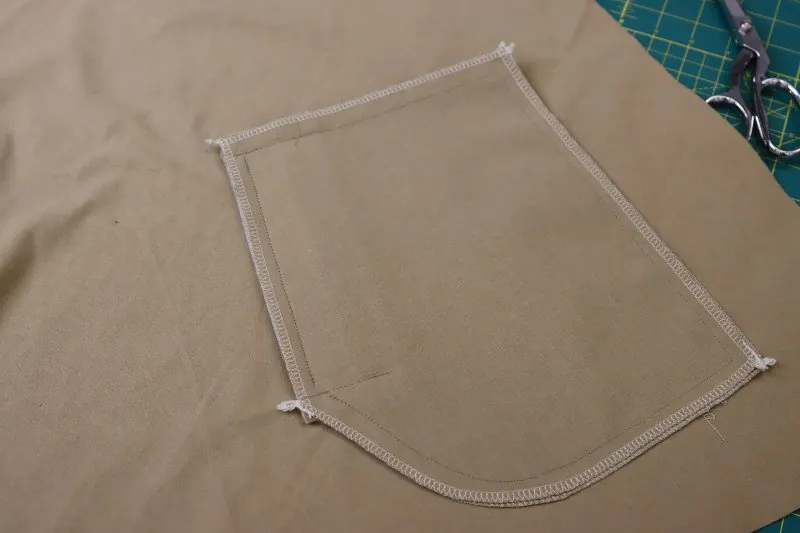
- Layer the two bags and pin them all around. Since both bags are the same size, you will need to fold part of one bag back on itself to line up the edges.
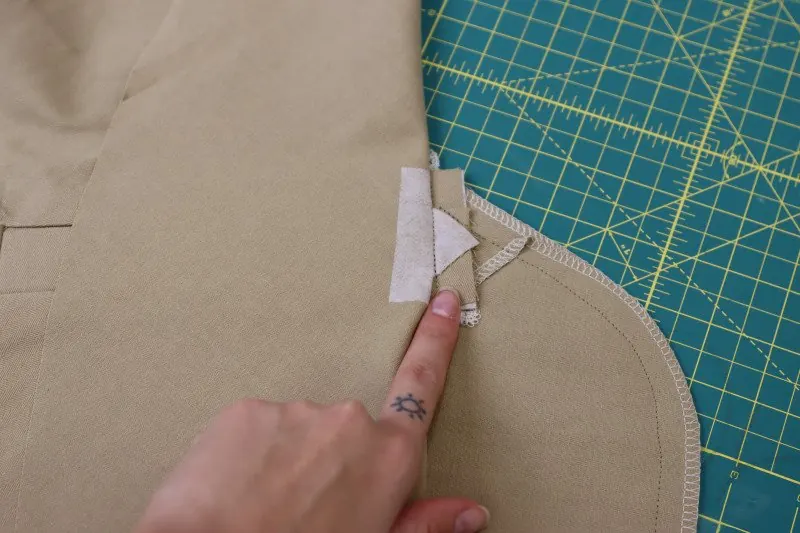
- Pin the triangle to the seam allowance at the end of the welts, as in the photo. Do this on both sides of the welts.
- Sew the triangles to the seam allowance at the end of the welts. DO NOT sew them to the cape itself: only to the welt seam allowance.
- Sew around the pocket bags to close them.
- Repeat for both welt pockets on the cape.
Step 3 — Folding the button placket
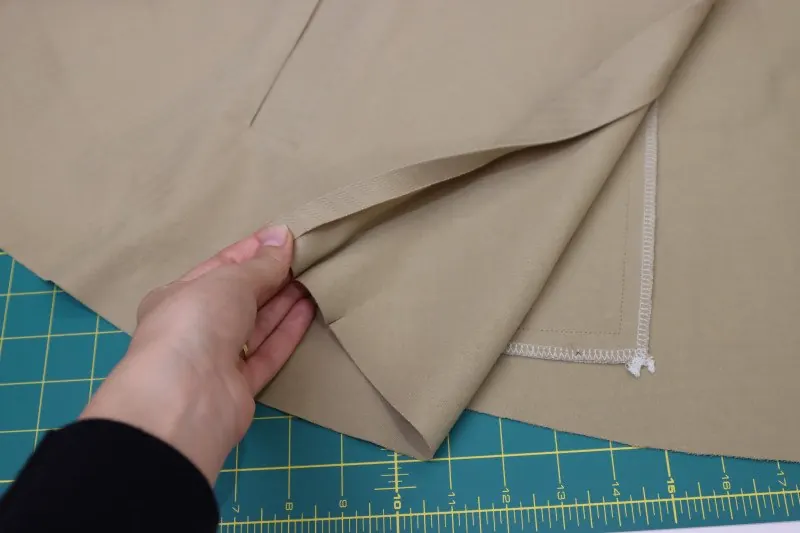
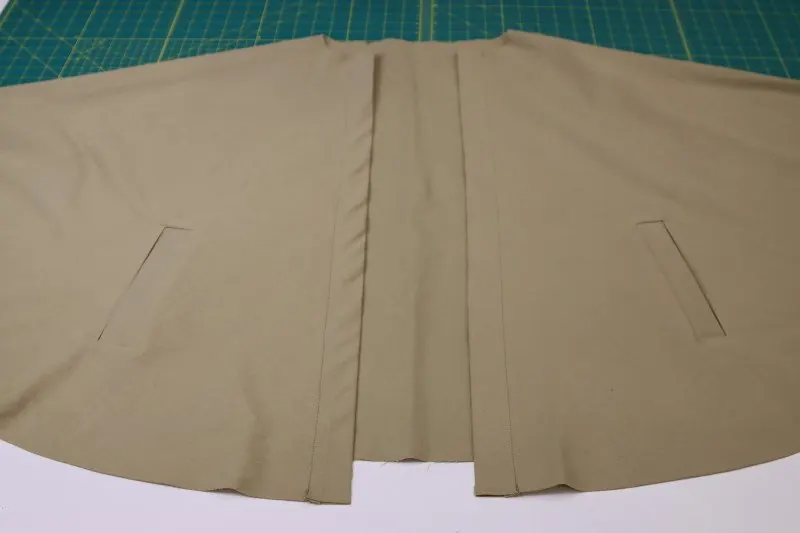
- Press a 1.27 cm (½") fold on each side of the cape's center front opening.
- Press a second fold on the front opening, aligned with the neckline notch, to enclose the first 1.27 cm fold.
- Topstitch over the first fold to form the button placket, but only from the hem to about ¾ of the way up the center front opening. The top of the placket is finished later (step 9). Do not sew up to the neckline (in photo 3.2, the topstitching goes up to the neckline: do not copy the photo).
Step 4 — Back box pleat
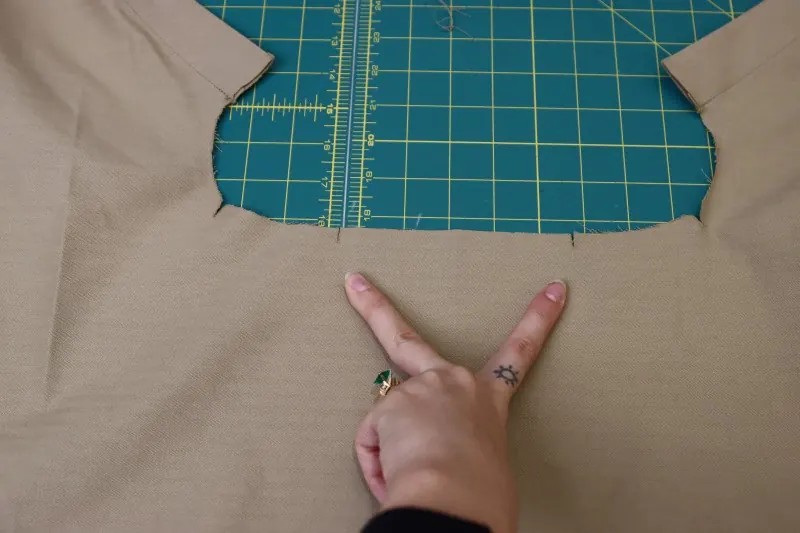
- Lay the lower cape layer (A) right side up, neckline flat, as in the photo.
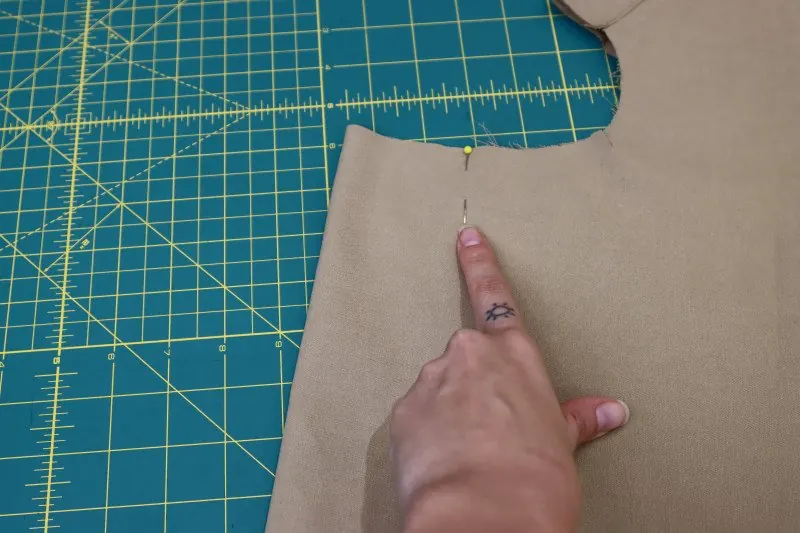
- Fold this layer right sides together, the fold centered on the cape's center back, matching the pleat notches at the neckline.
- Pin the notches together.
- Stitch the pleat with a 5.1 cm (2") long seam.
- Spread the two right sides of the fabric apart, then fold the pleat in half so the center back of the pleat lines up with the pleat seam.
- Press the box pleat flat.
- Baste across the pleat with a 0.6 cm (¼") seam allowance.
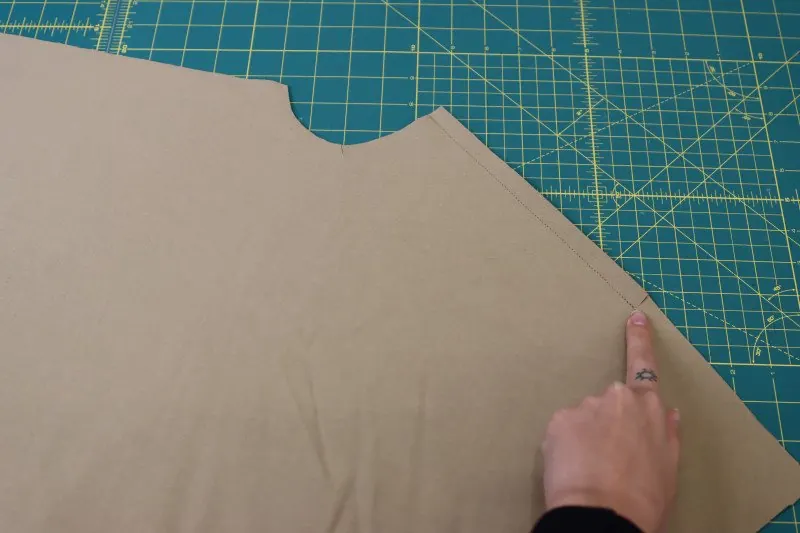
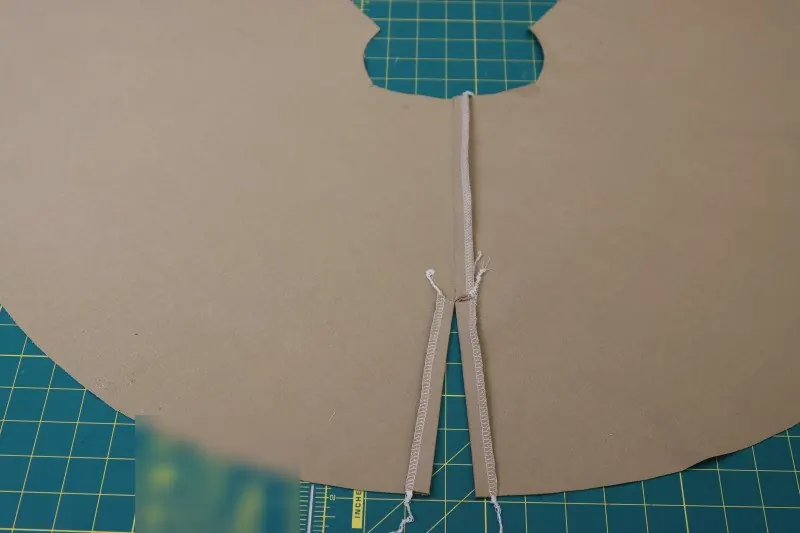
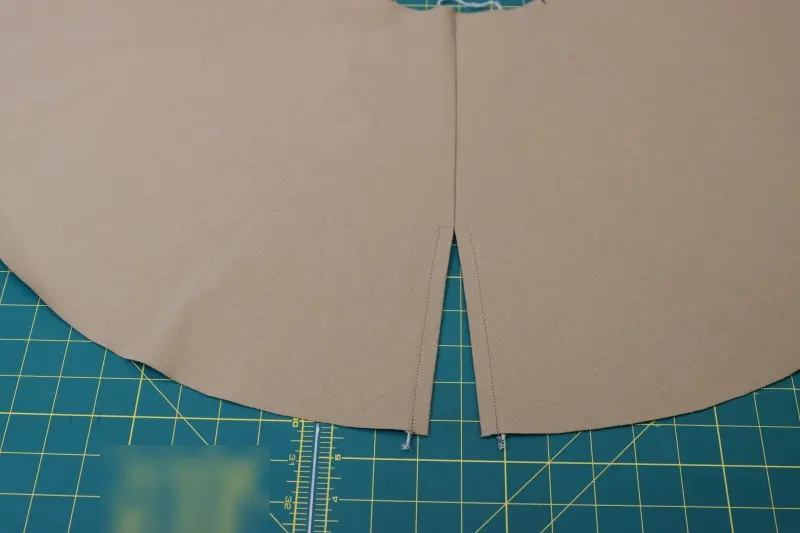
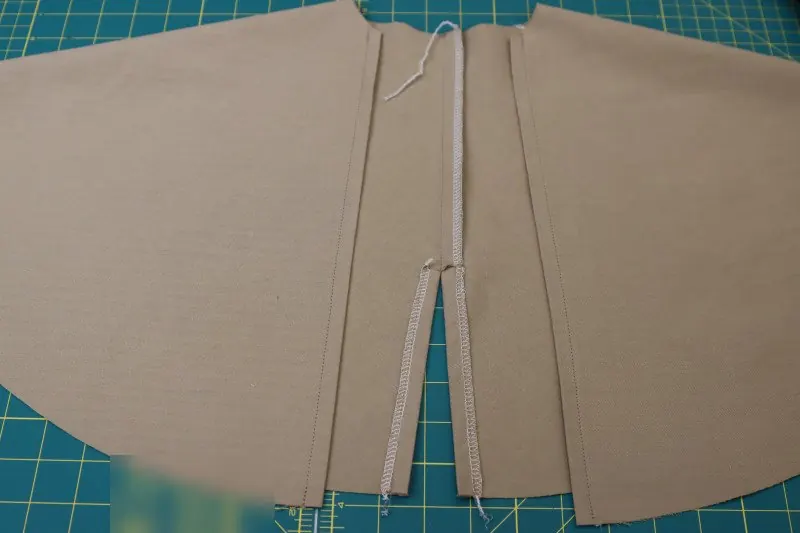
Step 5 — Back slit (capelet)
- Lay the two capelet pieces (B) right sides together, center backs aligned.
- Pin and stitch from the neckline down to the slit.
- Press the center back seam open, then press a 1.27 cm (½") fold into the slit, below the seam you just sewed.
- Topstitch the slit 0.6 cm (¼") from the folded edge, stitching securely across the top of the slit so the seam does not open.
- Press a 0.6 cm (¼") double-fold hem on the capelet's center front opening.
- Stitch the double-fold hem on the center front opening.
Step 6 — Joining the necklines
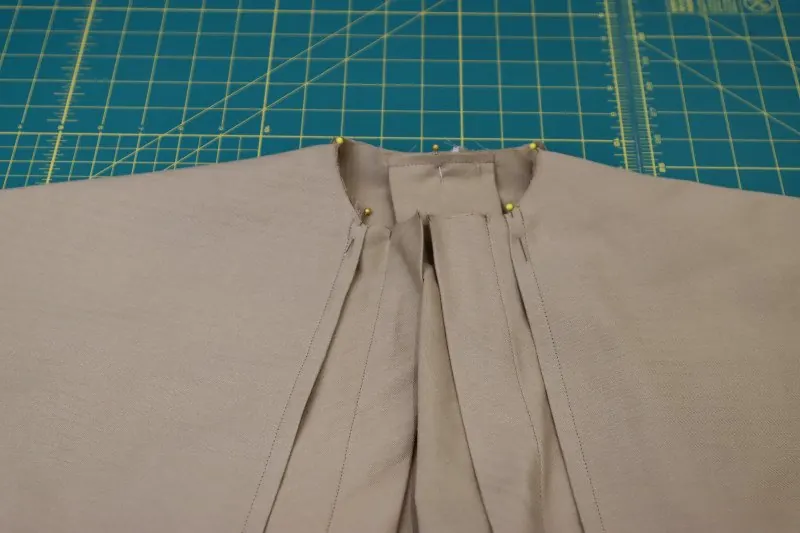
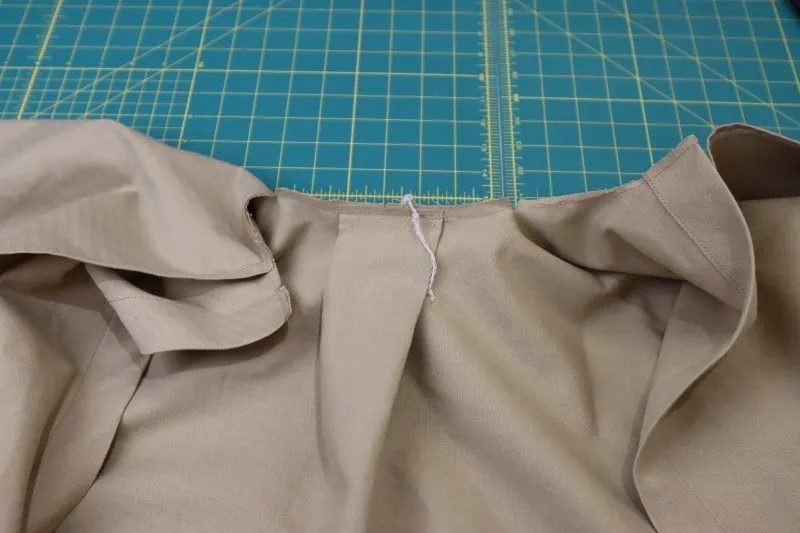
- Lay the capelet wrong side down on the right side of the cape (lower layer). Note: in photo 6.1, the button placket is topstitched up to the neckline. Do not do this.
- Pin the capelet neckline to the cape neckline.
- Stitch the capelet to the cape all around the neckline, matching the shoulder markings ("Shoulder" on pieces A and B).
Step 7 — Hems
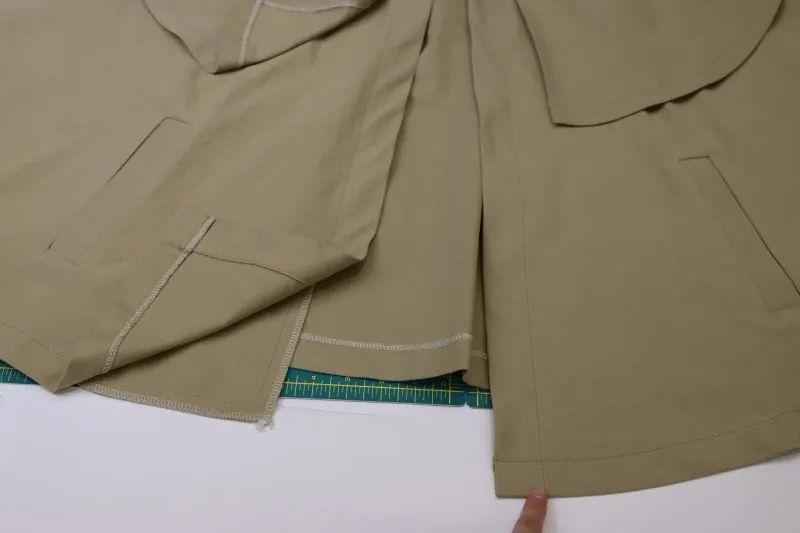
- Press a 2.5 cm (1") fold on the capelet hem and on the cape hem.
- Stitch this 2.5 cm fold with a 1.9 cm (¾") seam allowance. This gives a nice wide hem.
Step 8 — Securing the pocket bags
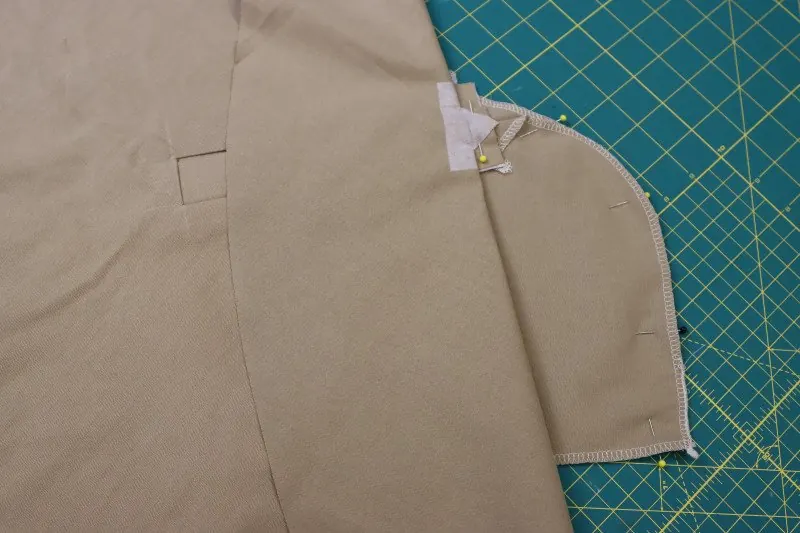
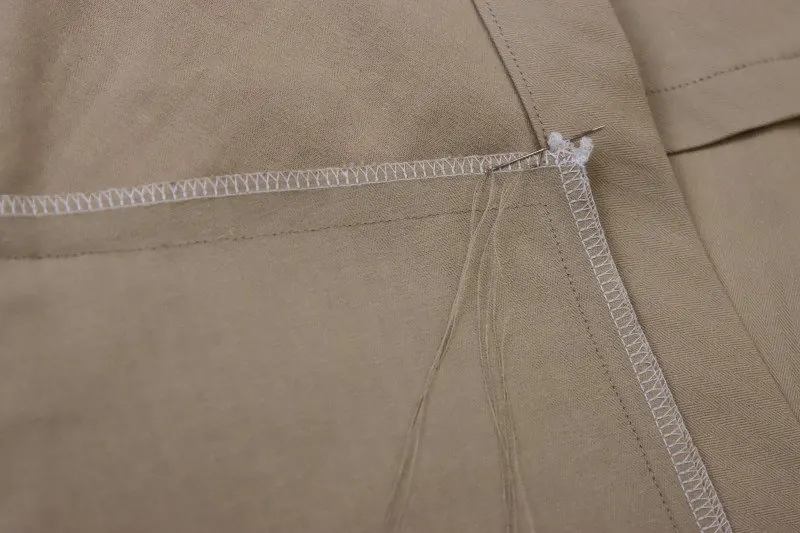
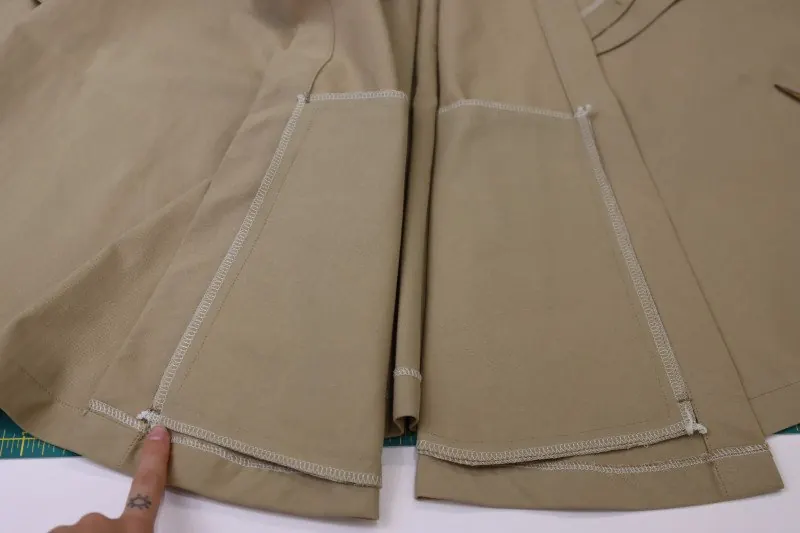
- Lay the pocket bags flat, folded toward the front button plackets.
- With a needle and thread, hand-sew small bar tacks at the corners of the pockets to secure them to the inside of the button placket. This keeps the bags from floating inside the jacket when the front is unbuttoned.
Step 9 — Finishing the button placket
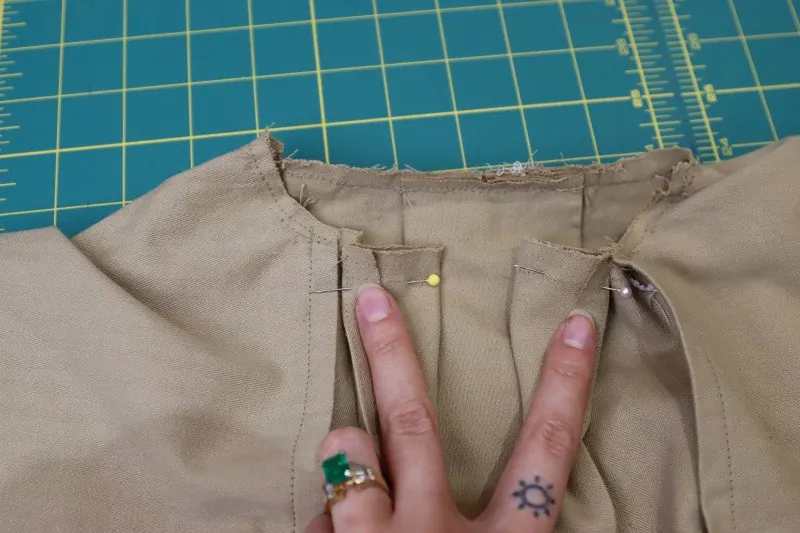
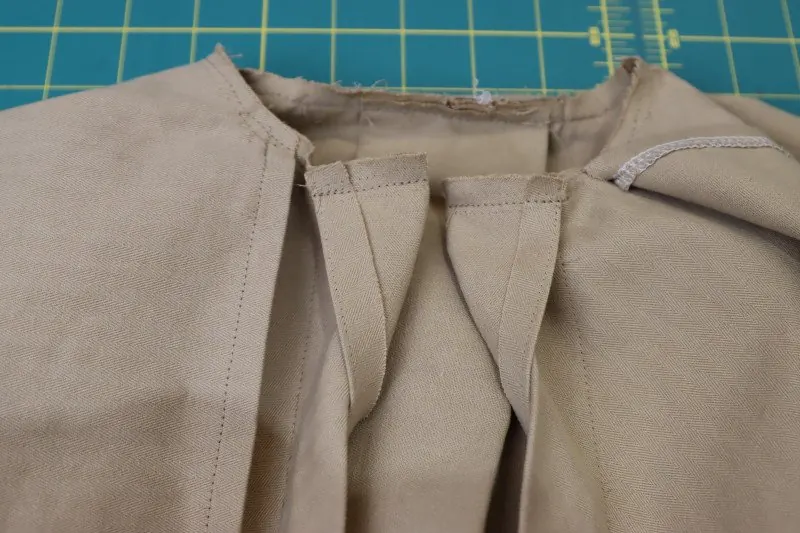
- The top of the button placket was intentionally left unfinished in step 3: finish it now. Unfold the button plackets, then fold each side back right sides together.
- Pin the top of the plackets right sides together, as in the photo.
- Stitch the top of the plackets right sides together, with a 1.27 cm (½") seam allowance.
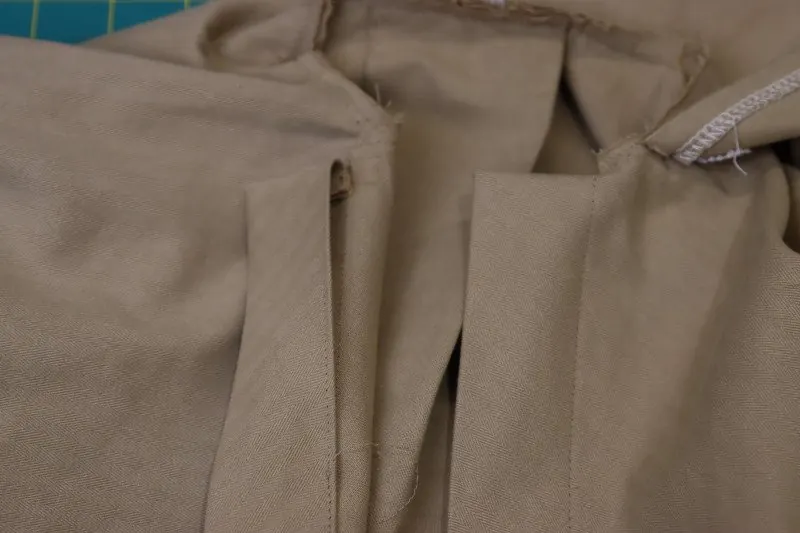
- Turn the plackets right side out.
- Finish the placket topstitching by continuing it all the way to the top of the placket.
Step 10 — Collar
- Fuse the interfacing to the wrong side of one of the collar pieces (C).
- Lay the collar pieces right sides together.
- Pin them together.
- Stitch the curved top edge and the sides of the collar pieces, leaving the bottom edge open, as in the photo.
- Trim the collar corners.
- Turn the collar right side out, push out the corners with a point turner and press the seams.
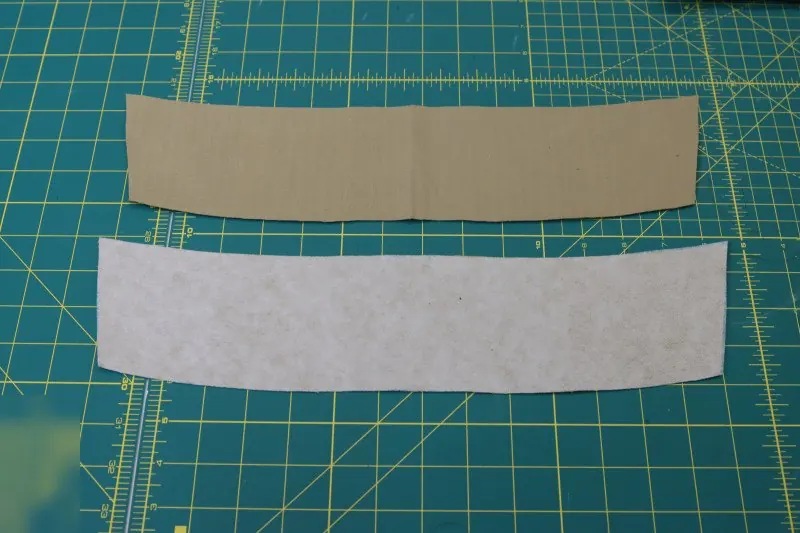
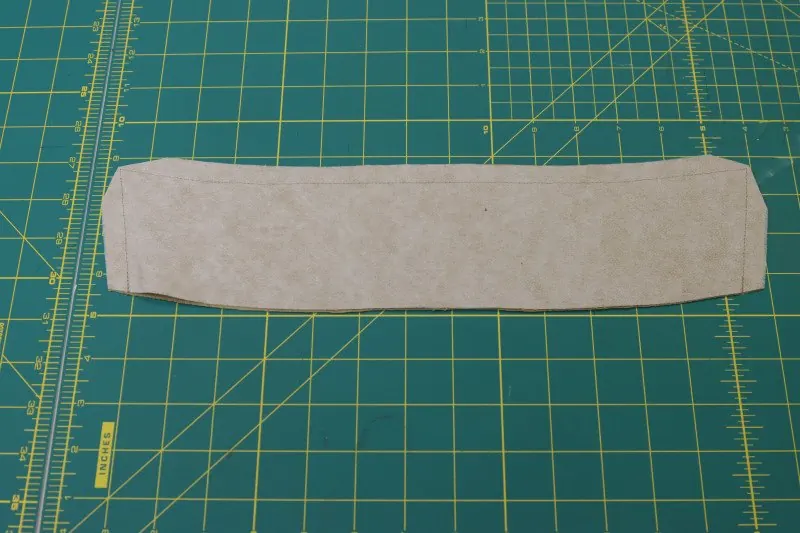
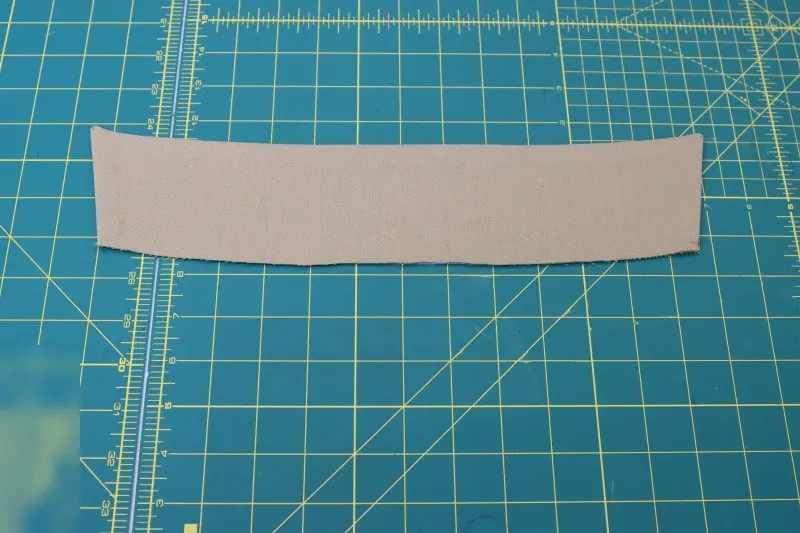
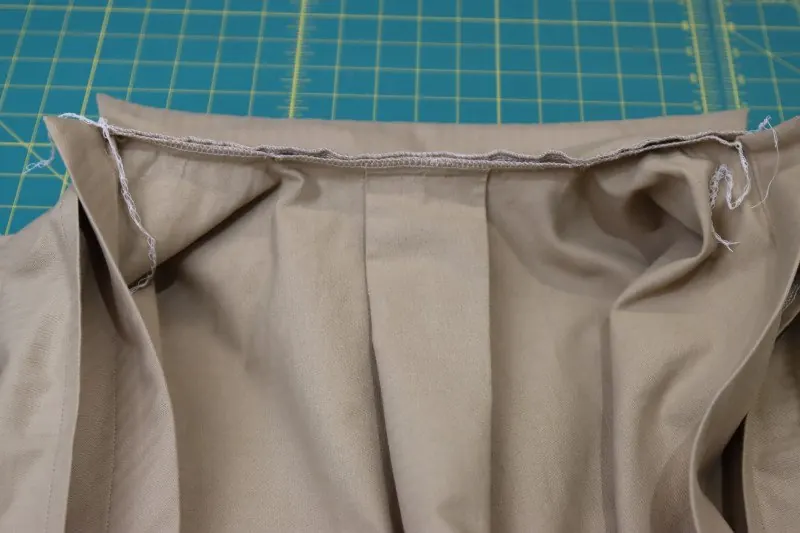
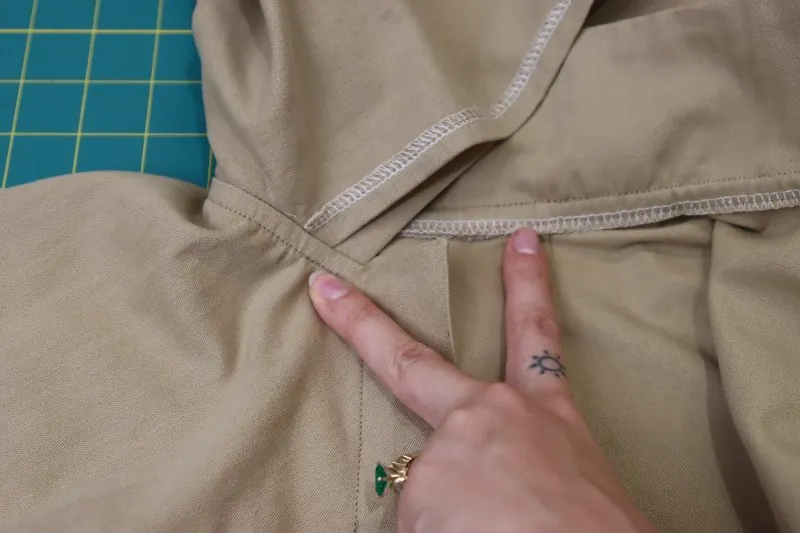
Step 11 — Attaching the collar
- Pin the raw edge of the collar to the raw edge of the cape neckline, right side of the cape against the interfaced collar piece.
- Stitch the collar to the cape.
- Press the collar seam allowance down into the cape and pin it.
- Understitch to secure the collar seam allowance inside the cape.
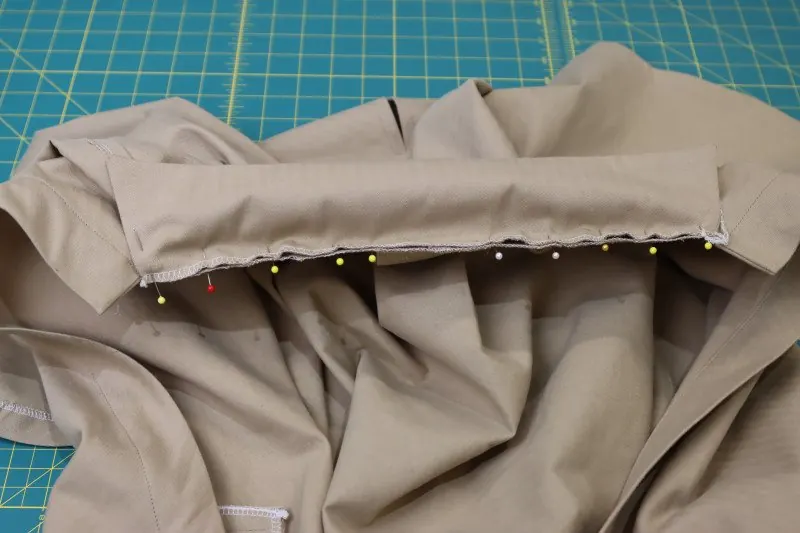
Step 12 — Buttons
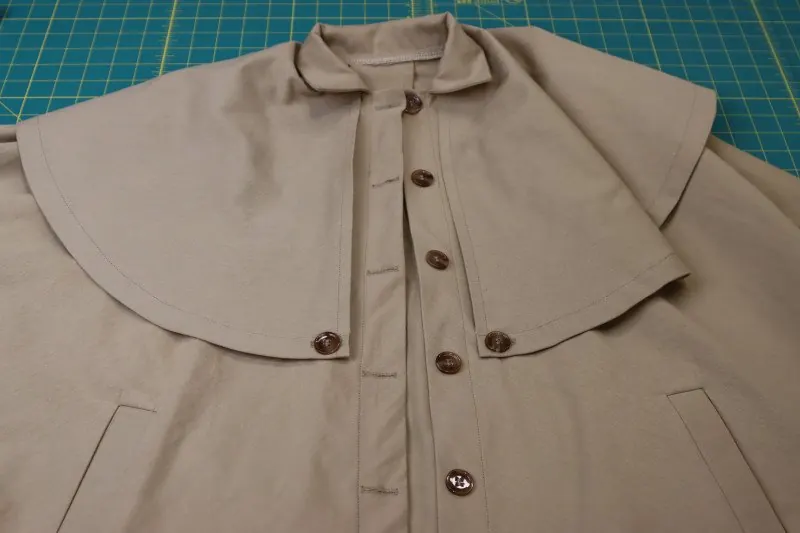
- Mark 6 evenly spaced positions for the buttons and buttonholes, on both sides of the button placket. Place the first button 1.9 cm (¾") from the top of the placket, then each button 8.9 cm (3½") from the previous one.
- Check that the capelet lies perfectly flat and in place on the cape. Mark the buttonholes on the capelet, and the matching buttons just below, on the cape.
- Hand-sew the buttons to the placket and to the cape.
- Sew the buttonholes on the placket and on the capelet with your machine's buttonhole foot.
- As in photo 12.1: the placket buttonholes are on the right front (the wearer's right side) and the buttons on the left front. The capelet closes with 2 buttons, one at each front corner.
Practical tips for sewing your cape jacket
These common sewing techniques complement the construction. They change neither the order of the steps nor the measurements in this tutorial.
They are most useful for the trickier parts (welt pockets, curved hem, buttonholes), and they end with how to sew a muslin.
Before you start
- Test your stitching on a scrap of the same fabric, in two layers, to set the stitch length and tension.
- For a medium-weight cotton twill, a size 80 or 90 universal machine needle works well.
- Fusible interfacing: place the glue side (grainy, shiny) against the wrong side of the fabric. Cover with a press cloth (a thin cloth) and press the iron down without sliding it, one area at a time.
- Transfer all the pattern markings to the fabric before removing the paper: neckline notches, pleat notches, slit marking, shoulder markings, pocket placement.
Yardage for sizes other than S
- Once the pattern is assembled and cut to your size, lay all the pieces on the floor over an area as wide as your fabric, following the grainline and the "on the fold" pieces. Measure the length they take up: this is the minimum yardage.
- Buy a little more than this minimum: the fabric may shrink in the wash, and it must be washed before cutting (section 3).
- If piece A does not fit on the fold across your fabric width, use the solution in section 4: two mirrored pieces, with a center back seam.
When to finish the raw edges
- Cape and capelet hems: finish the raw edge before step 7. The hem is folded only once: the raw edge stays visible on the inside.
- Capelet center back: the seam is pressed open (step 5). Finish each edge separately, ideally before sewing.
- Pocket bags: after stitching around them (step 2, item 7), finish both layers together.
- Neckline: after stitching the collar (step 11, point 2) and before pressing the seam allowance down (point 3), finish all the layers of the seam allowance together. Since there are many (collar, capelet, cape), you can first grade them to different widths to reduce bulk.
- Cape center back, only if you cut piece A in two (section 4): finish this seam like the others.
- The center front edges of the cape (enclosed in the placket) and of the capelet (double-fold hem) need no other finish.
Welt pockets (steps 1 and 2)
- Make a complete test on scraps before working on the cape.
- Shorten the stitch slightly for the welt stitching, and backstitch at each end.
- Both lines of stitching must be parallel and the same length, stopping exactly at the ends of the template.
- When cutting the triangles, cut up to the last stitch of each line, without cutting it. If you stop too early, the corners pucker; if you cut the stitching, the corner tears open.
Curved hem (step 7)
- The hem is curved: once folded up, the 2.5 cm turn-up is longer than the area it lies on.
- To ease in this excess, sew a line of long stitches in the turn-up, close to the edge, pull the thread gently to gather it just enough, then steam press before pinning.
- Pin often and stitch without pulling the fabric.
Buttonholes (step 12)
- Buttonhole length: the button's diameter plus its thickness. If your buttonhole foot has a button holder, place the button in it: the machine sets the length automatically.
- First sew a test buttonhole on a scrap with the same number of layers, and check that the button fits through.
- To open the buttonhole with a seam ripper, place a pin across the end: it stops you from cutting too far.
Muslin (test garment)
- Cut pieces A, B and C from an inexpensive fabric with a similar body to the real fabric, and sew them together with a long stitch, without finishing.
- Check that the collar is not tight, that the length from the center front neckline to the hem is what you want (table 2), that the cape sits well on the shoulders, that the pocket placement suits your hands and that you can move your arms freely.
- Transfer any changes to the paper pattern before cutting the real fabric.
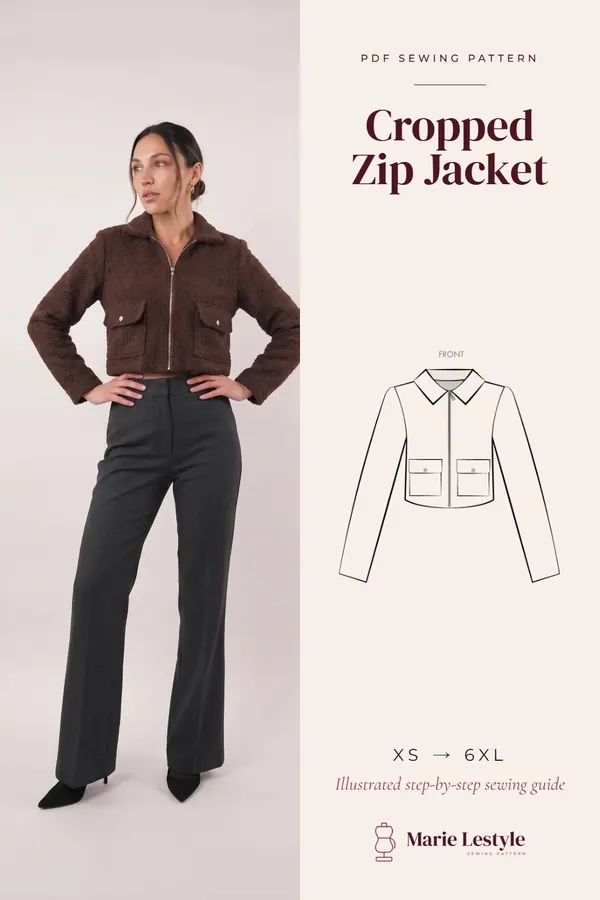
Enjoy sewing cropped jackets? Have a look at our cropped zip-up jacket tutorial as well.
Sewing glossary
This glossary defines the sewing terms used in this tutorial, from "bar tack" to "welt".
Keep it handy while you sew.
| Term | Definition |
|---|---|
| Bar tack | A few small hand stitches sewn on top of each other, joining two pieces over a small area. |
| Basting stitch | Long, temporary stitch that holds layers together. |
| Bias binding | Strip of fabric cut on the diagonal, used to wrap a raw edge. |
| Box pleat | Pleat whose two sides are folded toward each other. |
| Button placket | Band at the center front that carries the buttons and buttonholes. |
| Capelet | Small short cape sitting on the shoulders, over the cape. |
| Double-fold hem | Edge folded twice by the same width, then stitched: the raw edge is enclosed. |
| Fusible interfacing | Reinforcement ironed onto the wrong side of a piece. |
| Grainline | Direction of the fabric threads, parallel to the selvage. |
| Mirrored | Two pieces that mirror each other: one left and one right. |
| Notch | Small mark on the edge of a pattern piece, to transfer to the fabric. |
| On the fold | The piece is placed against the fabric fold: once cut and unfolded, it is double and symmetrical. |
| Overcast stitch / serger | Stitch that wraps the fabric edge so it does not fray; a serger does this while trimming the edge. |
| Pocket bag | Pieces that form the inside of the pocket. |
| Point turner | Tool with a pointed, non-cutting tip for pushing out corners. |
| Raw edge | Cut edge of the fabric, unfinished. |
| Right side / wrong side | The good side of the fabric / the inner side. |
| Seam allowance | Distance between the fabric edge and the stitching line (here 1.27 cm, included in the pattern). |
| Seam ripper | Small tool for cutting the threads of a seam or opening a buttonhole. |
| Selvage | Finished edge of the fabric, along its length. |
| Tailor's chalk | Flat chalk for marking fabric. |
| Topstitching | Stitching visible on the right side, parallel to an edge or a seam. |
| Understitch | Stitching close to a seam that holds the seam allowance to one side so it stays inside. |
| Welt | Folded strip that edges the opening of a welt pocket. |
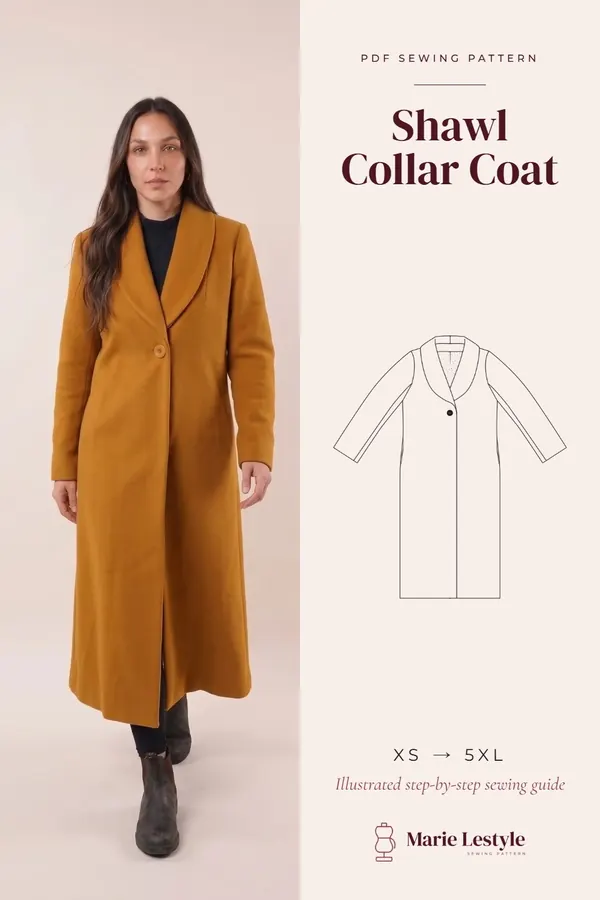
The pattern sheets are on pages 26 to 64 of the PDF. Print them at actual size. You'll find the cropped cape jacket PDF pattern in our shop, and for colder days, our shawl collar coat tutorial.
PDF · XS – 5XL
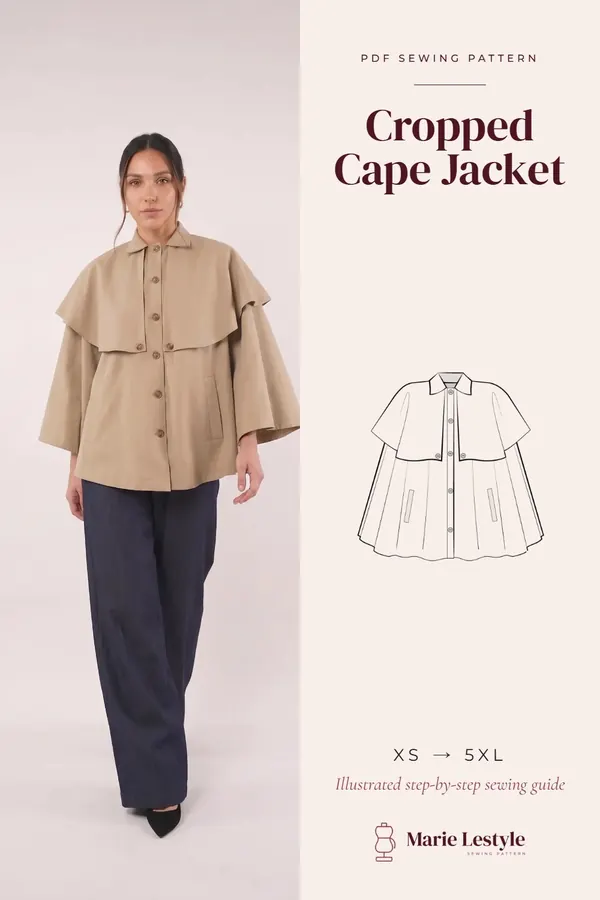
The PDF pattern for this design : Cropped Cape Jacket
Every piece to print at home at full size, with this guide as a PDF.
Download the PDF patternPDF pattern sold in the Marie Lestyle shop.
Frequently asked questions : Cropped Cape Jacket
What sizes does this jacket sewing pattern cover?
The pattern runs from XS to 5XL, plus sizes included. Bust measurements range from 78.7–81.3 cm (31–32") in XS to 142.2–152.4 cm (56–60") in 5XL. Pick your size with the charts in the "Choosing your size" section.
How much fabric do I need to sew the cape jacket?
For size S, you need 3 yards (2.74 m) of cotton herringbone twill. For another size, lay all the pieces on the floor over an area as wide as your fabric and measure the length they take up: that's the minimum yardage, so buy a little more.
What fabric works best for this cape jacket?
The pattern works best with medium-weight apparel fabrics: cotton twill, canvas, corduroy, denim, suiting wool or polyester gabardine. Pre-shrink the fabric in the wash before cutting.
What supplies do I need?
For size S: 8 buttons (20 mm), 1 spool of 250 m all-purpose thread and 1 yard (0.91 m) of fusible interfacing, plus hand sewing needles, a seam ripper, a point turner and tailor's chalk.
Are seam allowances included?
Yes, a 1.27 cm (½") seam allowance is included in the pattern. Sew with it for all seams, unless a step says otherwise.
Can I line the cape jacket?
The jacket is unlined, but lining is an option: cut an extra layer of the lower cape from a lining fabric, for example shearling for a cold climate, and join it right sides together along the hem and button placket.