Jacket Pattern Women: Sew the Cropped Zip Jacket Step by Step
An early-fall jacket in wool-blend bouclé, to sew in women's sizes 00 to 32 with our free photo tutorial.
By Marie · Updated
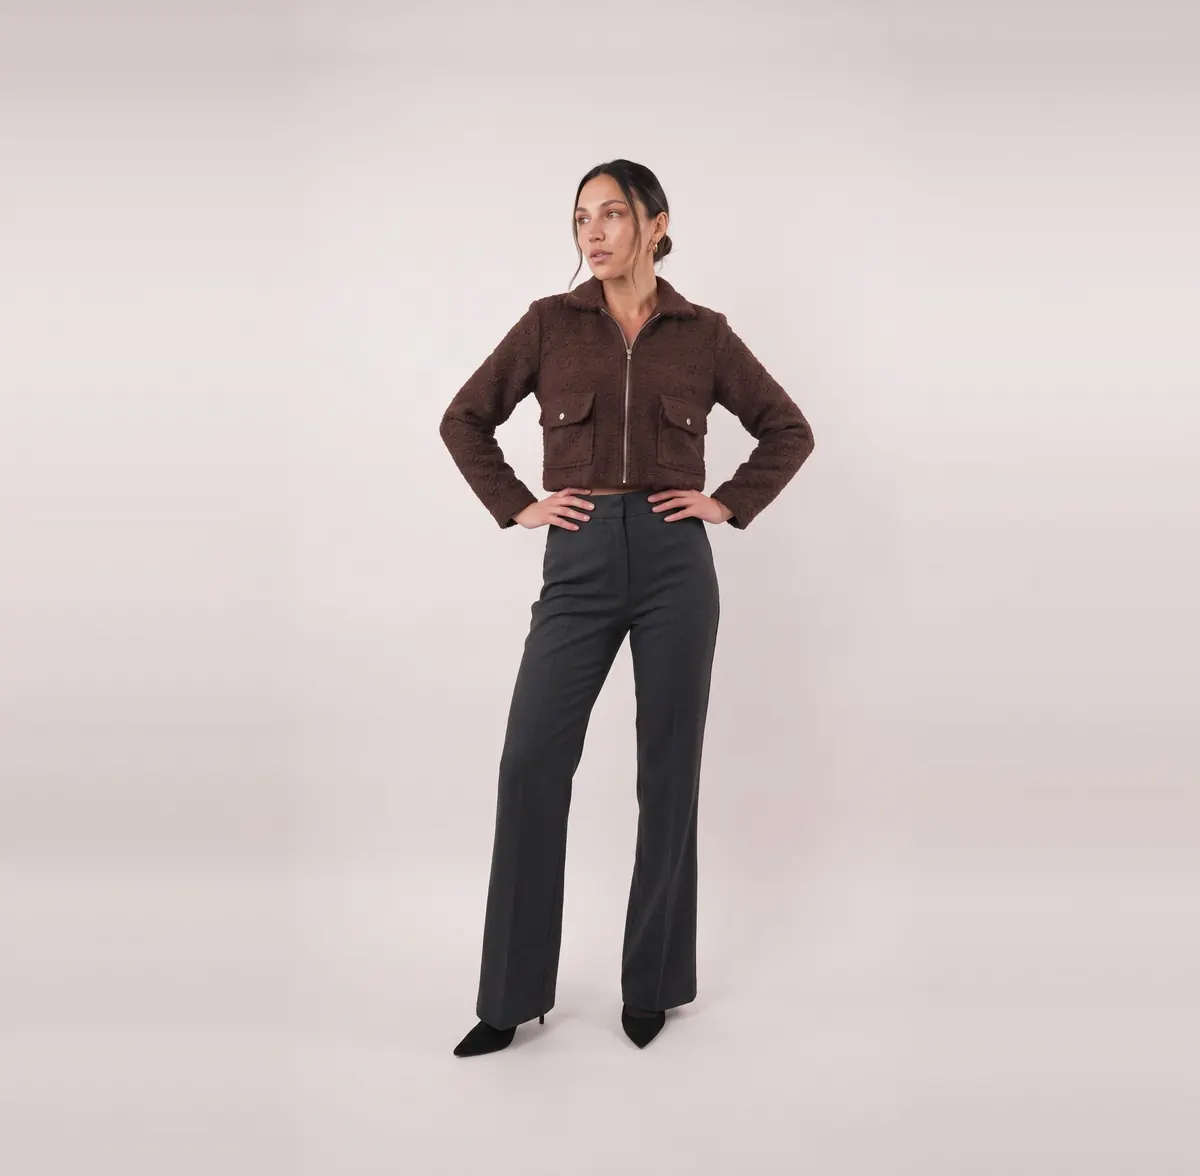
This women's jacket pattern lets you sew the Cropped Zip Jacket, a lined jacket cut at the waist with a collar, a separating zipper and patch pockets with flaps, in women's sizes 00 to 32. It is fairly simple to make and suits beginners who want to try outerwear. The free tutorial below covers size charts, supplies and pattern pieces, then the 11 steps with photos.
The Cropped Zip Jacket, a lined women's jacket for the first cool days
Start by getting to know the jacket: its fabric, its details, and how it looks once finished and worn. Every stage of the sewing is explained for free on this page, and you'll find our other designs on the home page of our free sewing tutorials.
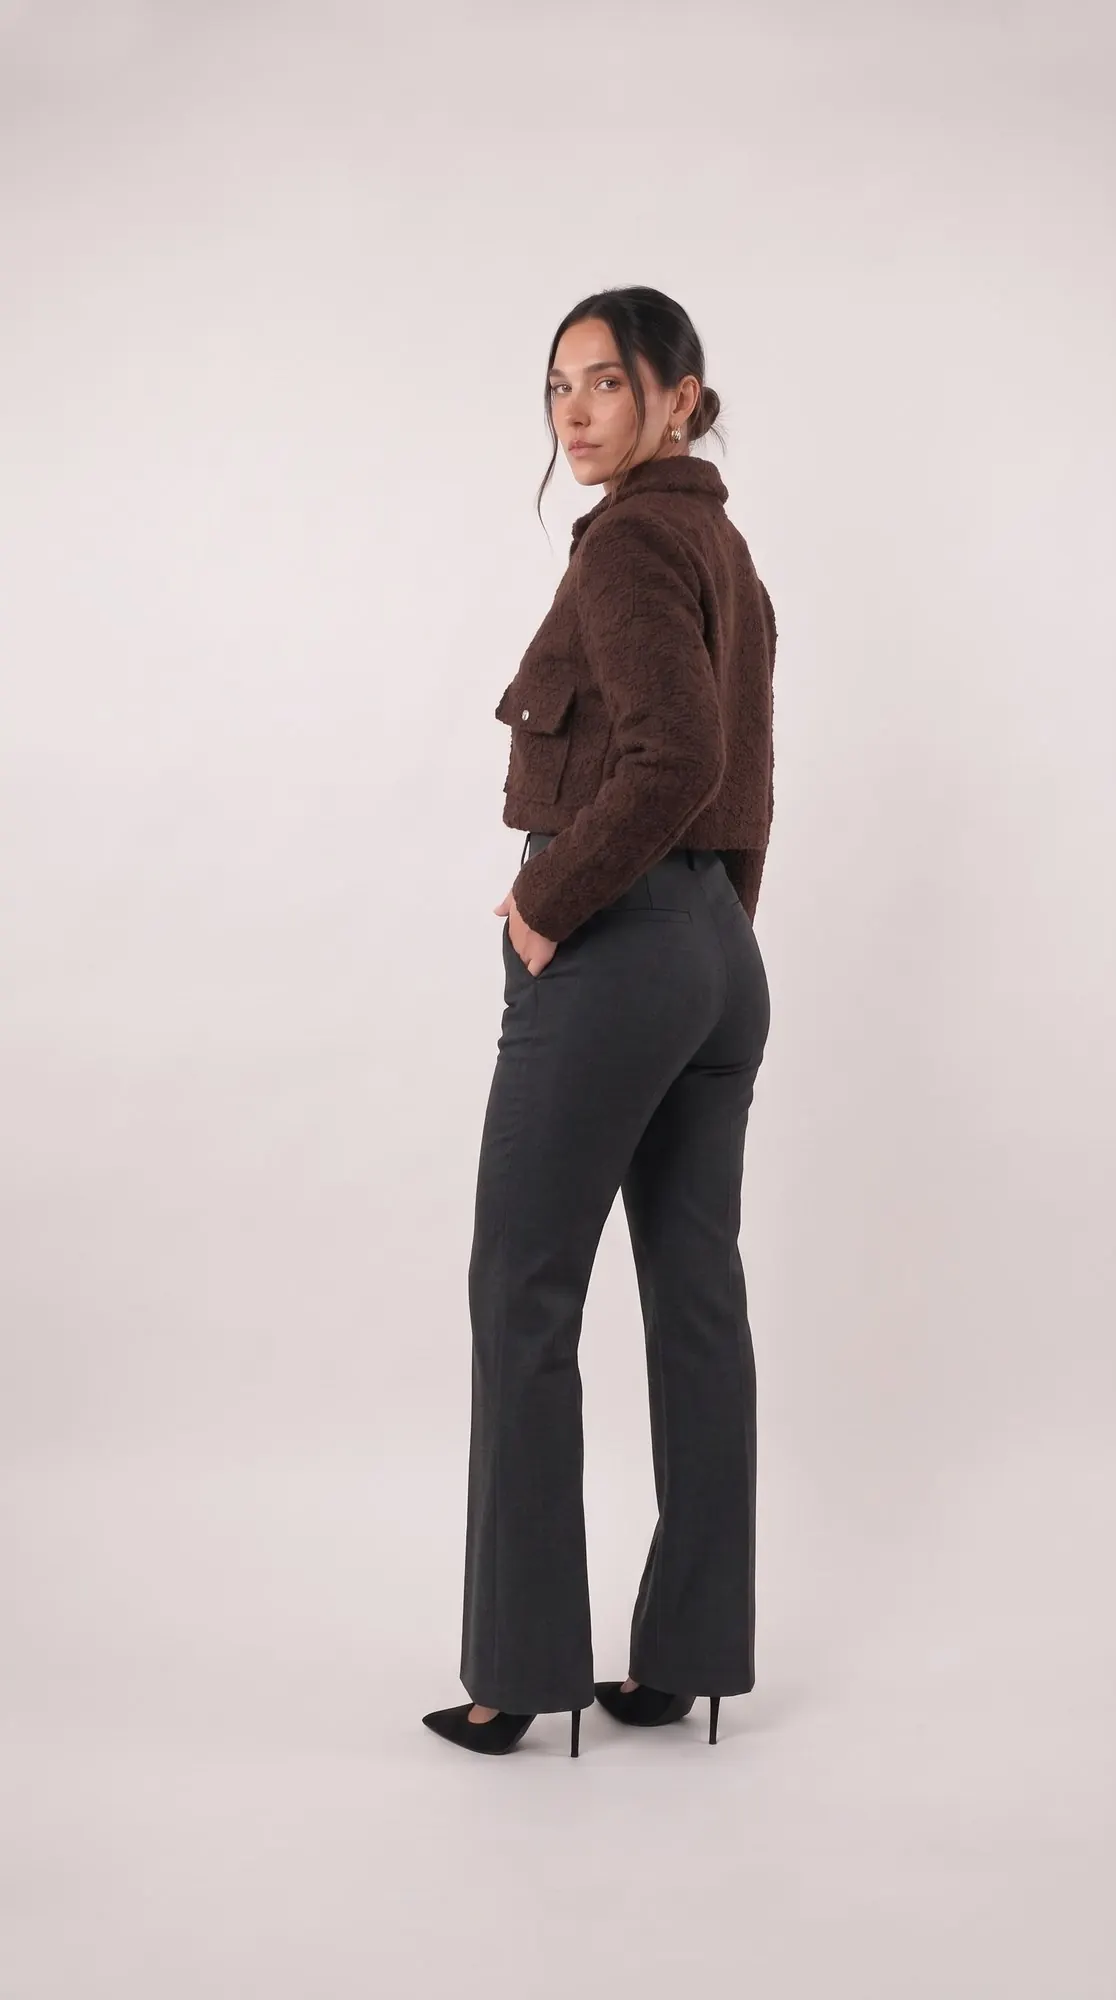
The Cropped Zip Jacket is the easy piece to throw on for the first cool days, when you're not quite ready to bring out your warmer coats. We made ours in a wool-blend bouclé in a lovely chocolate shade, with a cozy texture that is almost reminiscent of sherpa. If you'd like to try something else, flannel or corduroy would also work very well and give the jacket a completely different look.
The construction is fairly simple, with a collar, a zipper and patch pockets. We chose to line ours, but if your fabric is soft enough, you can skip the lining for an even quicker project. The details are easy to customize too: choose silver or gold hardware, replace the snaps with pretty buttons, or play with contrasting details to make the jacket truly your own.
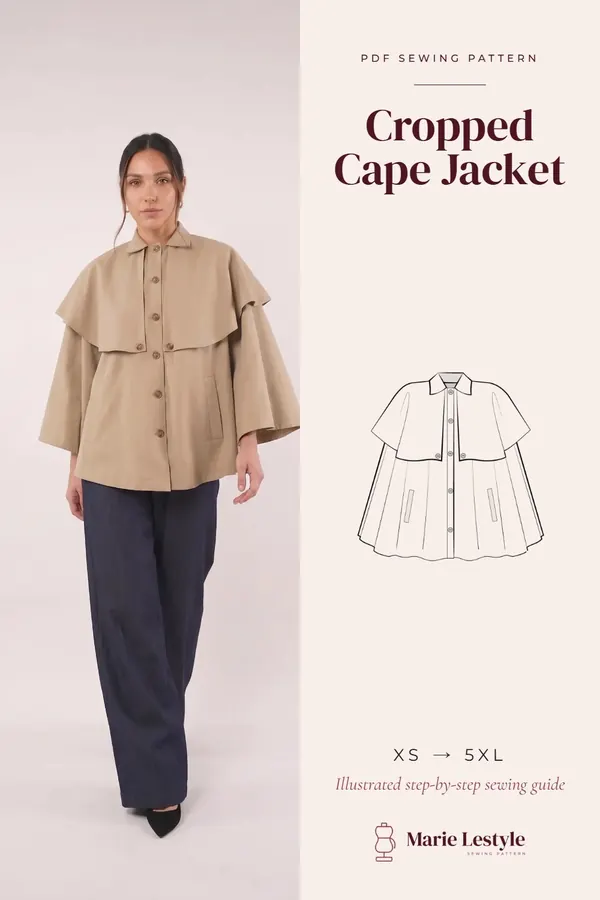
The Cropped Zip Jacket is simple, but certainly not ordinary. Its cropped silhouette is easy to wear with jeans, trousers or a longer skirt, and its beginner-friendly construction makes it a great introduction to sewing outerwear. It's an early-fall piece that won't stay hanging in your closet for long. If you like short jackets, take a look at our cropped cape jacket tutorial as well.
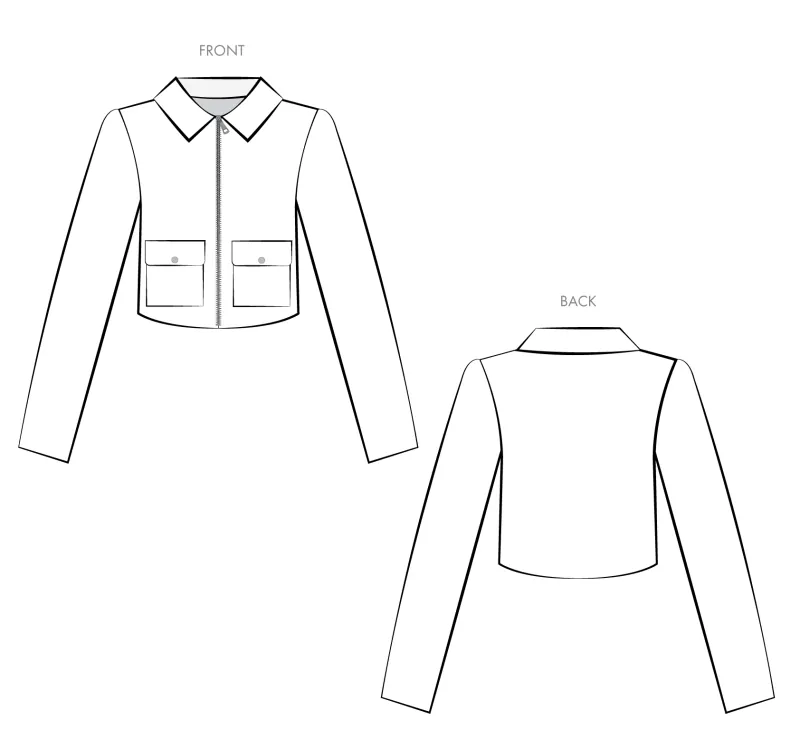
Technical drawings
The technical drawings show the seams and the silhouette of the jacket.
The finished jacket
These photos of the finished jacket show the result you're aiming for from every angle.
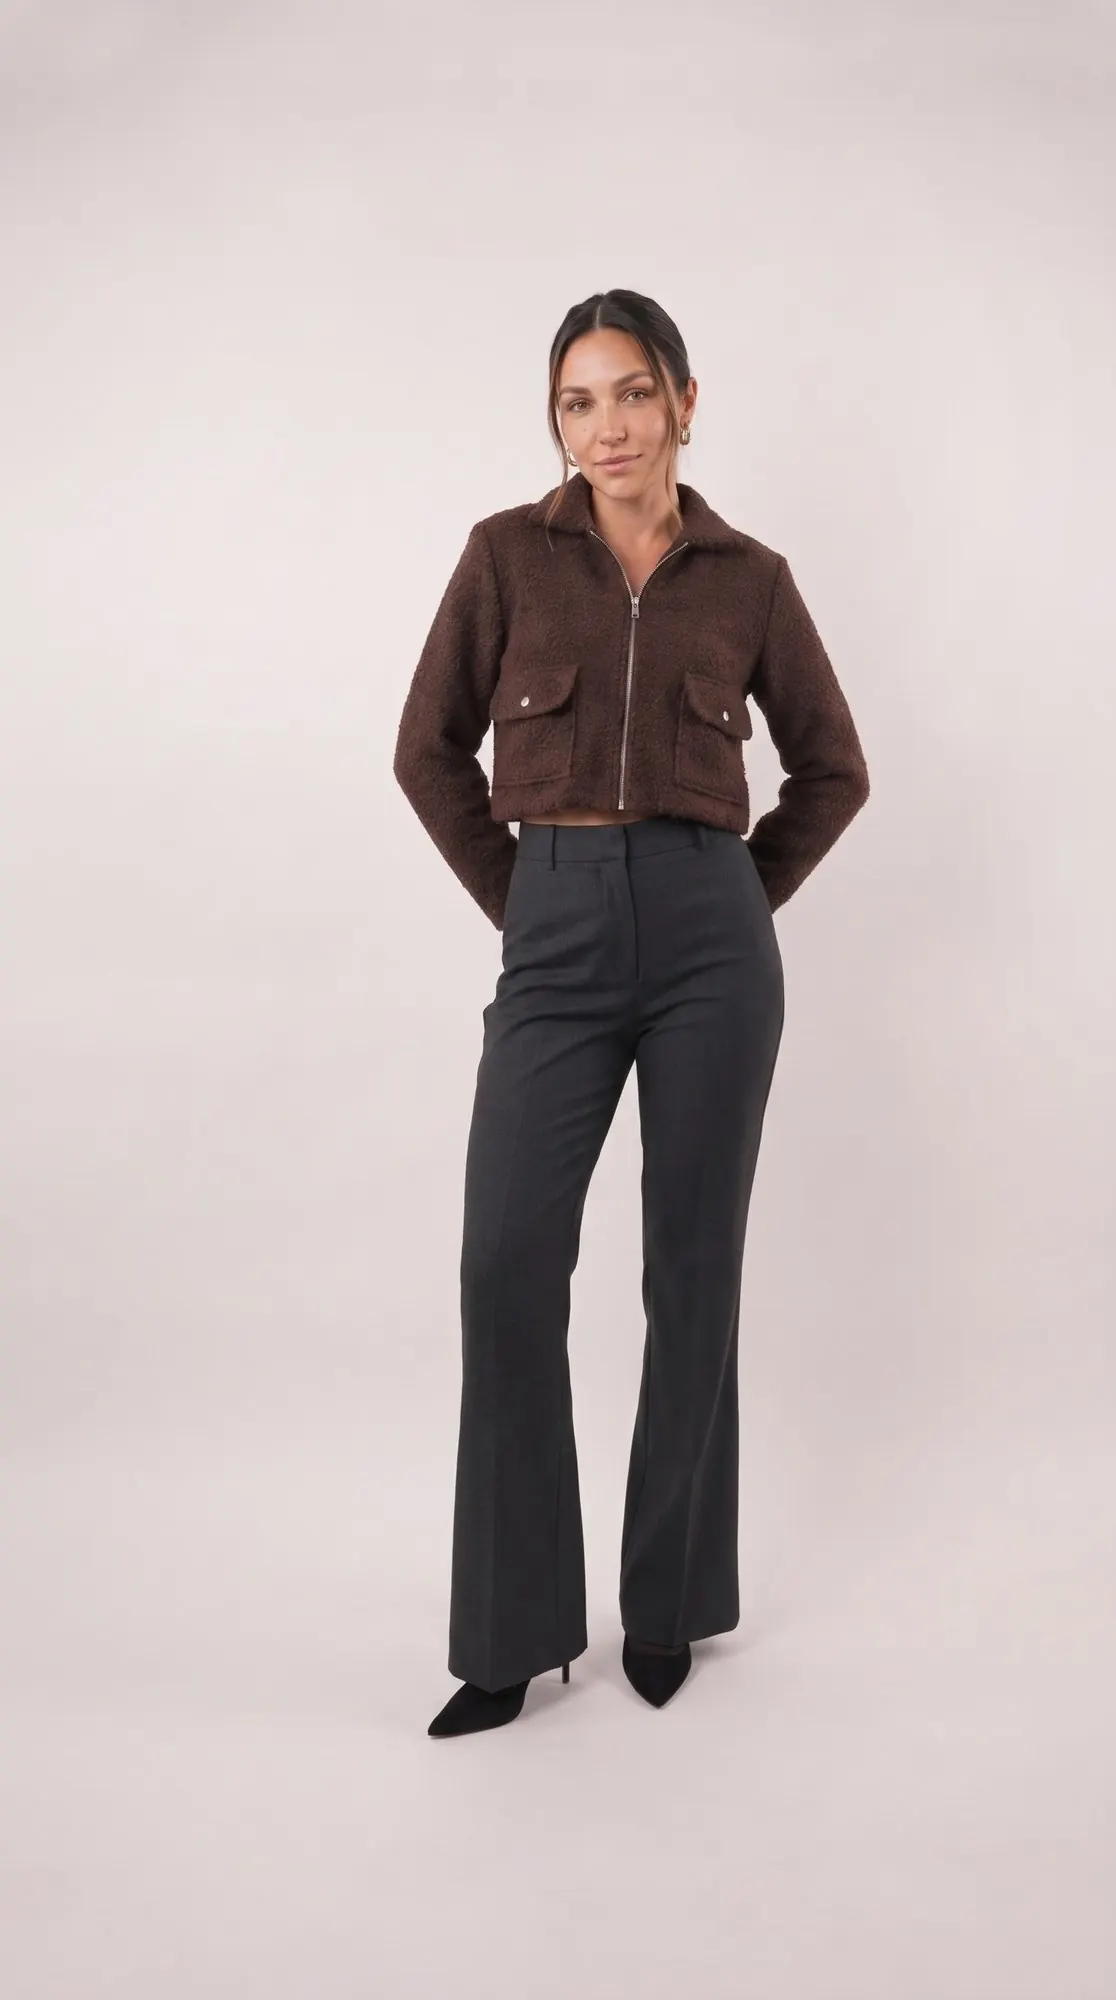
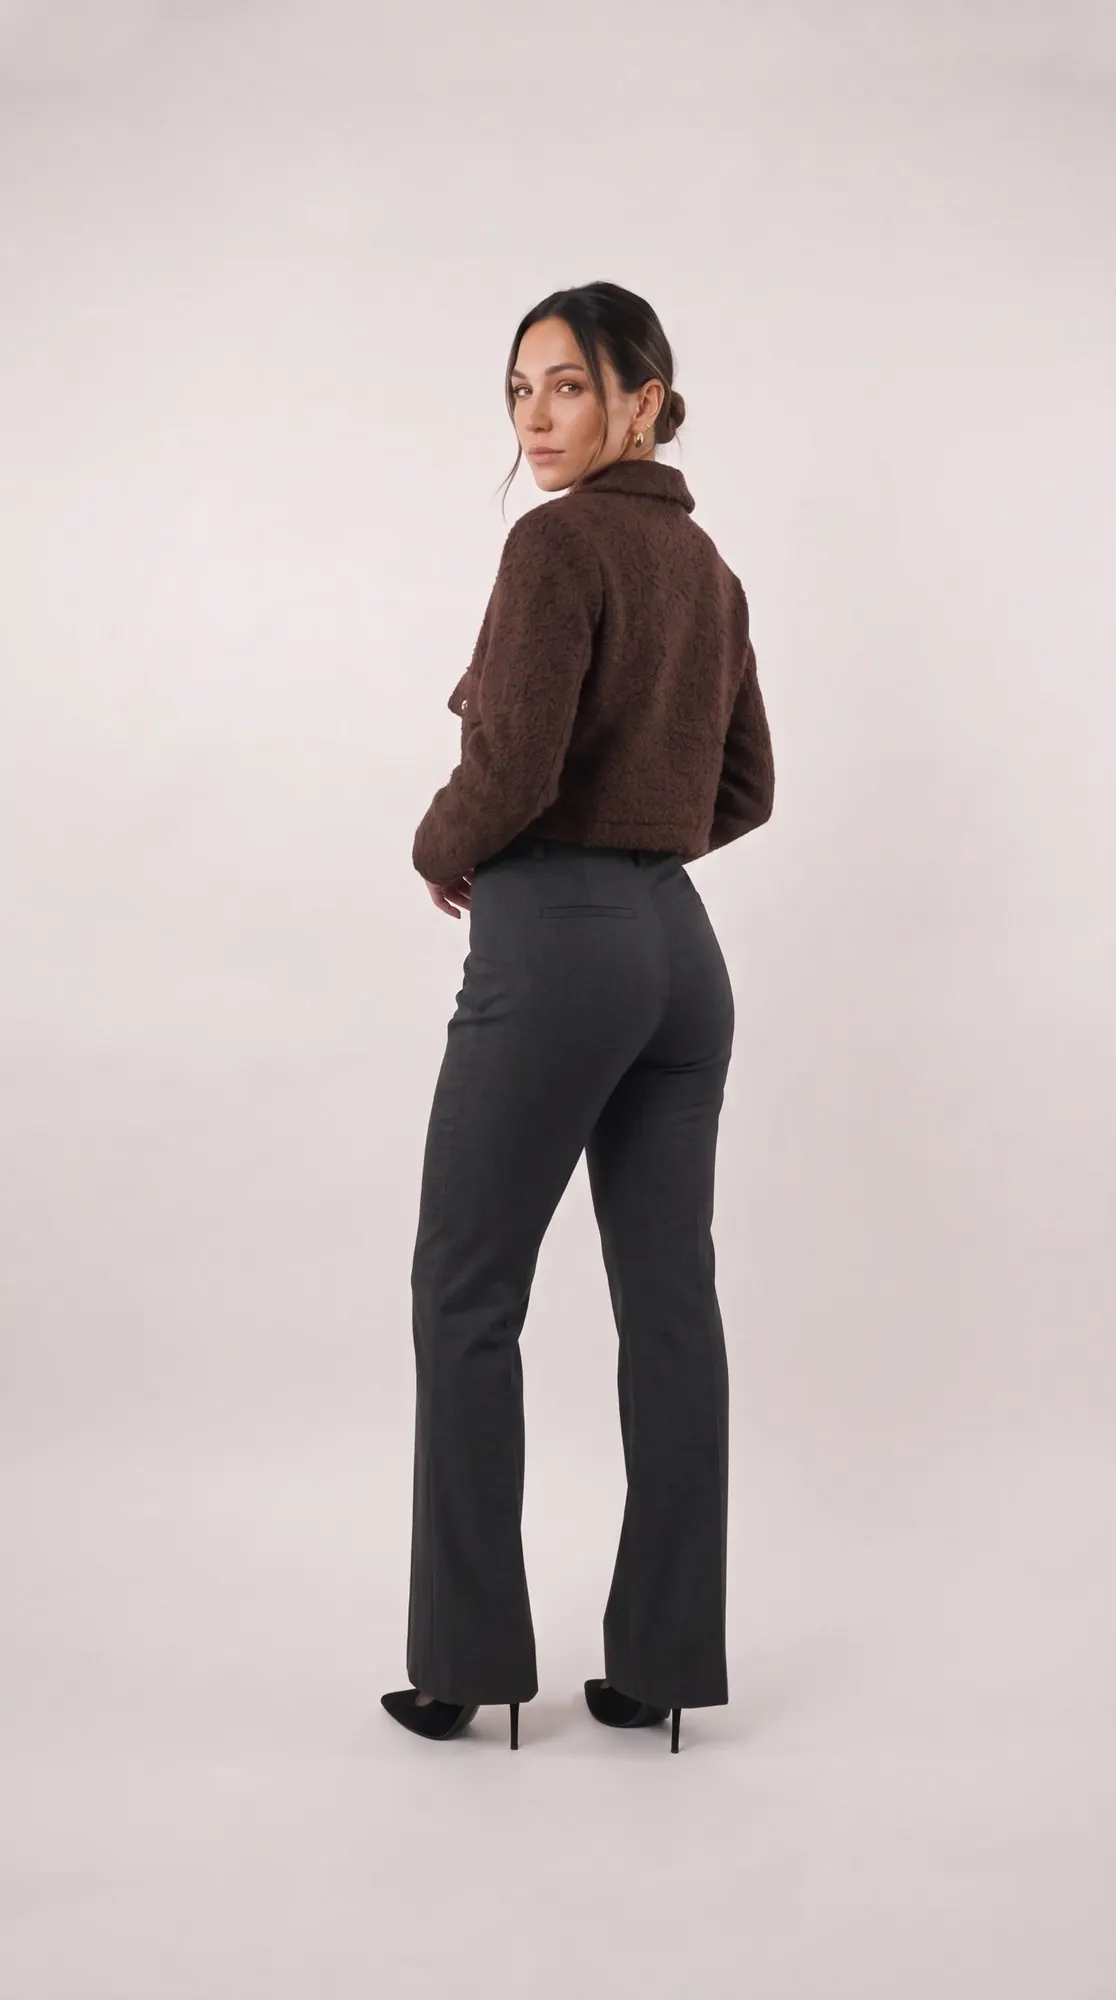
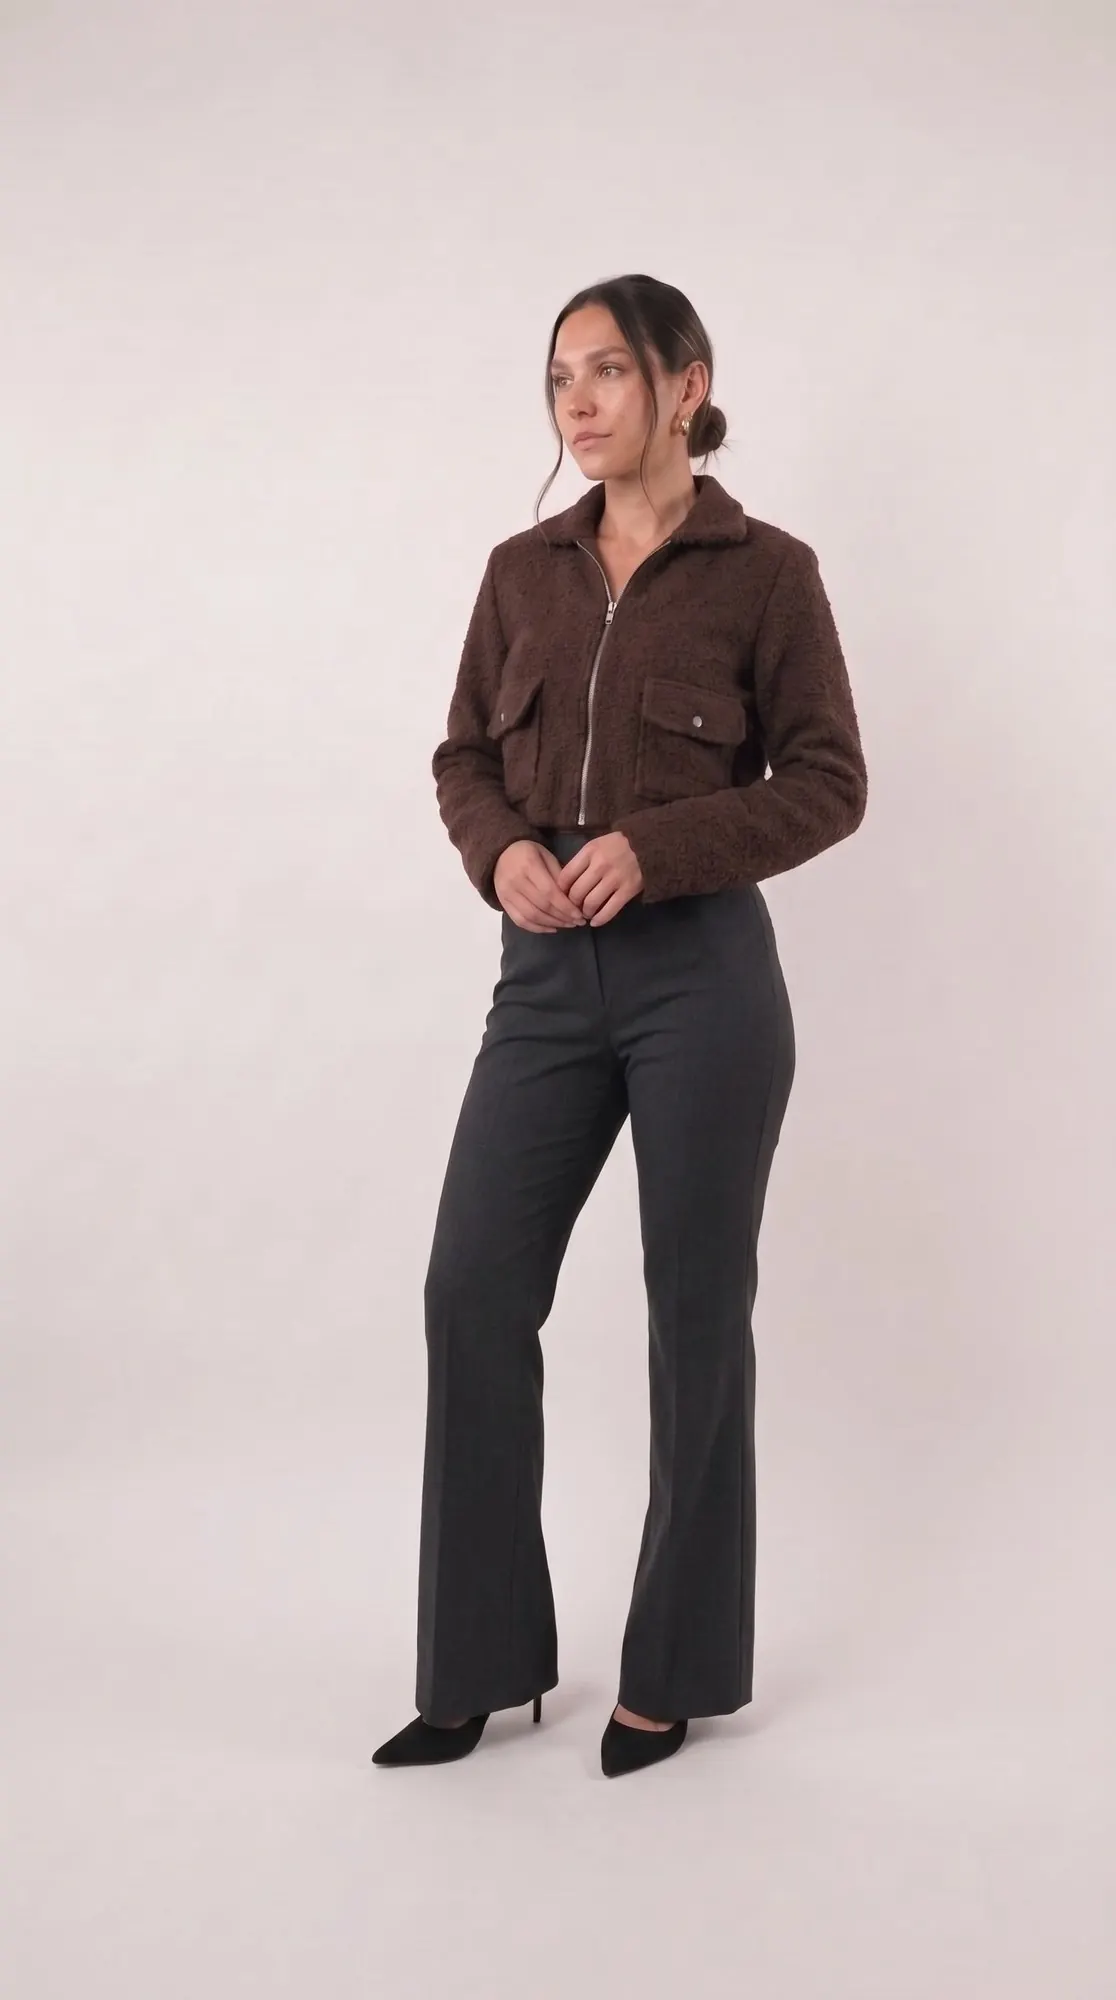
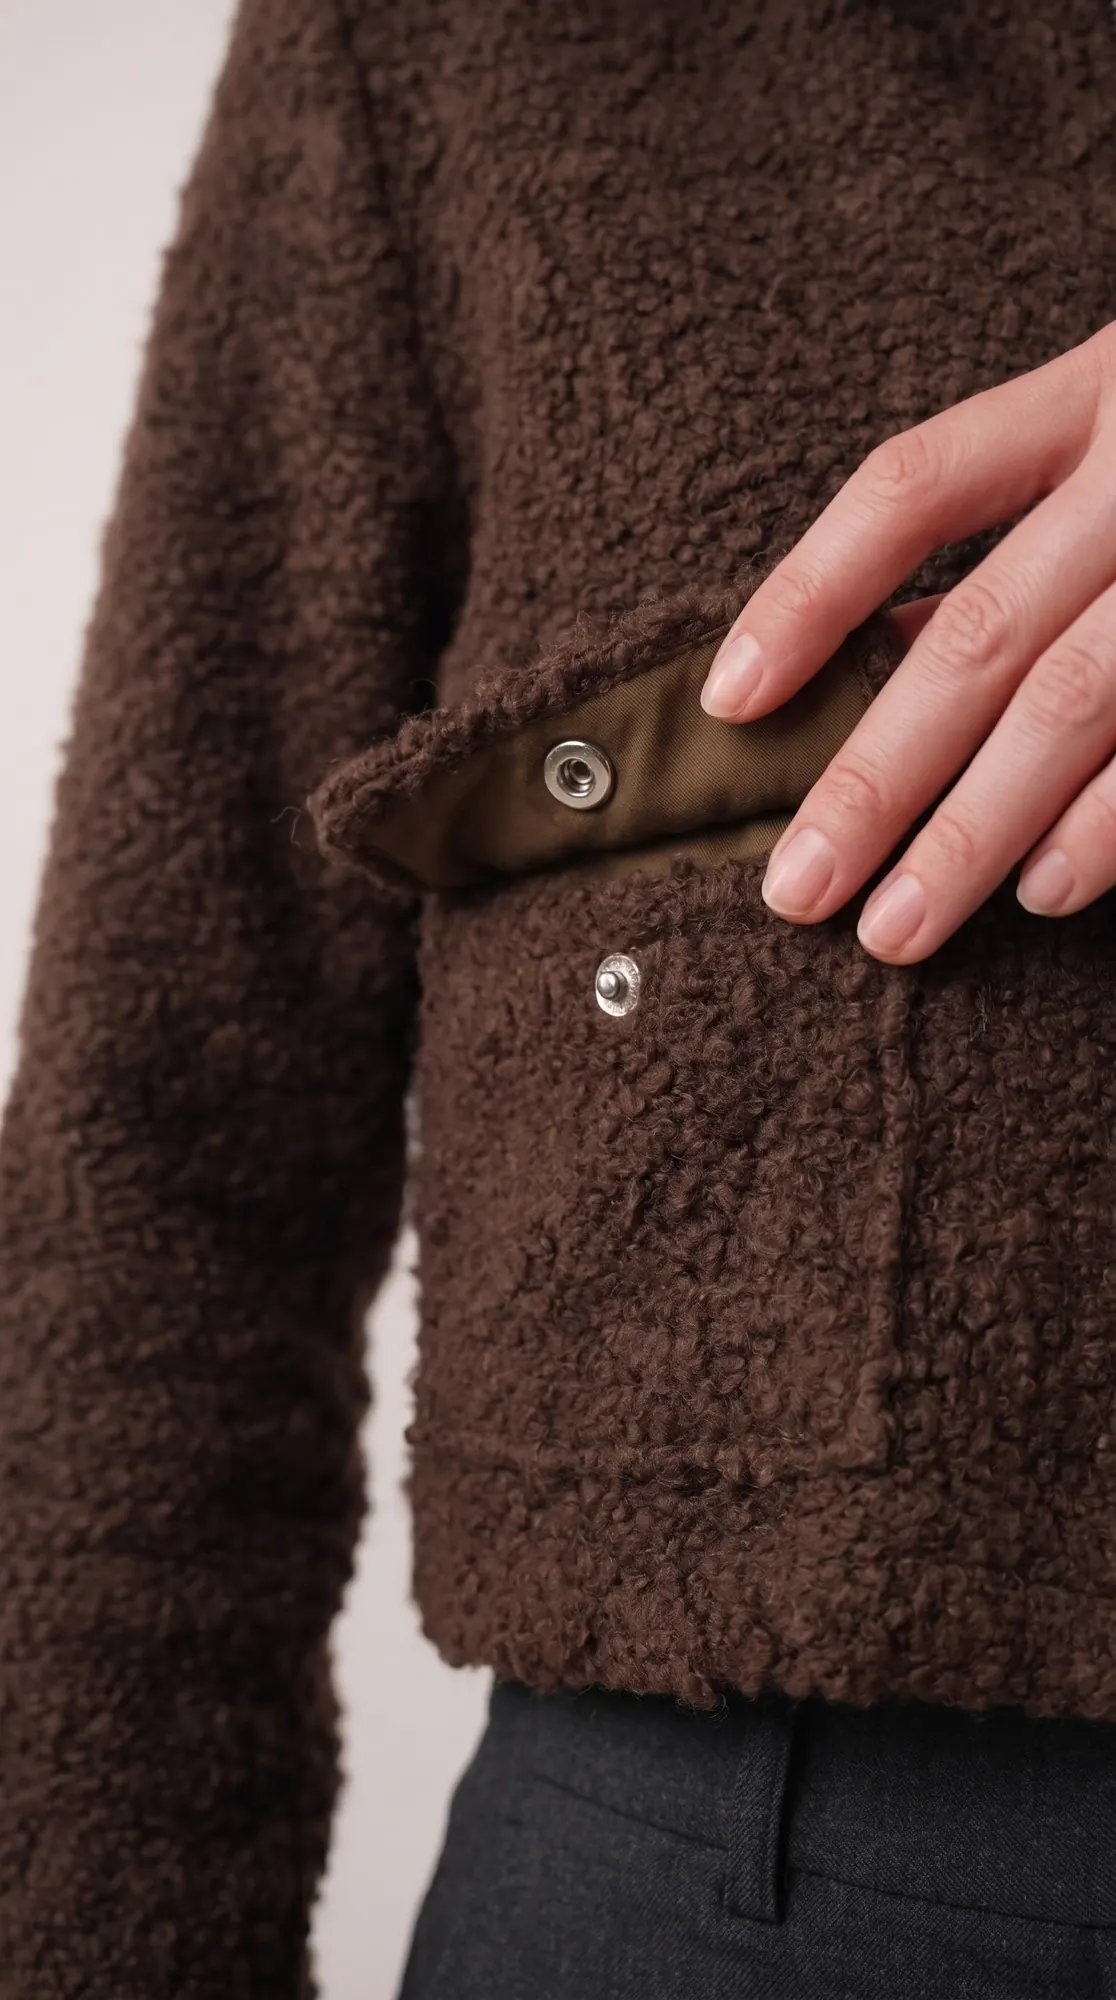
The jacket worn
In town, with high-waisted flared trousers.
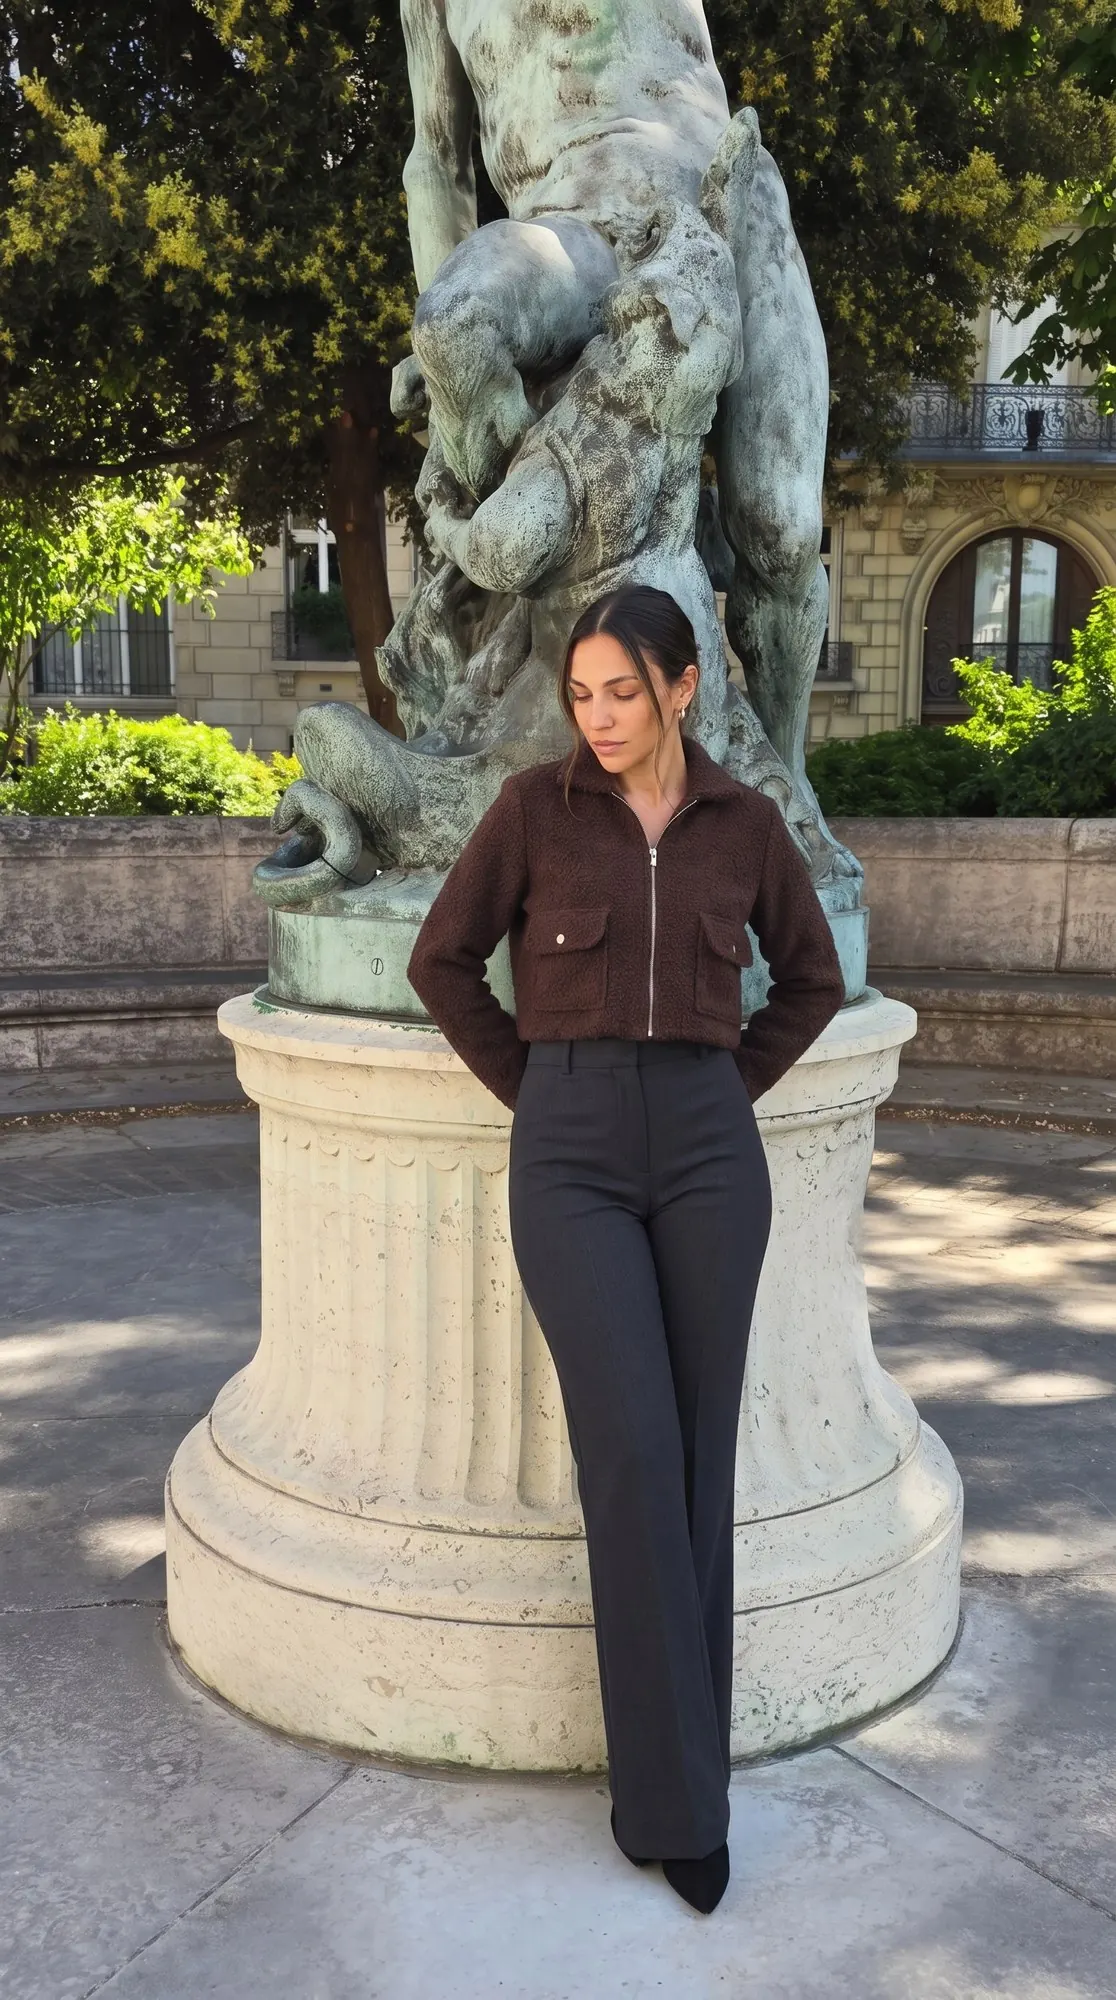
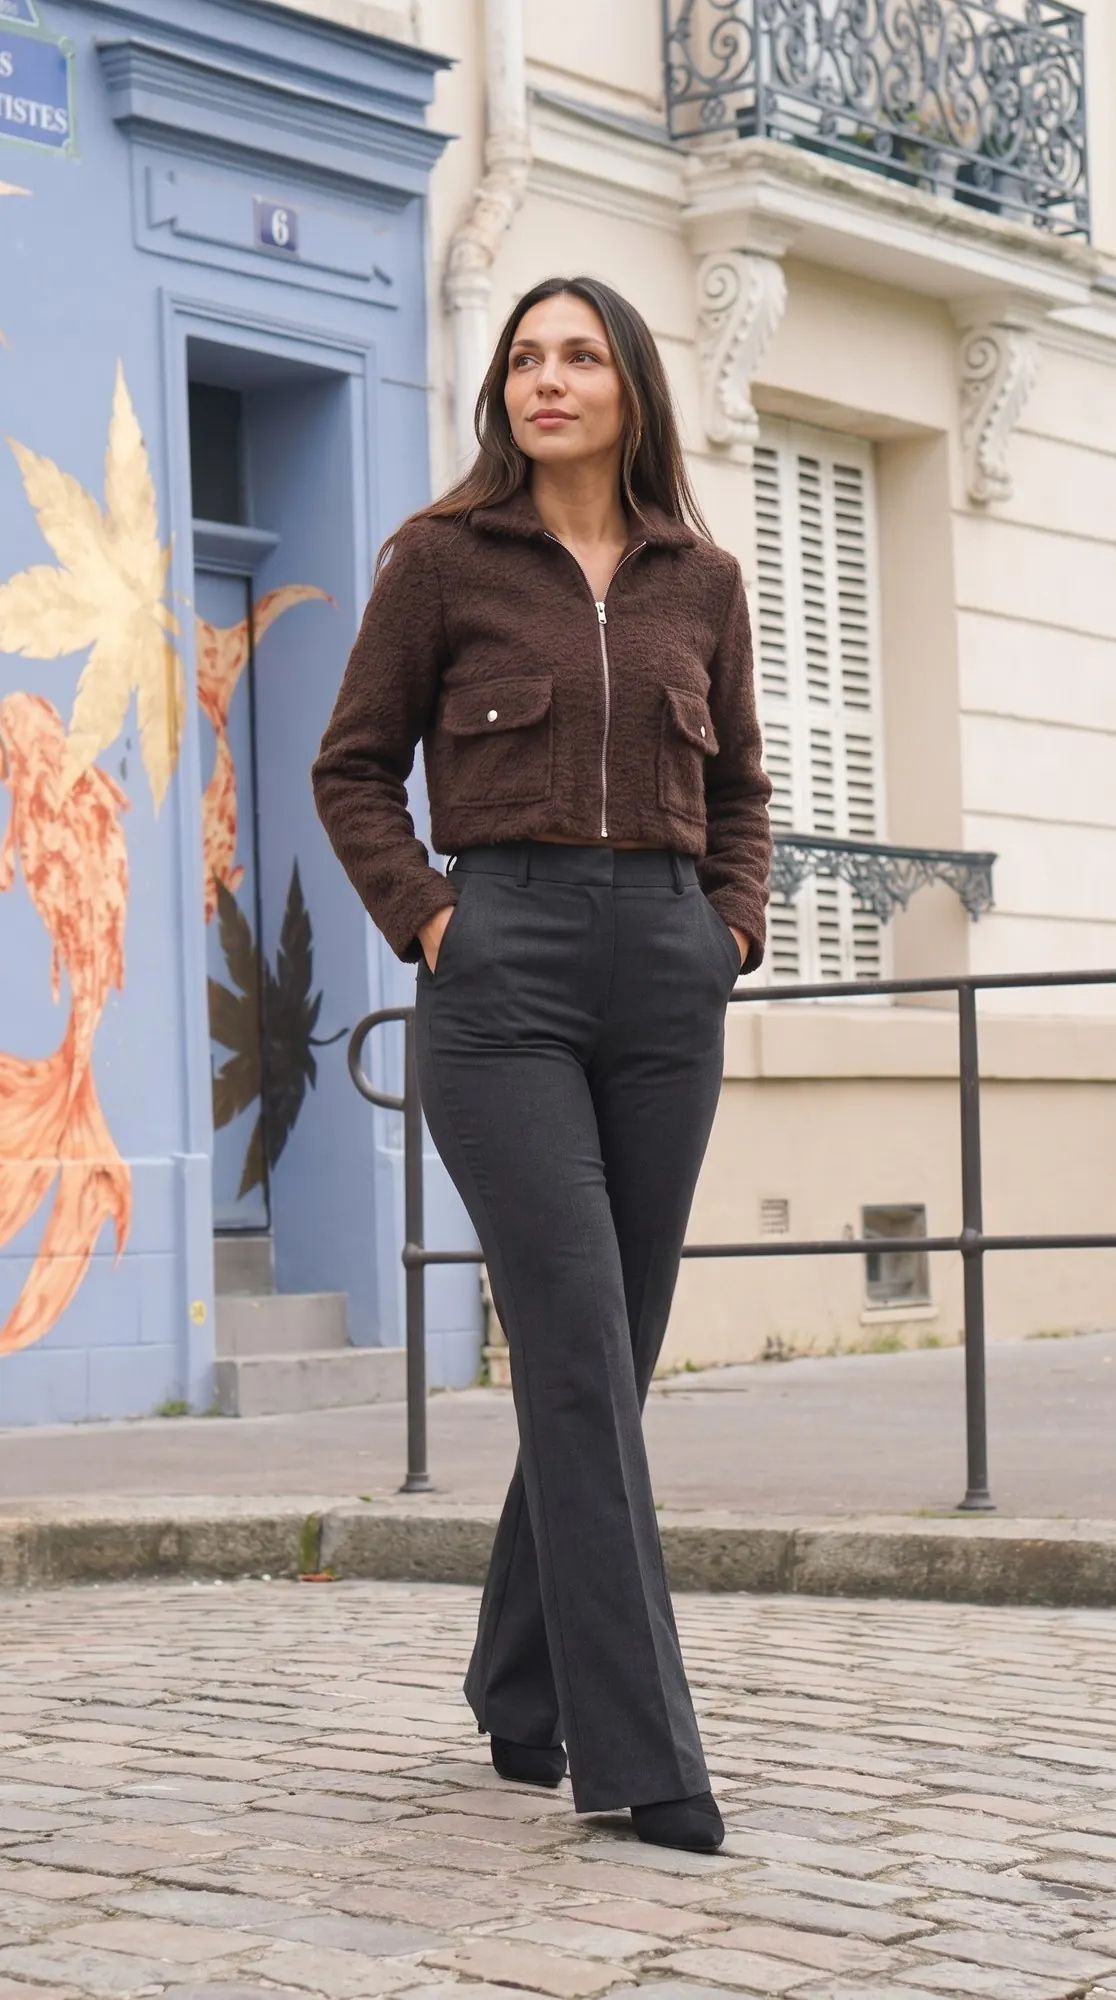
Ways to wear it
Cropped at the waist, the jacket is worn with high-waisted trousers.
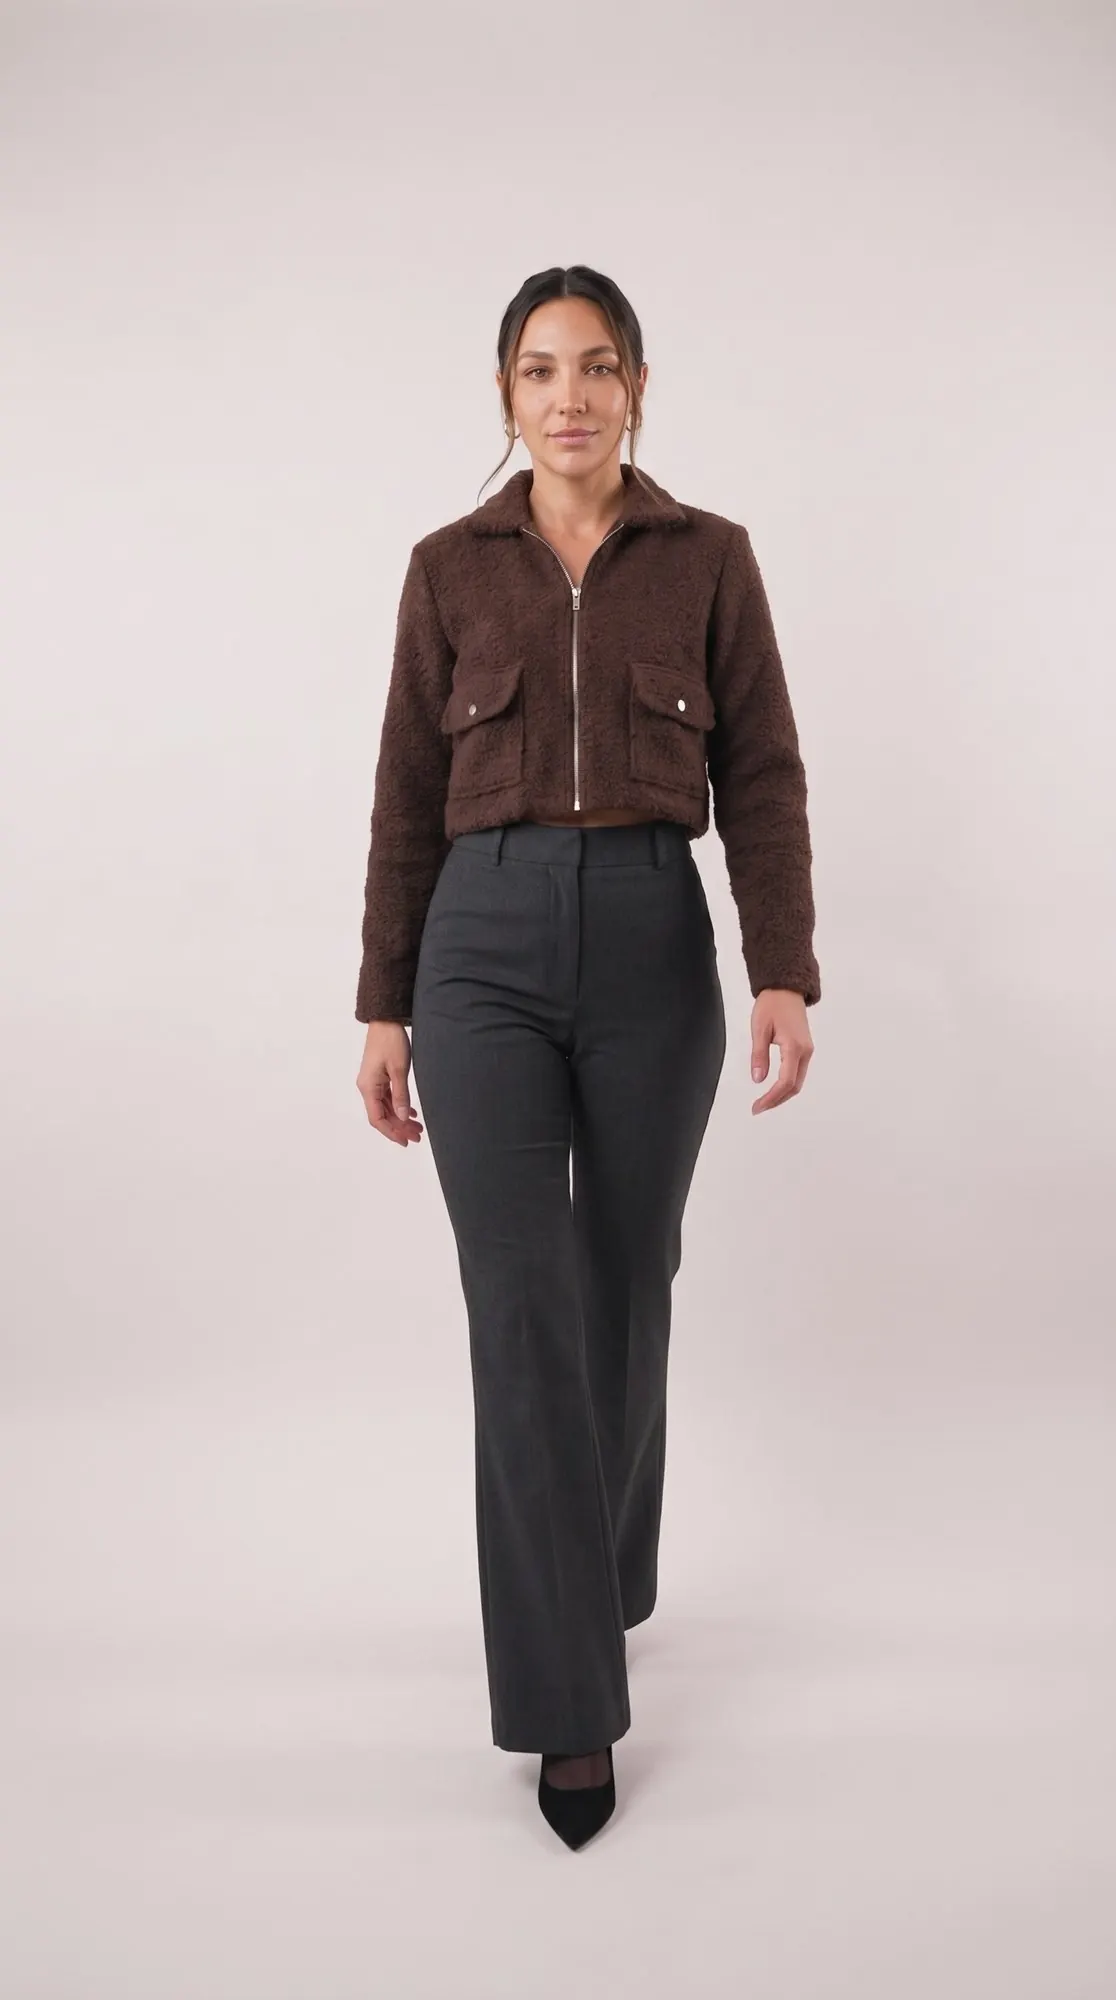
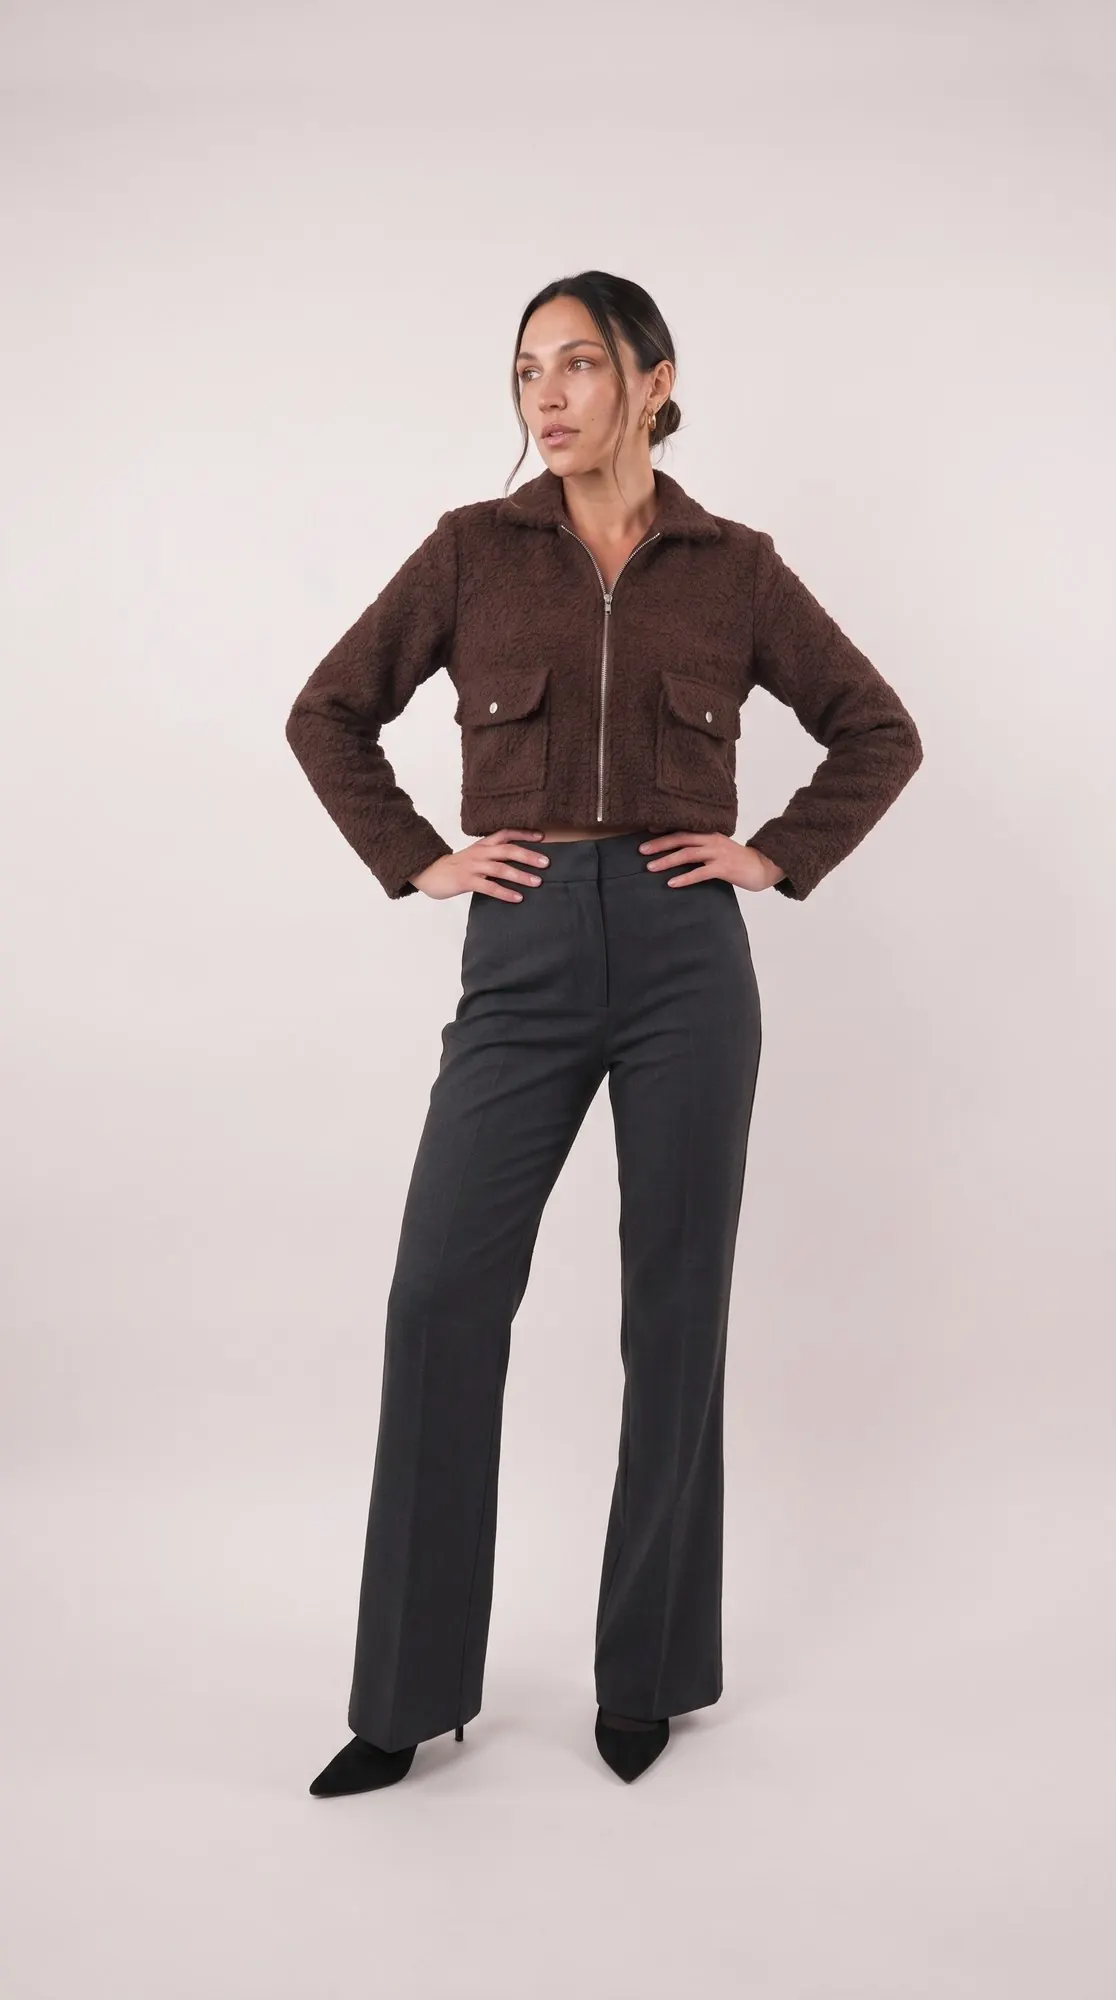
Choosing your size, including plus sizes 16 to 32
Start by taking your bust, waist and hip measurements, then compare them with the tables below to find your size.
Women's sizes 00 to 32. Measurements in centimeters; inches are shown in small print under each value.
Table 1 — Body measurements (cm)
| Size | 00 | 0 | 2 | 4 | 6 | 8 | 10 | 12 | 14 |
|---|---|---|---|---|---|---|---|---|---|
| Bust | 78.7 31" | 81.3 32" | 83.8 33" | 86.4 34" | 88.9 35" | 91.4 36" | 95.3 37.5" | 99.1 39" | 102.9 40.5" |
| Waist | 58.4 23" | 61.0 24" | 63.5 25" | 66.0 26" | 68.6 27" | 71.1 28" | 74.9 29.5" | 78.7 31" | 82.6 32.5" |
| Hips | 86.4 34" | 88.9 35" | 91.4 36" | 94.0 37" | 96.5 38" | 99.1 39" | 102.9 40.5" | 106.7 42" | 110.5 43.5" |
| Size | 16 | 18 | 20 | 22 | 24 | 26 | 28 | 30 | 32 |
|---|---|---|---|---|---|---|---|---|---|
| Bust | 108.0 42.5" | 113.0 44.5" | 118.1 46.5" | 123.2 48.5" | 128.3 50.5" | 134.6 53" | 141.0 55.5" | 147.3 58" | 153.7 60.5" |
| Waist | 87.6 34.5" | 92.7 36.5" | 97.8 38.5" | 102.9 40.5" | 108.0 42.5" | 114.3 45" | 120.7 47.5" | 127.0 50" | 133.4 52.5" |
| Hips | 115.6 45.5" | 120.7 47.5" | 125.7 49.5" | 130.8 51.5" | 135.9 53.5" | 142.2 56" | 148.6 58.5" | 154.9 61" | 161.3 63.5" |
Table 2 — Finished garment measurements, approximate (cm)
| Size | 00 | 0 | 2 | 4 | 6 | 8 | 10 | 12 | 14 |
|---|---|---|---|---|---|---|---|---|---|
| Bust | 88.9 35" | 91.4 36" | 94.0 37" | 96.5 38" | 99.1 39" | 101.6 40" | 105.4 41.5" | 109.2 43" | 113.0 44.5" |
| Waist | 88.9 35" | 91.4 36" | 94.0 37" | 96.5 38" | 99.1 39" | 101.6 40" | 105.4 41.5" | 109.2 43" | 113.0 44.5" |
| Length | 47.0 18.5" | 47.0 18.5" | 48.3 19" | 48.3 19" | 49.5 19.5" | 49.5 19.5" | 50.8 20" | 50.8 20" | 52.1 20.5" |
| Size | 16 | 18 | 20 | 22 | 24 | 26 | 28 | 30 | 32 |
|---|---|---|---|---|---|---|---|---|---|
| Bust | 118.1 46.5" | 123.2 48.5" | 128.3 50.5" | 133.4 52.5" | 138.4 54.5" | 144.8 57" | 151.1 59.5" | 157.5 62" | 163.8 64.5" |
| Waist | 118.1 46.5" | 123.2 48.5" | 128.3 50.5" | 133.4 52.5" | 138.4 54.5" | 144.8 57" | 151.1 59.5" | 157.5 62" | 163.8 64.5" |
| Length | 52.1 20.5" | 53.3 21" | 53.3 21" | 53.3 21" | 55.9 22" | 55.9 22" | 55.9 22" | 58.4 23" | 58.4 23" |
Size guide
The size guide is based on the style and ease intended for this design. You can also choose your size from the finished garment measurements you want, grading between sizes if needed. Measure the printed pieces to check that their dimensions match the fit you want, and adjust if needed before cutting the fabric. For the best result, sew a test garment in a similar fabric to check and adjust the fit of your pattern.
Always read all the instructions before cutting the fabric!
Supplies and fabric for the cropped jacket
Gather your fabric and supplies before you start: the list below gives the quantities we used for size S.
Here are the supplies we used, if you want to follow our version exactly, along with a selection of other fabric types if you want to customize yours. The pattern includes technical drawings, so you can clearly see the seams and the silhouette of the jacket, and a size chart to find your size.
Supplies used (quantities for size S)
| Item | Quantity |
|---|---|
| Wool-blend bouclé, color of your choice | 1.5 yards = 1.37 m |
| Polyester lining, color of your choice | 1.5 yards = 1.37 m |
| Heavy-duty snap kit with tools, nickel finish, 7 sets | 1 |
| T5 metal separating zipper, off-white tape and silver teeth, 69.9 cm (27.5") | 1 |
| Silver metal zipper pull, medium size, rounded edges | 1 |
| All-purpose sewing thread 250 m, matching the fabric | 1 spool |
| The PDF pattern (sheets to print) | — |
Sew the jacket in the color of your choice. In all the photos the fabric is chocolate.
Other supplies used
- Point turner
- Fusible interfacing (recommended for the collar)
- Awl
Which fabric should you choose?
This pattern works best with medium-weight apparel fabrics. Other recommended fabric types:
- Denim
- Corduroy
- Faux suede
- Flannel
2 tips for sewing wool bouclé
- Above all, finish all the raw edges of the fabric with a serger or a zigzag stitch as soon as the pieces are cut. This bouclé frays very easily, and finishing the raw edges before sewing keeps it from unraveling during construction.
- Set your iron to medium heat, with little steam, to keep the wool from distorting and shrinking when you press the seams.
The pieces of the women's jacket pattern
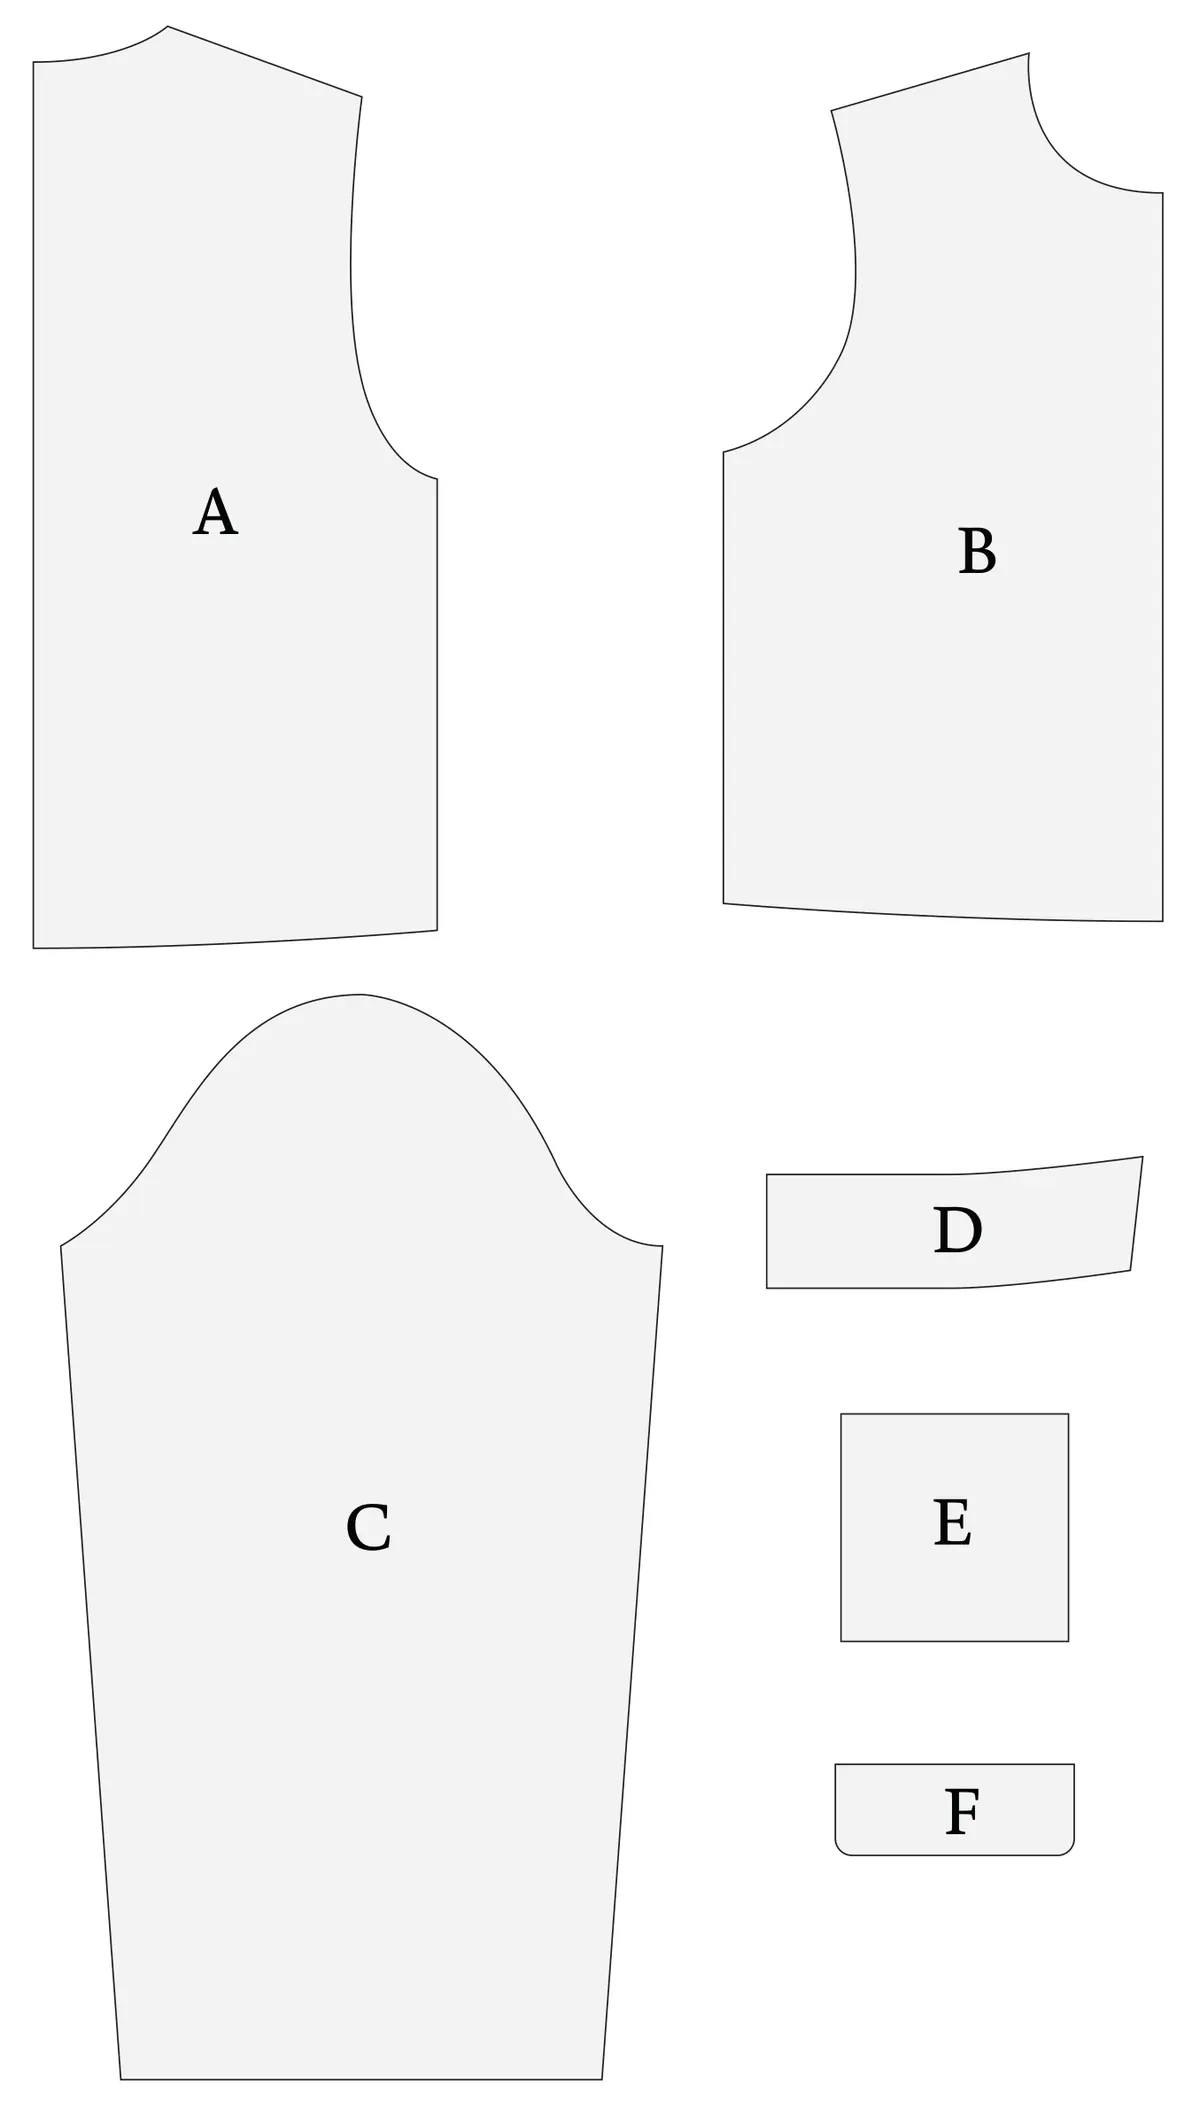
Cut pieces A to F from the fabric, and the back, fronts, sleeves and pocket flaps from the lining too, following the table below and the grainline.
| Piece | Name | Cut |
|---|---|---|
| A | Back | Fabric — 1 on the fold Lining — 1 on the fold |
| B | Front | Fabric — 2 mirrored Lining — 2 mirrored |
| C | Sleeve | Fabric — 2 mirrored Lining — 2 mirrored |
| D | Collar | Fabric — 2 on the fold |
| E | Pockets | Fabric — 2 |
| F | Pocket flaps | Fabric — 2 Lining — 2 |
1.27 cm (½") seam allowances are included in the pattern. Sew with a 1.27 cm (½") seam allowance for all seams, unless otherwise stated.
Pieces D, E and F have only 6 cutting lines: 00-2, 4-8, 10-14, 16-20, 22-26, 28-32. Place each piece with its “GRAINLINE” arrow parallel to the selvage.
The PDF pattern to print
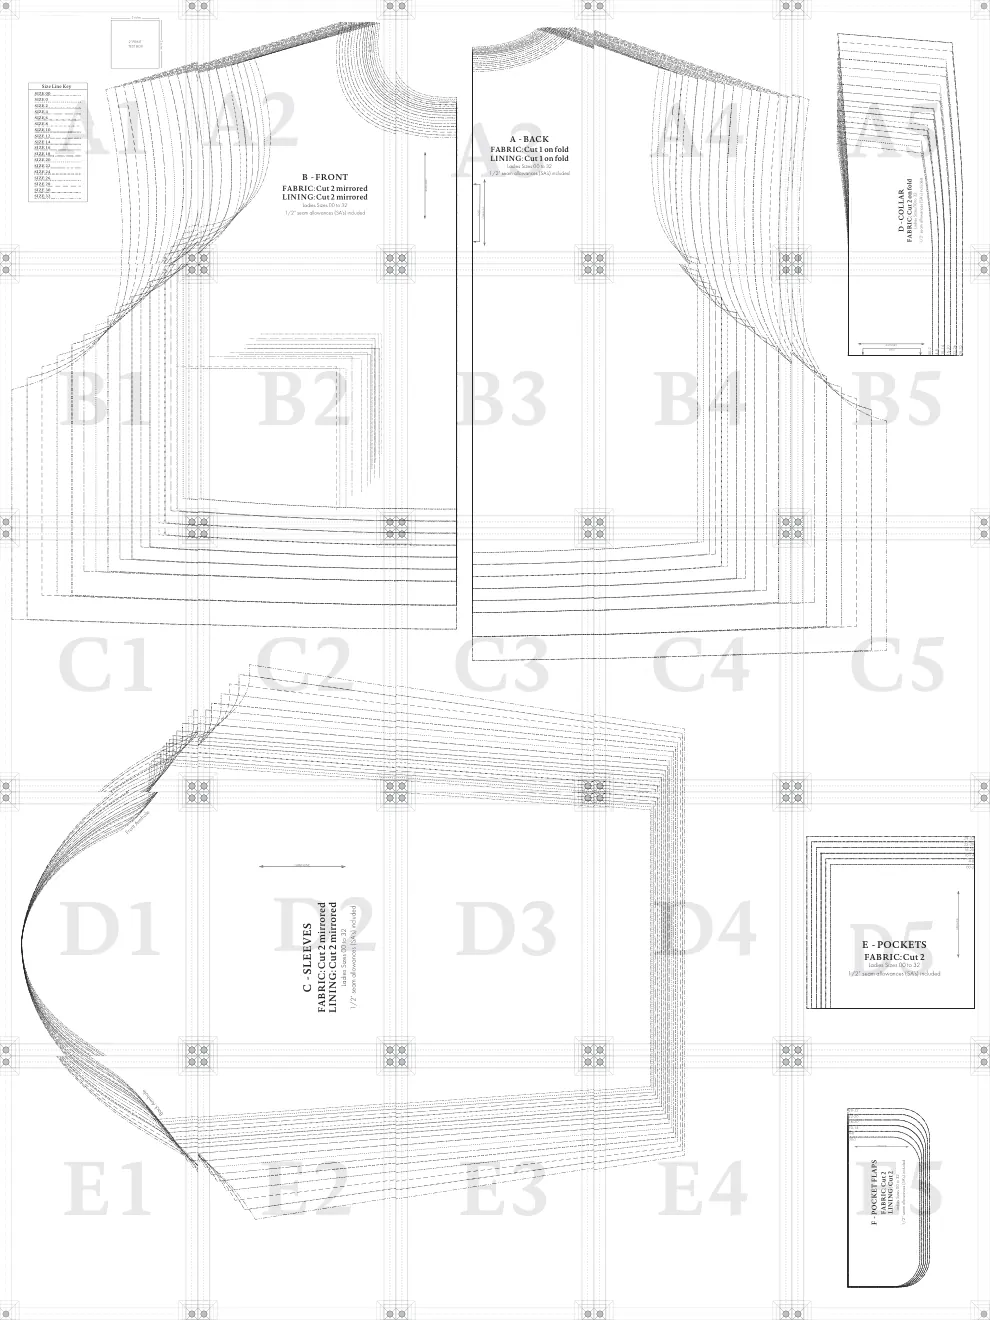 A · BackB · FrontC · SleevesD · CollarE · PocketsF · Flaps
The pieces of the Cropped Zip Jacket are in the PDF pattern: you print it at home at actual size, then assemble the sheets. It covers women's sizes 00 to 32, and includes a test square to check the scale before you print everything. The construction tutorial stays free on this page.
Download the PDF patternHow to sew a jacket: the Cropped Zip Jacket step by step
The instructions below guide you through sewing the Cropped Zip Jacket from start to finish, from the patch pockets to the pocket snaps. Each step gives the instructions first, then the photos.
Sew with a 1.27 cm (½") seam allowance for all seams, unless otherwise stated.
Step 1 — Front pockets
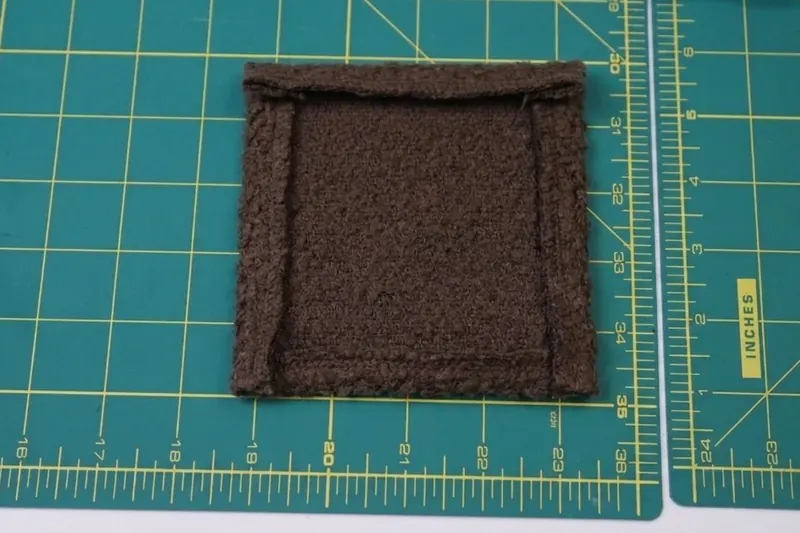
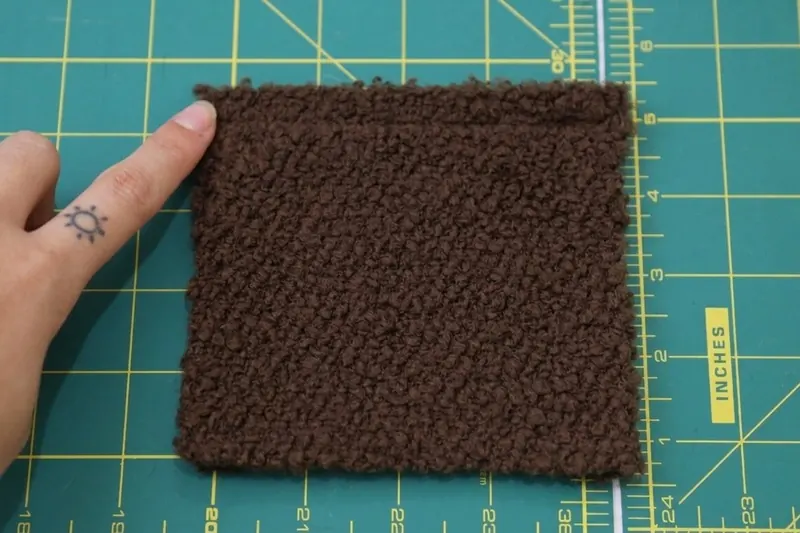
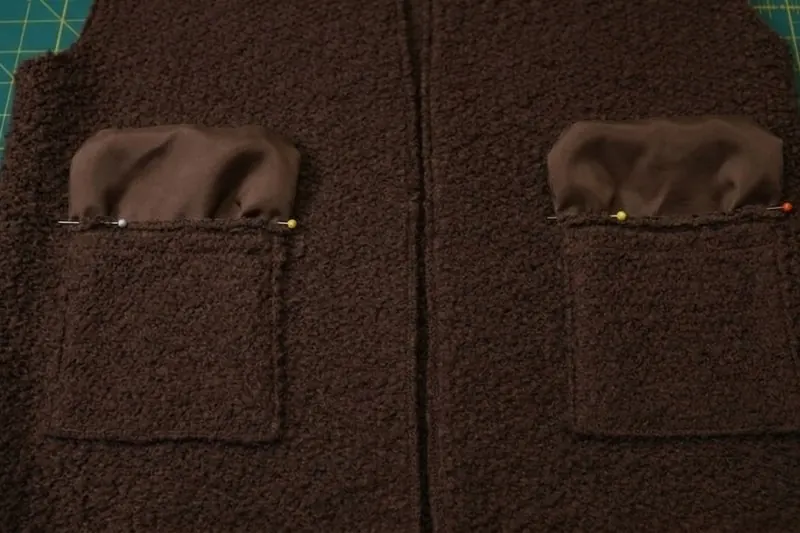
- Press a 1.27 cm (½") fold toward the wrong side of the fabric on all edges of the front pockets.
- Topstitch the top edge of the pocket with a 1.0 cm (⅜") seam allowance, to catch the 1.27 cm (½") fold.
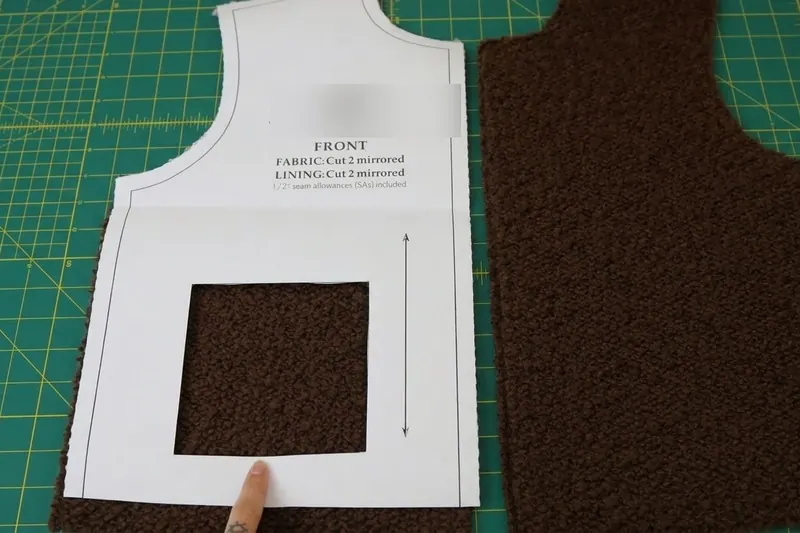
- Cut out the pocket placement from the paper pattern and lay the paper on the jacket fronts.
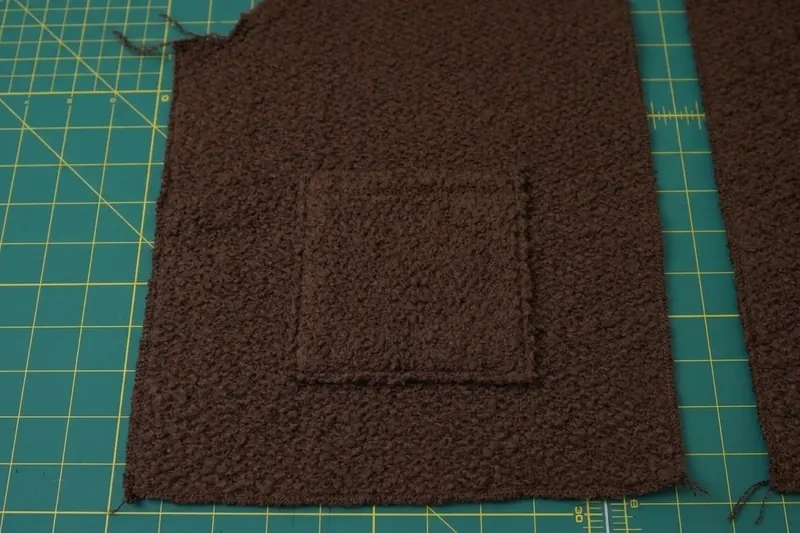
- Place the pocket, wrong side against the right side of the jacket front, just inside the square of the paper pattern: this marks the exact pocket placement.
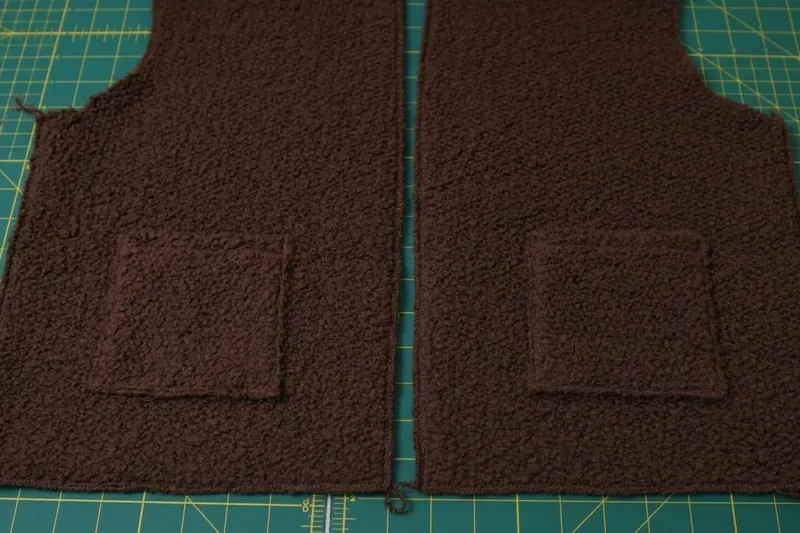
- Pin and stitch the sides and bottom of the pockets to the jacket front.
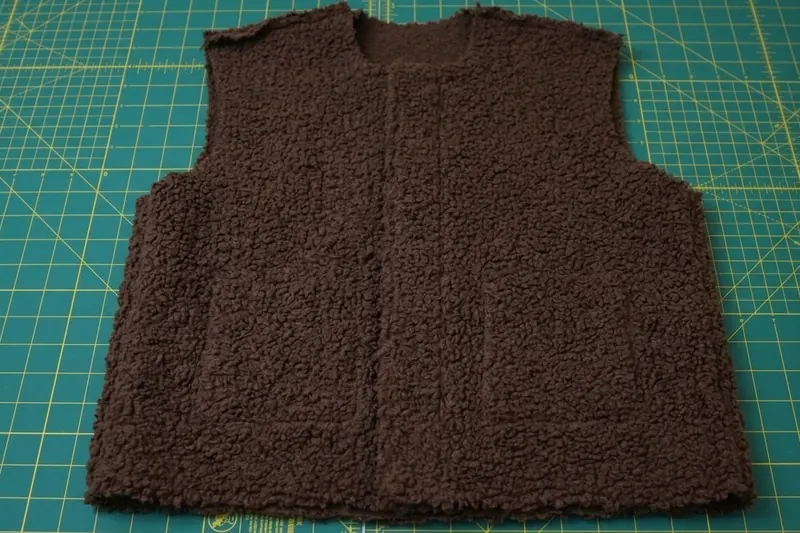
Step 2 — Shoulder and side seams
- Place the jacket fronts right sides together on the jacket back, shoulders and sides aligned.
- Pin and stitch the fronts to the back at the side seams and the shoulder seams.
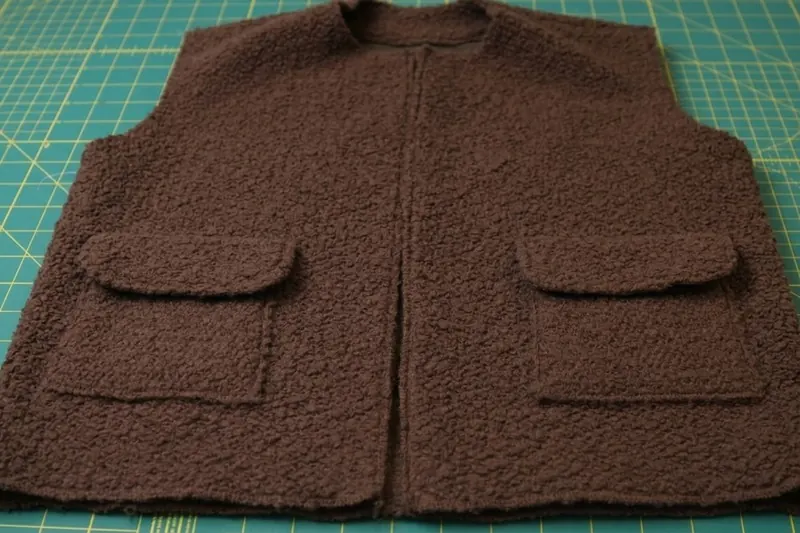
Step 3 — Pocket flaps
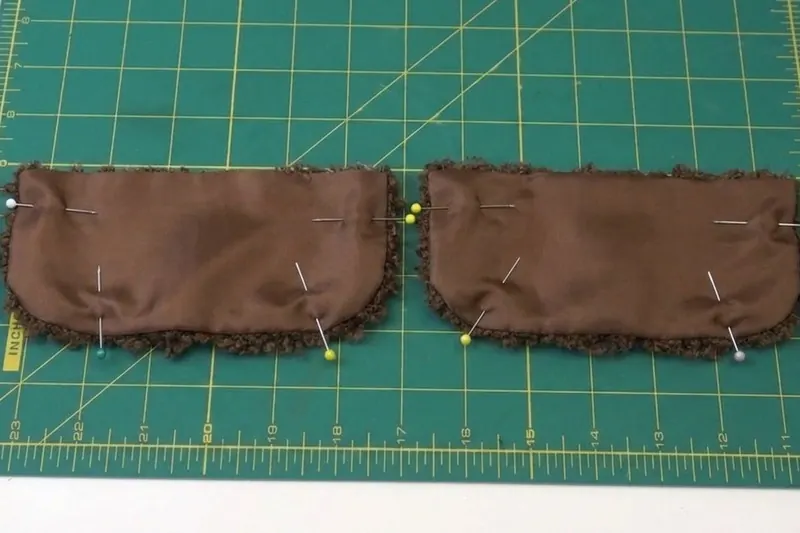
- Place the lining pocket flaps right sides together on the main fabric pocket flaps.
- Pin around the curved sides and bottom of the flaps, to join the lining to the main fabric.
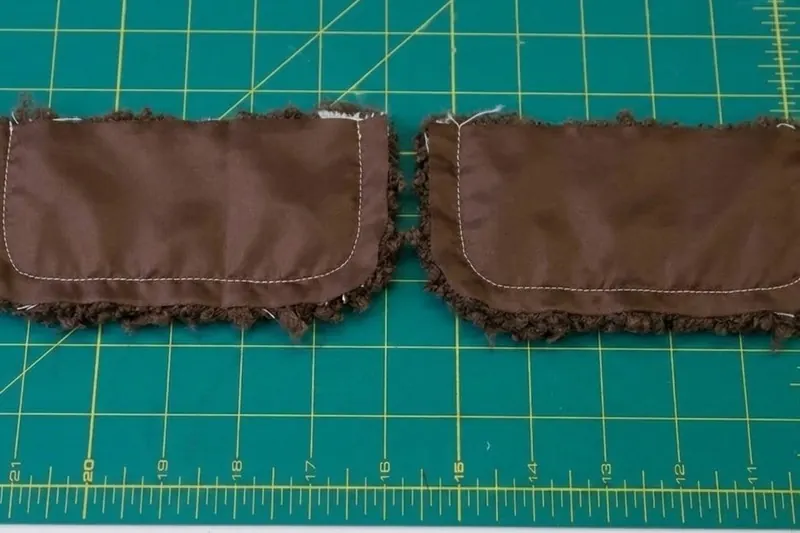
- Stitch around the curved sides of the flaps, leaving the straight top edge unsewn.
- Turn the flaps right side out to hide the seam allowance.
- Finish the top raw edge of the flaps with a serger or a zigzag stitch, or by tucking the raw edges inside the flaps.
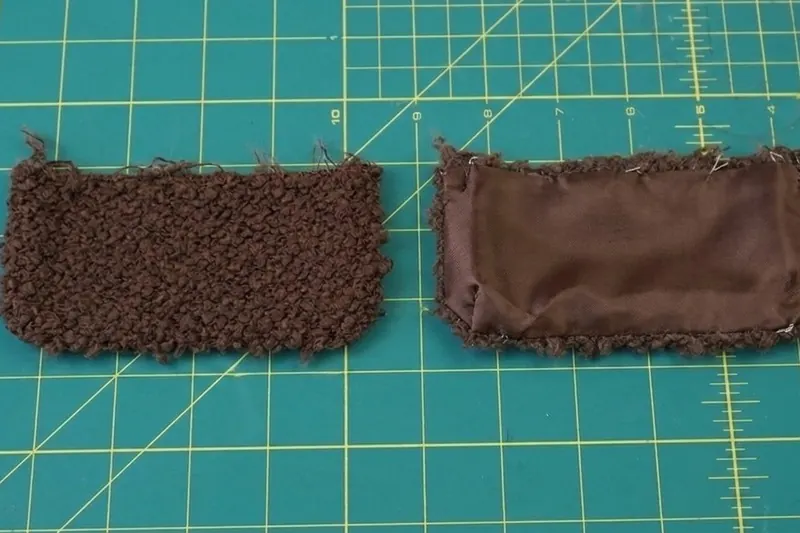
- Pin the flaps right sides together on the jacket front, 0.6 cm (¼") above the top opening of the front pockets, as in photo 3.4.
- Stitch the finished edge of the flaps to the jacket front with a 0.6 cm (¼") seam allowance.
- Press the flaps down, so that the lining touches the front of the pocket.
Step 4 — Sleeves
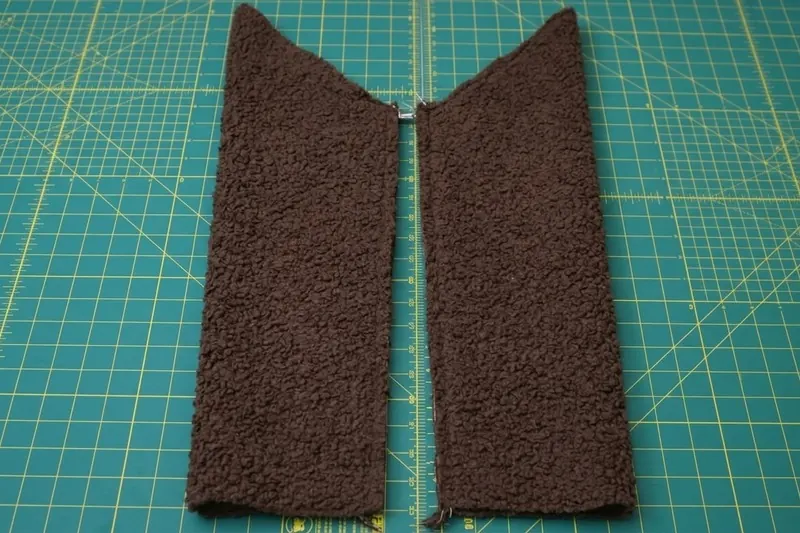
- Fold the sleeves in half, right sides together, with the underarm edges aligned.
- Stitch the underarm seams.
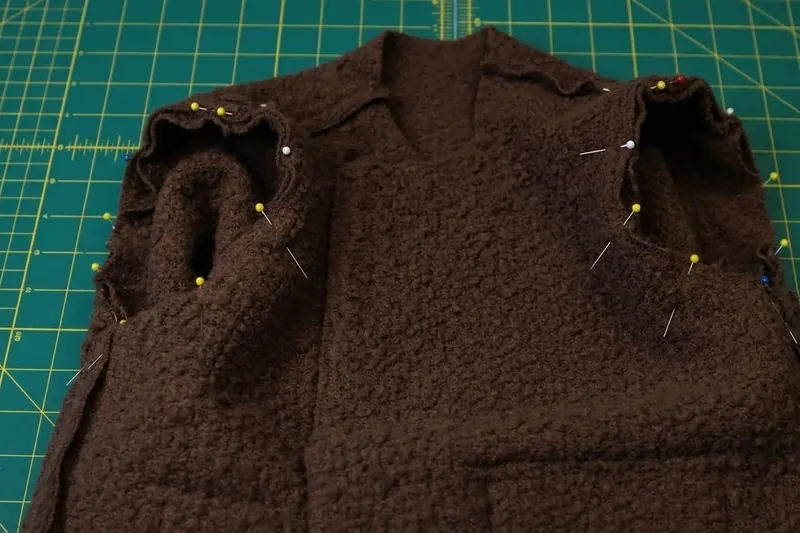
- Turn the sleeves right side out and the jacket wrong side out.
- Pin the sleeve caps into the jacket armholes, making sure to match the front slope of the sleeve with the jacket front.
- Stitch the sleeves to the jacket.
- Turn the jacket right side out.
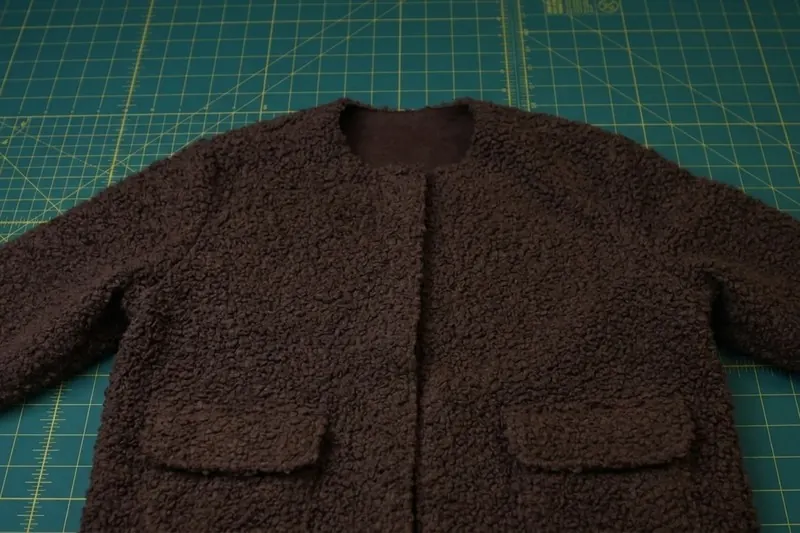
Step 5 — Lining
- Assemble the lining jacket body the same way as the main fabric body in step 2.
- Assemble the lining sleeves and set them into the lining jacket the same way as in step 4.
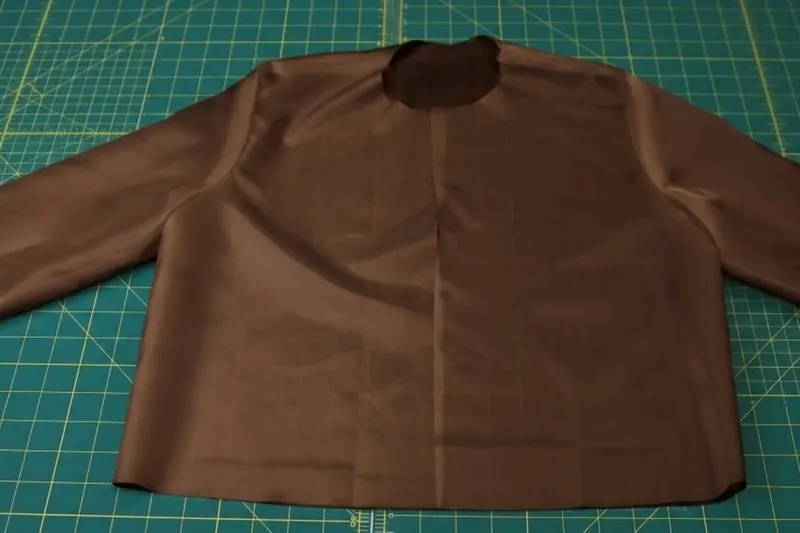
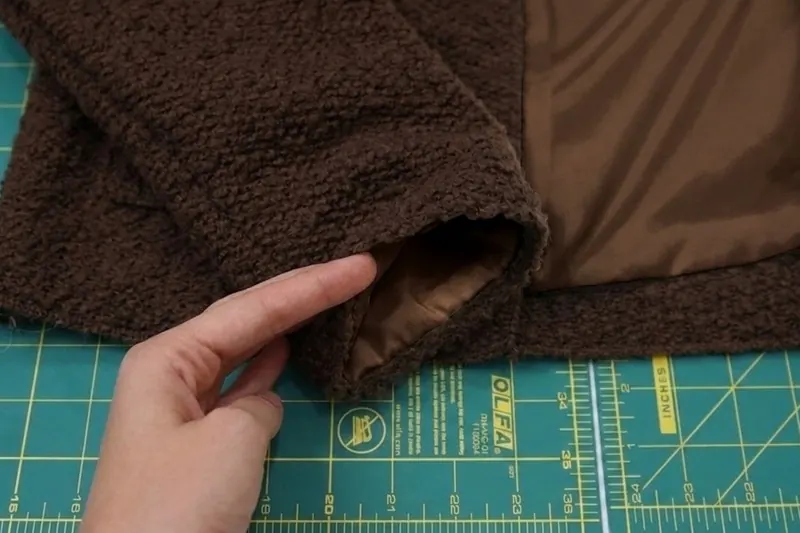
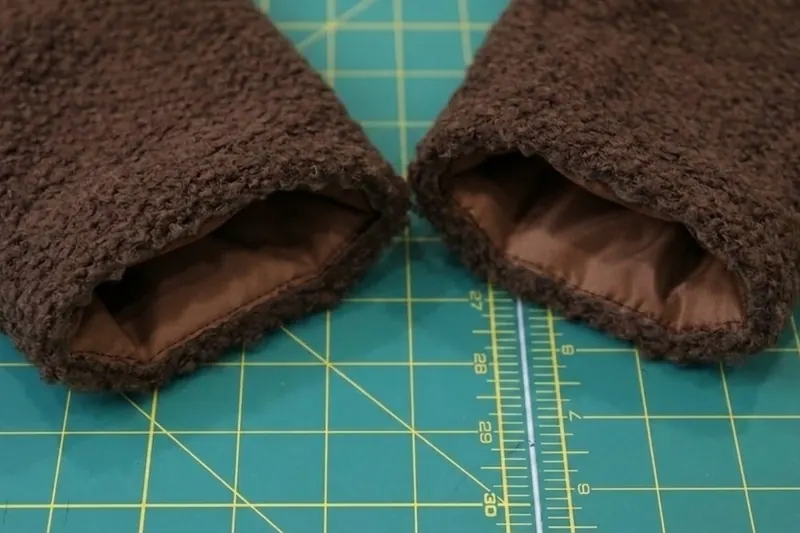
Step 6 — Joining the lining to the sleeves
- Put the lining jacket inside the main fabric jacket, wrong sides together.
- Reach between the lining and the main fabric through the bottom of both jackets, then reach into one of the sleeves and grab the sleeve hems with your fingers.
- Pinch the sleeve hems right sides together, with the underarm seams open and flat.
- Pull the sleeve hems, right sides together, out through the bottom hem of the jacket, so they are easier to sew.
- Keeping the sleeve hems between your fingers, right sides together, pin the hem of the lining sleeve to the hem of the main fabric sleeve, right sides together.
- Stitch the hem of the lining sleeve to the hem of the main fabric sleeve.
- Pull the lining sleeve back through the main fabric sleeve and tuck it into the jacket.
- Press the sleeve hem.
- Repeat for the other sleeve of the jacket.
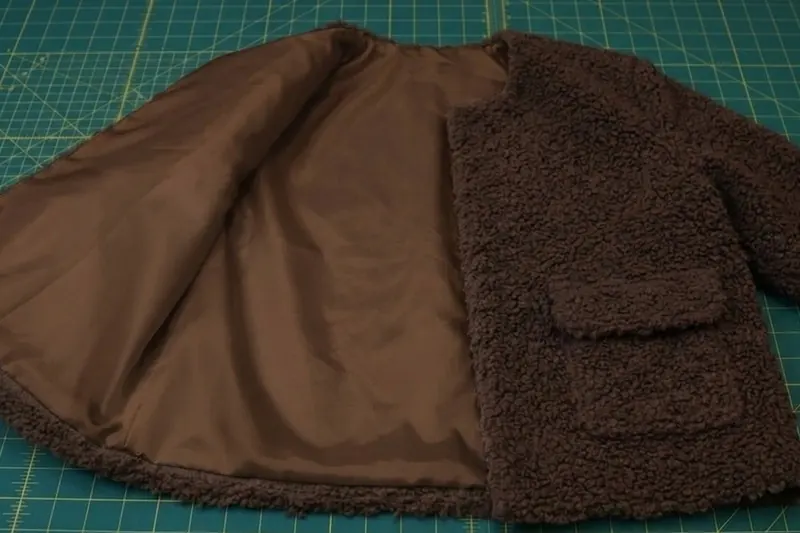
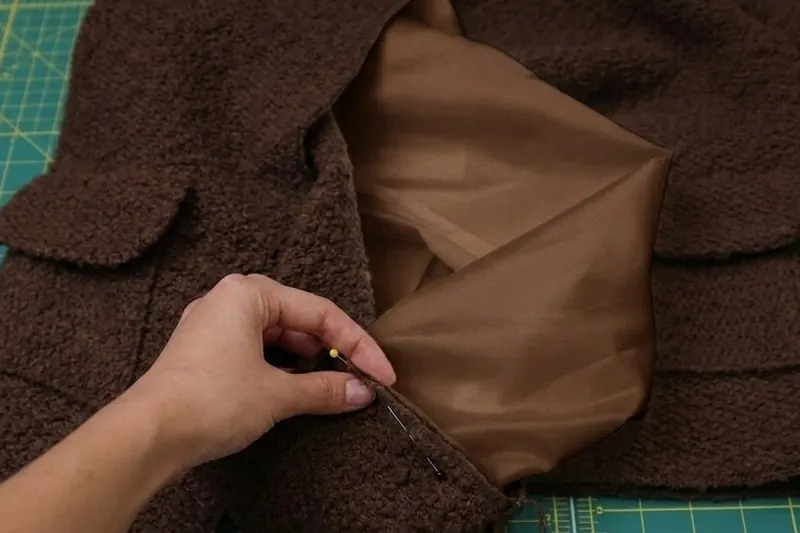
Step 7 — Zipper
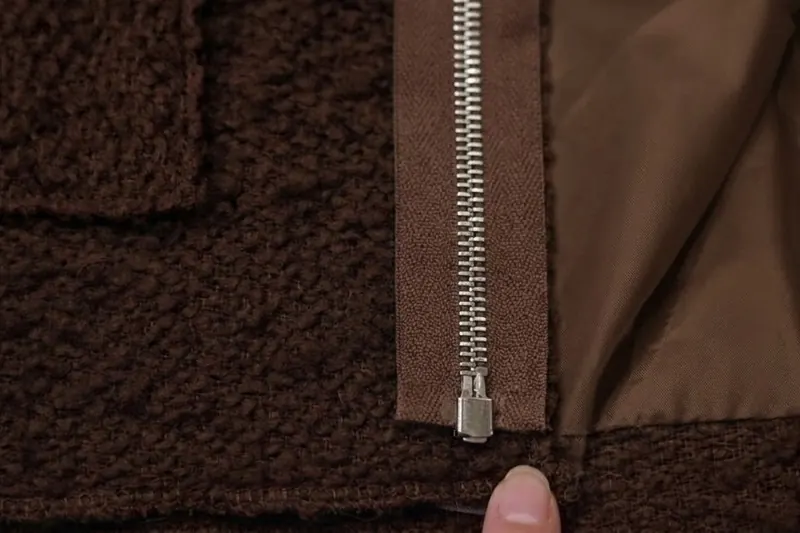
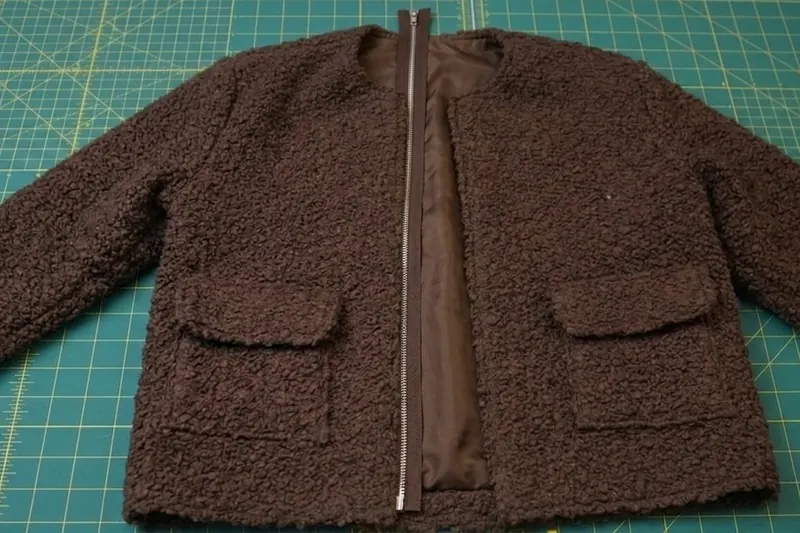
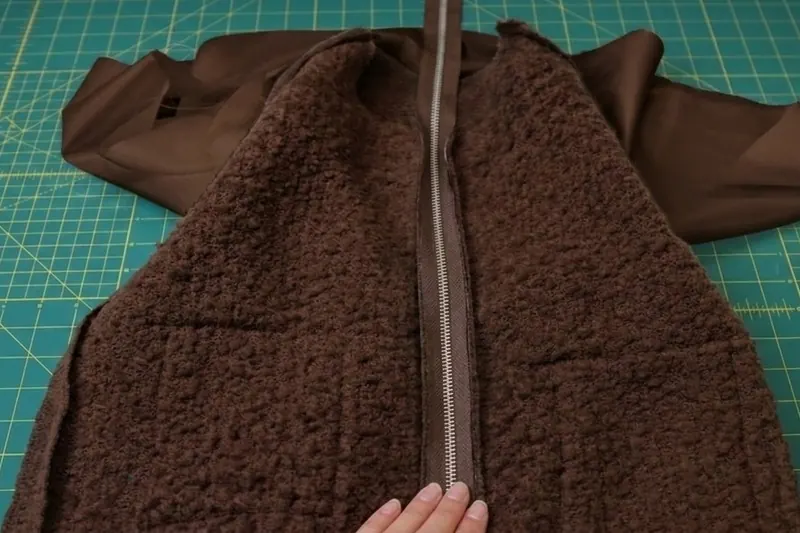
- With the jacket right side out, place the zipper face down on the right-hand side of the center front opening (on your right when wearing the jacket), with the edge of the tape aligned with the raw edge of the outer fabric, leaving a 1.9 cm (¾") gap between the bottom of the zipper and the bottom raw edge of the jacket.
- Pin and stitch the zipper tape closest to the raw edge of the center front opening only to the main fabric of the jacket, not to the lining yet.
- Fold the zipper away from the right side of the jacket and press the seam flat.
- Turn the jacket wrong side out.
- Pin and stitch the other side of the zipper tape to the other side of the center front opening, on the main fabric of the jacket.
- Open the zipper.
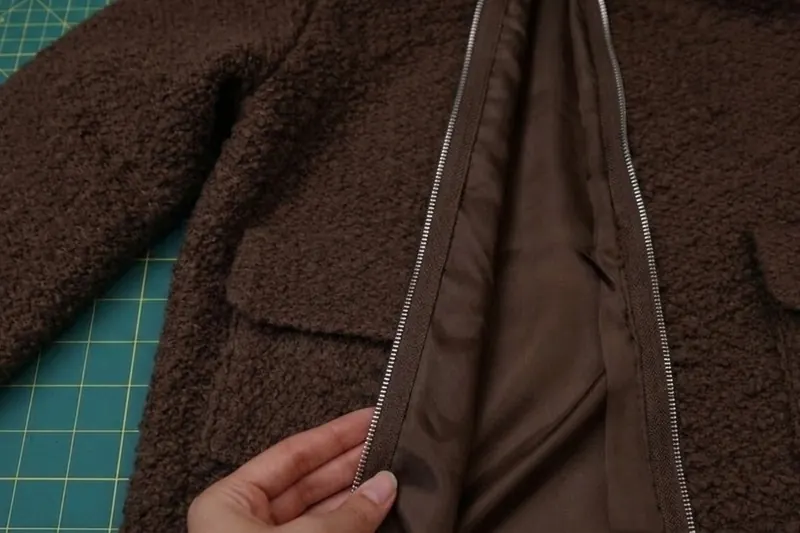
- Arrange each side of the center front opening so that the lining and the main fabric sandwich their side of the zipper, right sides together, making sure the lining is perfectly aligned with the main fabric at the corners of the center front opening.
- Pin and stitch the lining right sides together to the main fabric at the center front opening.
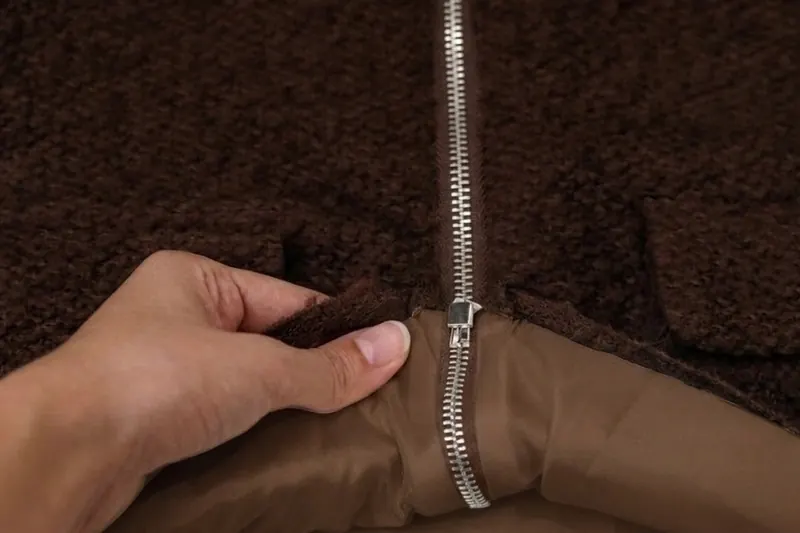
- Turn the center front openings right side out so the zipper teeth show again.
- Close the zipper to check that the necklines line up on both sides.
Step 8 — Hem
- Open the zipper.
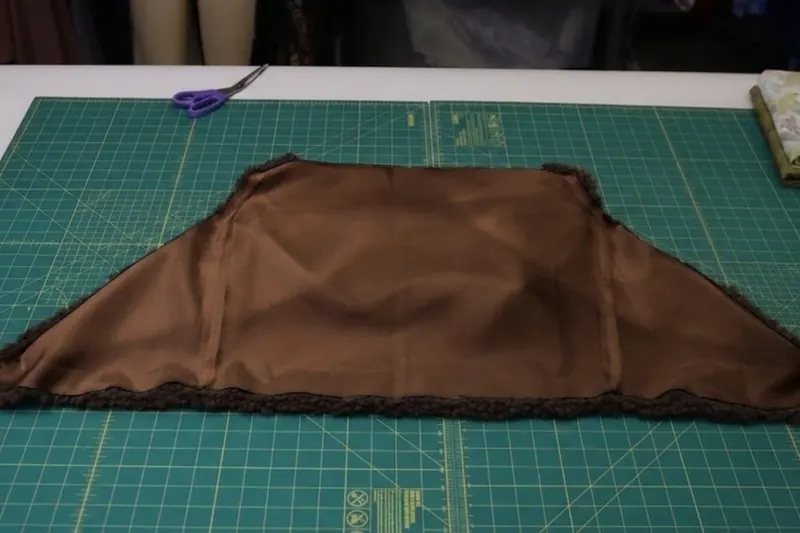
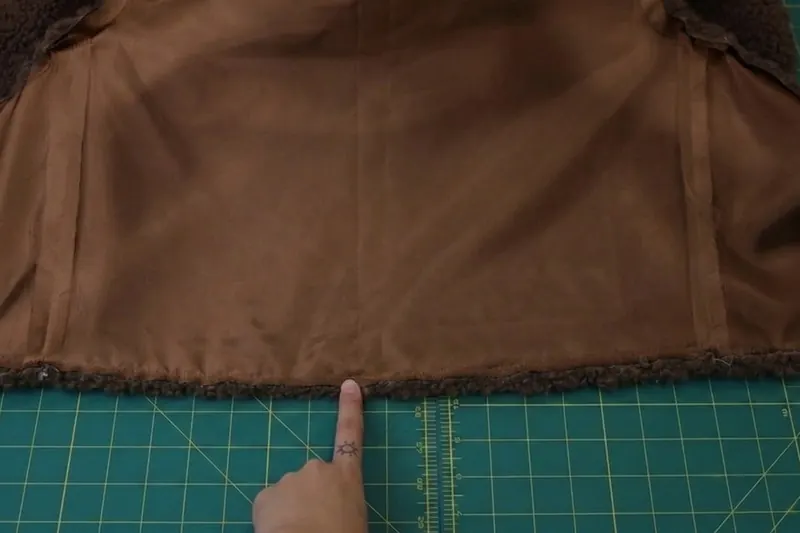
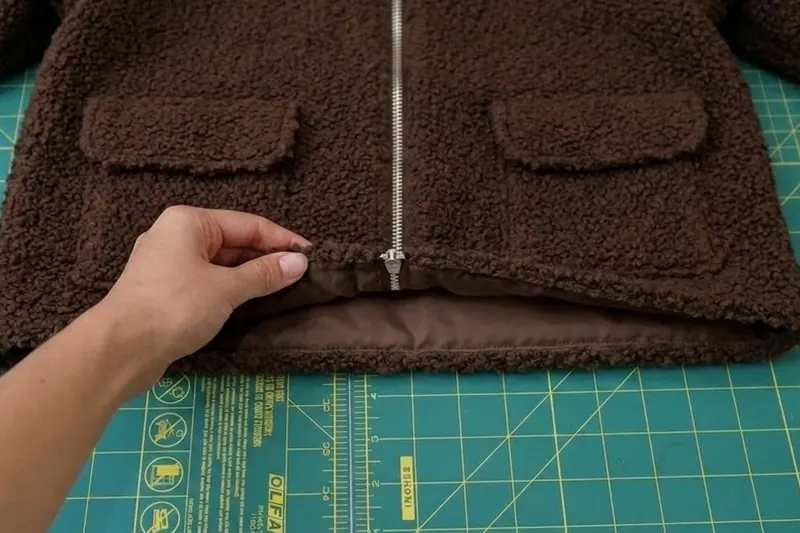
- Separate the main fabric jacket from the lining jacket at the hem, then fold them back around the rest of the jacket to place the hems right sides together instead of wrong sides together.
- Pin and stitch the lining hem to the main fabric hem with a 1.27 cm (½") seam allowance. You can stitch all the way along the hem, because the neckline opening will be used to turn the jacket right side out again.
- Turn the jacket right side out through the neckline.
- Press the jacket hem.
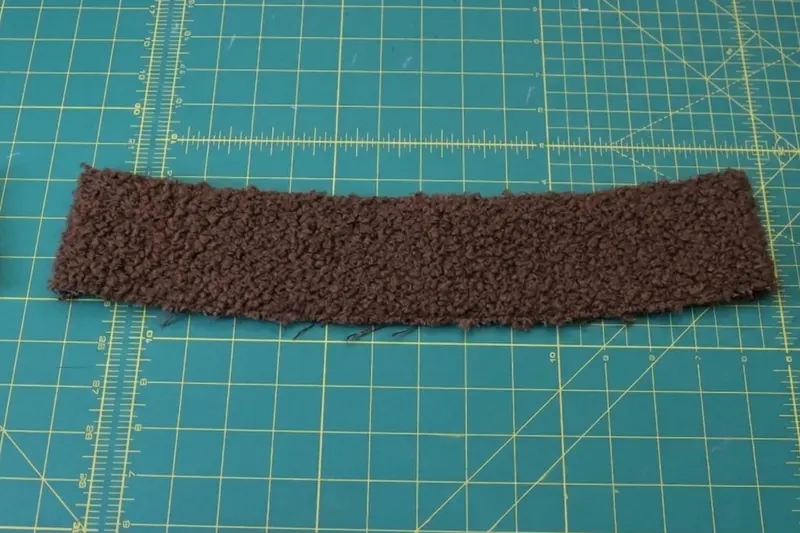
Step 9 — Collar
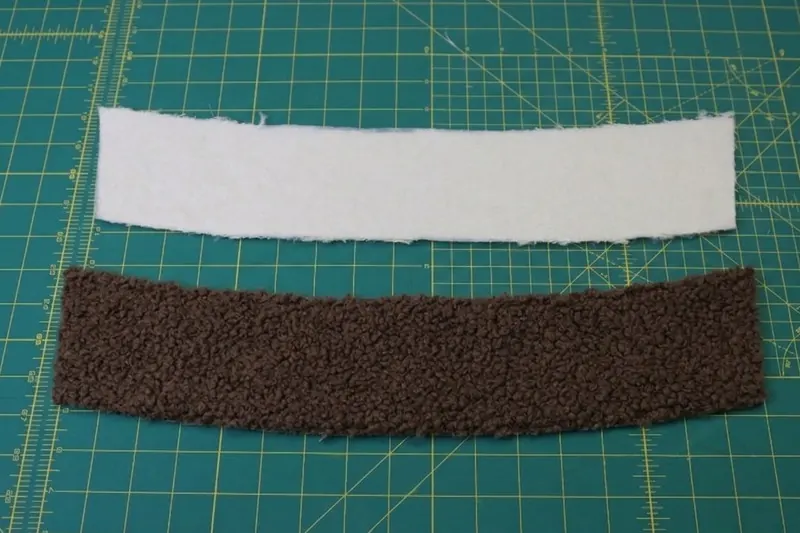
- Fuse the interfacing to one of the collar pieces.
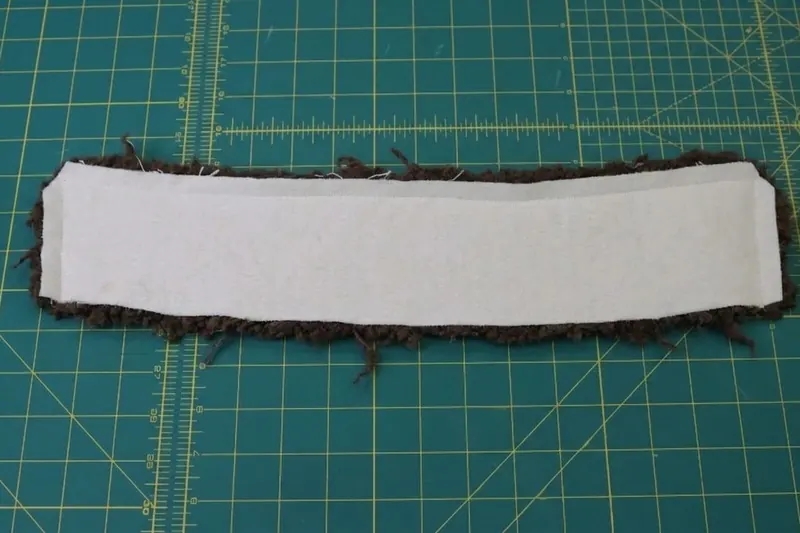
- Pin the collar pieces right sides together.
- Stitch the curved top edge and the sides of the collar pieces, leaving the bottom edge open, as in photo 9.2.
- Trim the corners of the collar.
- Turn the collar right side out and press the seams.
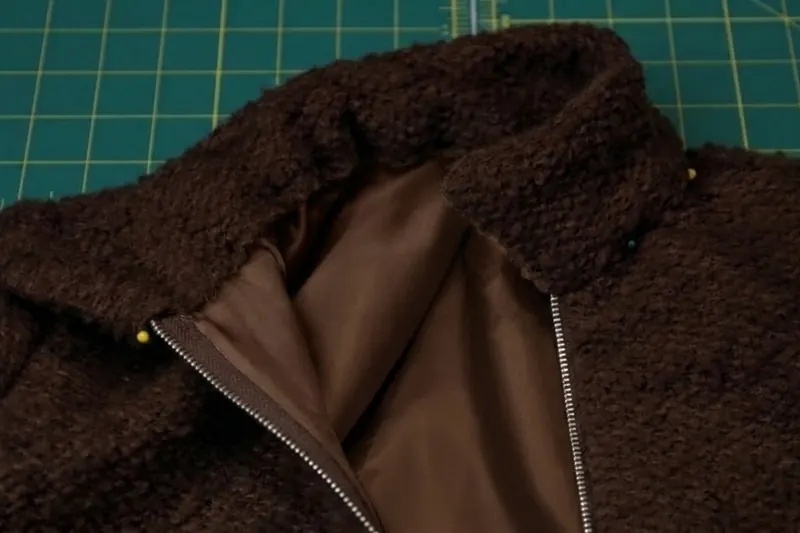
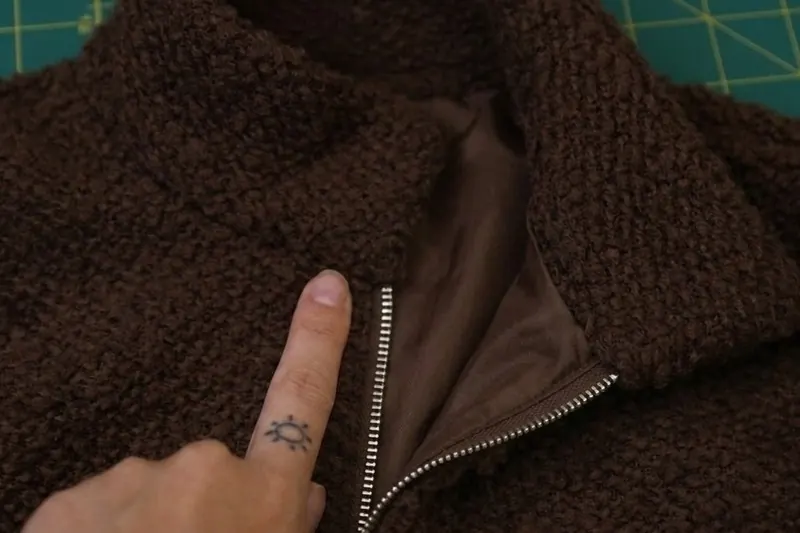
Step 10 — Attaching the collar
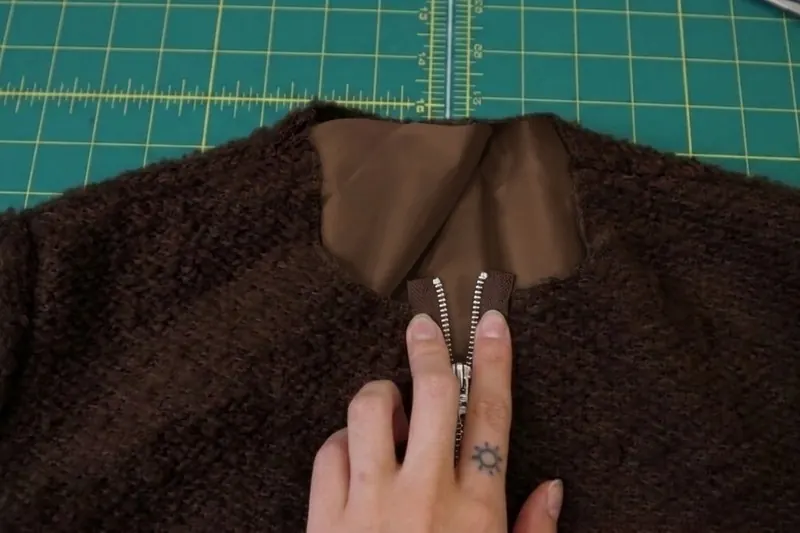
- Open the zipper so the zipper pull is at the bottom of the zipper. Don't try to close the zipper again until the end of this step.
- Trim the ends of the zipper tape that extend past the jacket neckline.
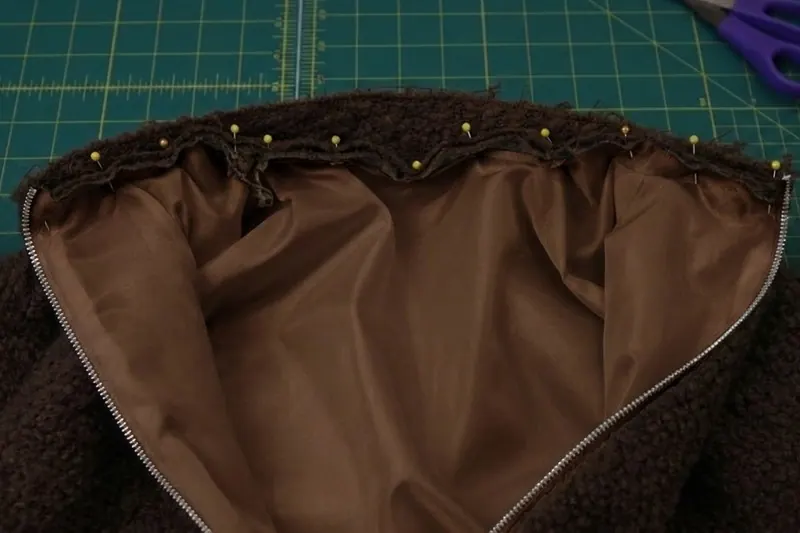
- Pin the raw edge of the interfaced side of the collar to both the main fabric and the lining at the jacket neckline.
- Stitch the interfaced side of the collar to the necklines, with the ends of the collar aligned with the zipper teeth.
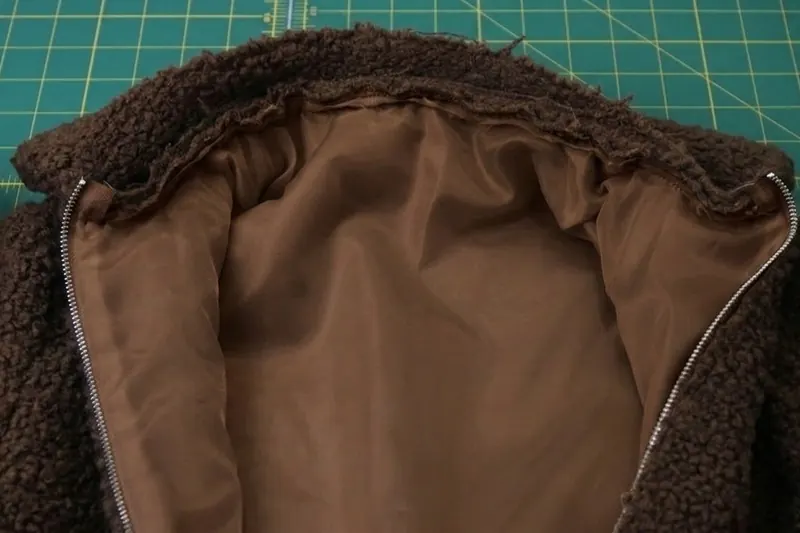
- Fold under the other raw edge of the collar and pin the fold to the lining jacket, just over the first collar seam you have just sewn.
- Stitch in the ditch of the seam from the outside of the jacket, to catch the folded edge of the inner collar piece.
Step 11 — Pocket snaps
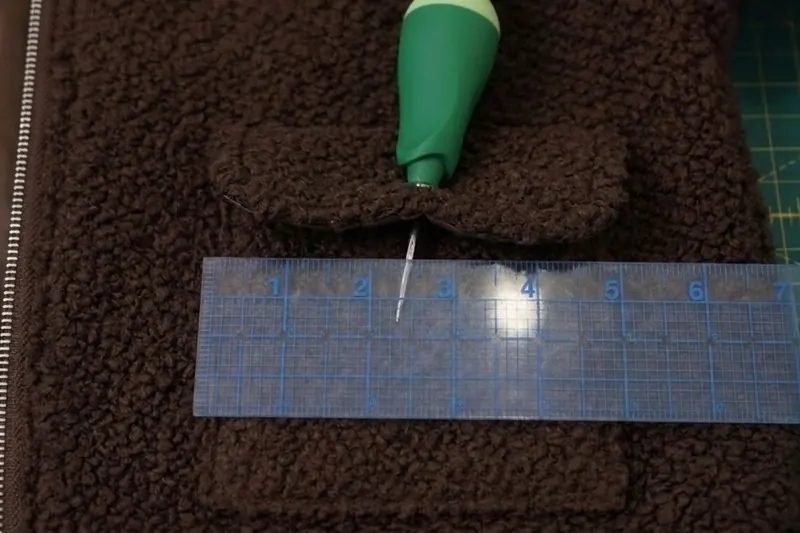
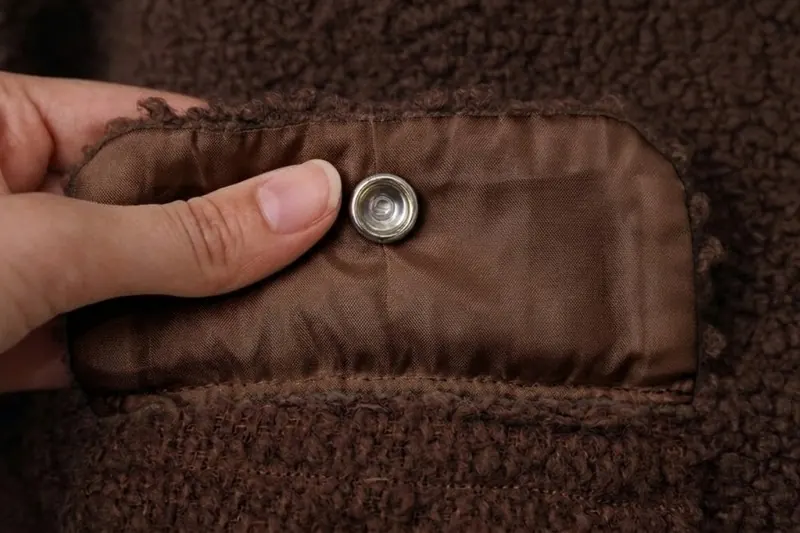
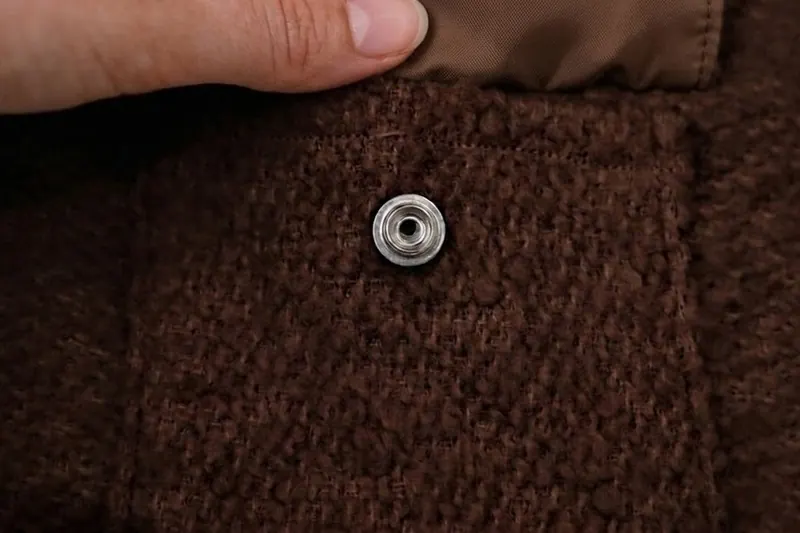
- With an awl, pierce a hole in the pocket flap.
- Insert the cap and the socket of the snap into the pocket flap and set them with a hammer.
- Pierce a hole in the front pocket, just below the snap on the flap.
- Insert the stud and the backing of the snap into the front pocket and set them with a hammer.
- Do the same on both front pockets.
Practical tips for sewing your cropped jacket
These common sewing techniques complement the steps for the bouclé, the pockets, the zipper, the collar and the muslin. They change neither the order of the steps nor the measurements in the tutorial.
Before you start
- Test your stitching on a scrap of bouclé, in a double layer, to set the stitch length and tension. Also test on the lining, which is more slippery.
- Test your pressing on a scrap before pressing the jacket: medium heat, little steam. A thin press cloth between the iron and the bouclé keeps its loops from being crushed.
- Transfer the pattern markings to the fabric before removing the paper: armhole markings (labeled “Front Armhole” and “Back Armhole”) and pocket placement (the square on the front pattern piece).
Yardage for a size other than S
- Once the pattern is assembled and cut to your size, lay all the fabric pieces on the floor on an area as wide as your fabric, following the grainline and the “on the fold” pieces. Measure the length they take up: that is the minimum yardage. Do the same for the lining.
- Buy a little more than this minimum, so you can test your stitching, pressing and snaps on scraps.
Pockets and flaps (steps 1, 3 and 11)
- Before stitching the pockets, check that both pockets are at the same height and the same distance from the center front.
- First set a test snap on a scrap, through the same layers as the flap and the pocket, to adjust the force of the hammer blows.
- Close the flap over the pocket before piercing the pocket: the hole goes just below the snap on the flap.
Zipper (step 7)
- Pin the zipper tape with pins placed crosswise, so it doesn't slip on the bouclé.
- Stitch with a zipper foot, 1.27 cm from the edge, without touching the teeth.
- Before stitching the second side, close the zipper and check that the pockets and shoulder seams fall at the same height on both sides.
Collar (steps 9 and 10)
- With a thick bouclé, grade the collar seam allowances (trim one layer a little shorter than the other) for a flatter edge.
- Push out the collar corners with the point turner before pressing.
- When stitching in the ditch, sew slowly and check on the inside that the folded edge of the collar is caught all the way along.
Muslin
- Cut pieces A, B and C from an inexpensive fabric with a weight and drape similar to the real fabric, and assemble them with a long stitch, without lining or finishes.
- Check: the shoulder width; the width (table 2); the length of the jacket and sleeves; the pocket placement; that you can move your arms freely.
- Transfer any changes to the paper pattern before cutting the real fabric.
Enjoy sewing zippers? Try our zip jumpsuit tutorial next.
Sewing glossary
This glossary defines the sewing terms used in this tutorial, from “armhole” to “underarm seam”.
Keep it handy while you sew.
| Term | Definition |
|---|---|
| Armhole | Opening in the garment where the sleeve is sewn in. |
| Awl | Pointed tool that pierces a small hole in the fabric. |
| Bouclé | Fabric whose surface is covered with small loops of yarn. |
| Fusible interfacing | Reinforcing fabric that is ironed onto the wrong side of a piece to stiffen it. |
| Grainline | Direction of the threads in the fabric, parallel to the selvage. |
| Lining | Thin, slippery fabric that covers the inside of the jacket. |
| Mirrored | Two pieces that mirror each other: one left and one right. |
| Neckline | Edge of the garment around the neck. |
| On the fold | The piece is placed against the fold of the fabric: once cut and unfolded, it is double and symmetrical. |
| Patch pocket | Pocket sewn onto the right side of the garment. |
| Pocket flap | Lined piece sewn above the pocket, which falls over its opening. |
| Point turner | Tool with a pointed, non-cutting tip for pushing out corners. |
| Raw edge | Cut edge of the fabric, unfinished. |
| Right side / wrong side | The good side of the fabric / the inner side. |
| Seam allowance | Distance between the edge of the fabric and the stitching line (here 1.27 cm, included in the pattern). |
| Selvage | Finished edge of the fabric, along its length. |
| Separating zipper | Zipper that opens completely at the bottom, into two parts. |
| Serger stitch (overlock) | Stitch that encloses the edge of the fabric to keep it from fraying. |
| Sleeve cap | Rounded top of the sleeve, which is sewn to the armhole. |
| Snap | Two-part metal fastener (stud and socket), each part set with a hammer together with its backing piece. |
| Stitch in the ditch | Stitch exactly in the groove of an existing seam, so the stitching doesn't show. |
| Topstitching | Visible stitching on the right side, parallel to an edge or a seam. |
| Underarm seam | Seam that closes the sleeve, from the wrist to the underarm. |
In the PDF pattern, the sheets to print are pages 26 to 50. Print them at actual size. You'll find the Cropped Zip Jacket PDF pattern in the shop and, for colder weather, our shawl collar coat tutorial.
PDF · 00 – 32
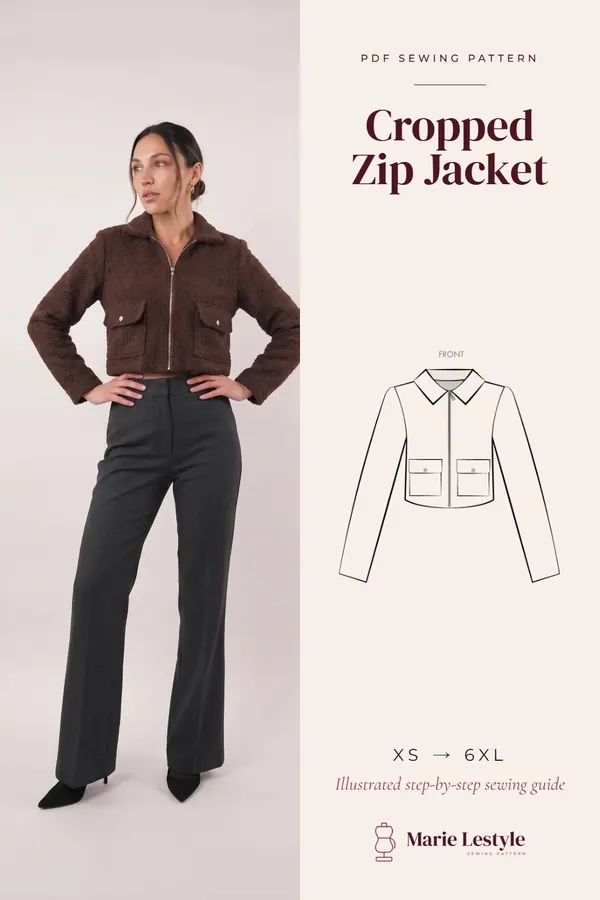
The PDF pattern for this design : Cropped Zip Jacket
Every piece to print at home at full size, with this guide as a PDF.
Download the PDF patternPDF pattern sold in the Marie Lestyle shop.
Frequently asked questions : Cropped Zip Jacket
What sizes does this women's jacket pattern come in?
The pattern covers women's sizes 00 to 32, including plus sizes 16 to 32. The bust measurement goes from 78.7 cm (31") in size 00 to 153.7 cm (60.5") in size 32. Compare your bust, waist and hip measurements with the tables in the “Choosing your size” section.
How much fabric do I need for the Cropped Zip Jacket?
For size S, you need 1.5 yards (1.37 m) of wool-blend bouclé and 1.5 yards (1.37 m) of polyester lining. For another size, lay all the pieces on the floor on an area as wide as your fabric and measure the length they take up: that is the minimum yardage. Do the same for the lining, and buy a little more than this minimum.
What fabric works best for this cropped jacket?
The pattern works best with medium-weight apparel fabrics. We used a wool-blend bouclé; denim, corduroy, faux suede and flannel are also recommended.
What supplies do I need besides fabric?
For size S: a heavy-duty snap kit with tools (7 sets), a T5 metal separating zipper of 69.9 cm (27.5"), a zipper pull and a 250 m spool of all-purpose thread. You'll also use a point turner, fusible interfacing for the collar and an awl.
Is the Cropped Zip Jacket a good project for beginners?
Yes. The jacket is fairly simple to make, with a collar, a zipper and patch pockets, which makes it a great first outerwear project for beginners.
Do I have to line the jacket?
No. We chose to line ours, but if your fabric is soft enough, you can skip the lining for an even quicker project. The step-by-step tutorial shows the lined version.