Jumpsuit Pattern Sewing: The Zip-Front Jumpsuit Step by Step
A knit jumpsuit with an exposed front zipper, stand-up collar, waist ties and wide legs, to sew in women's sizes XS to 5XL with our free photo tutorial.
By Marie · Updated
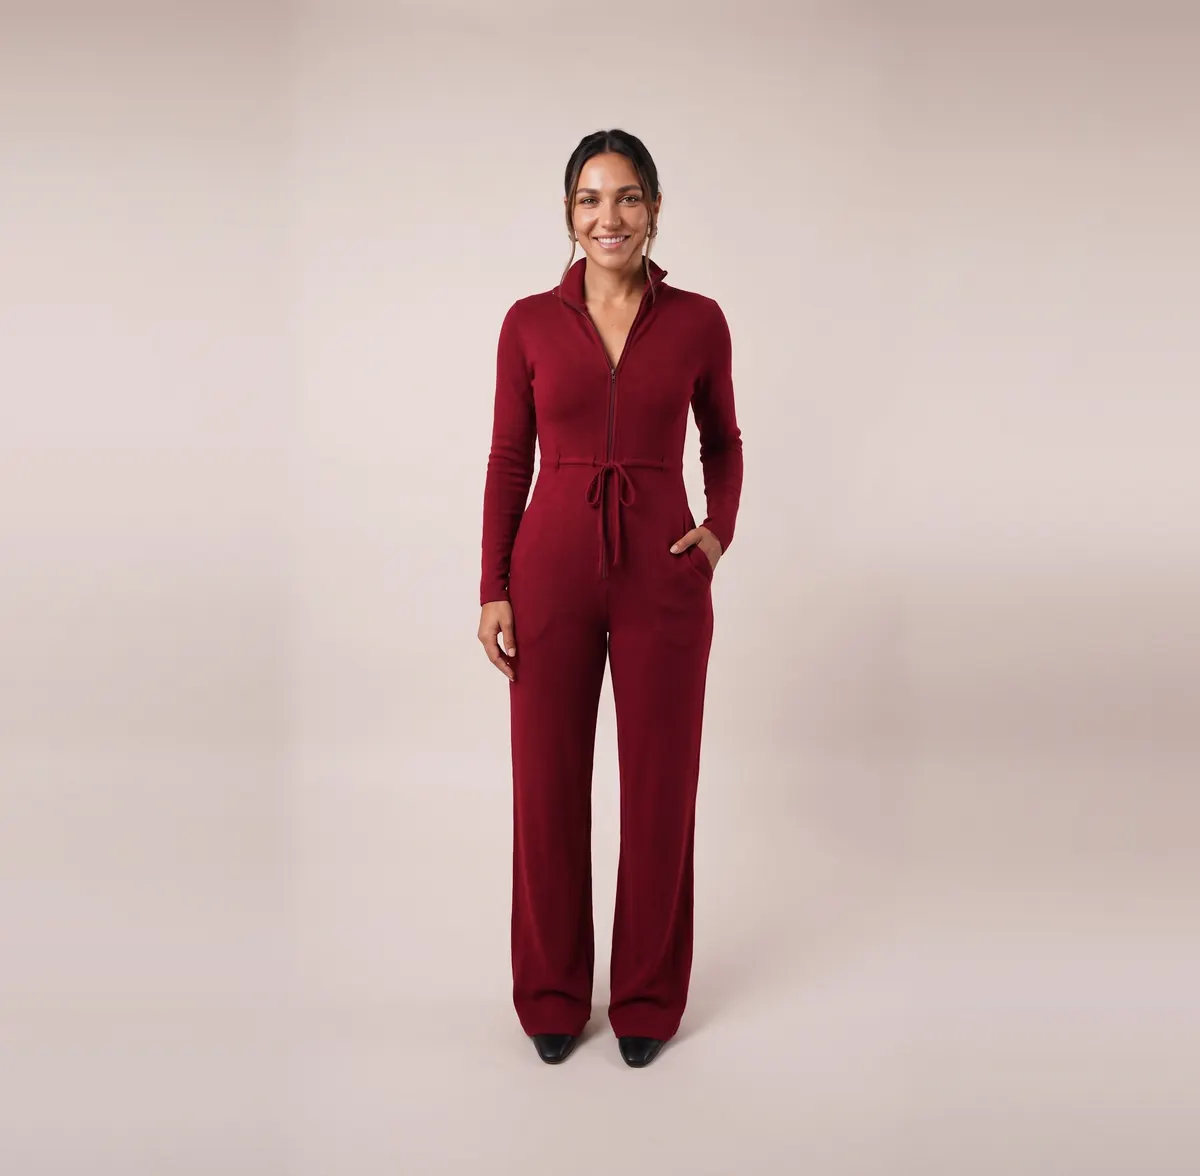
This jumpsuit sewing pattern lets you sew the Zip-Front Jumpsuit, a stretch knit jumpsuit with an exposed front zipper, a stand-up collar, waist ties, side-seam pockets and wide legs, in women's sizes XS to 5XL. It was designed with beginners in mind, and the stretch of the rib knit keeps fitting simple. The free tutorial below covers the size charts, supplies and pattern pieces, then the 14 construction steps with 38 photos.
The Zip-Front Jumpsuit, a knit jumpsuit with an exposed zipper
Here is the garment you are going to sew: the Zip-Front Jumpsuit, a women's knit jumpsuit with an exposed front zipper, a stand-up collar, waist ties and wide legs. The whole construction is explained for free on this page, and you can find our other designs on the home page of our free sewing tutorials.
The Zip-Front Jumpsuit is an all-in-one outfit with just enough attitude to turn a sidewalk into a runway.
The sample is made in a rayon rib knit that catches the light like city pavement after the rain. Its soft, stretchy drape forgives the little beginner slip-ups between the first pin and the final press. This knit cooperates with you and your sewing machine, and it makes you look far more experienced than your seam ripper's history would suggest.
The exposed front zipper is the star of the show. Zip it up high for a clean, elongated silhouette, with a cozy collar framing your face, or pull it down for a little more drama and a little fresh air on your skin. The adjustable waist ties let you cinch and sculpt the silhouette, or keep things relaxed and easy. The wide, flowing legs move with you and make even a simple coffee run feel cinematic.
The jumpsuit was designed with beginners in mind, and it stays approachable. Thanks to the stretch of the rayon rib knit, you get fewer fitting headaches and more effortlessly elegant moments. There is no complicated closure hidden in tricky seams and no stiff fabric demanding perfection: just thoughtful construction, clean lines and a silhouette that does the heavy lifting for you.
Think of it as loungewear that decided to be ambitious, or streetwear that still believes in softness. Sew it once, and you may well find yourself planning a second one in another shade.
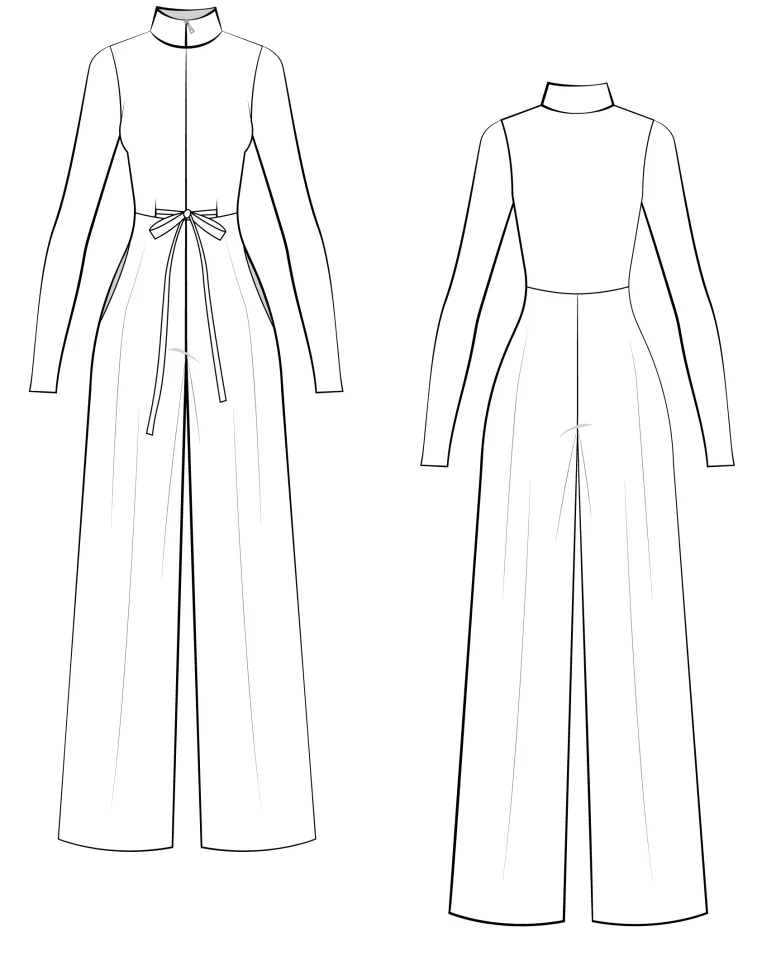
Technical drawings
The technical drawings show the seams and the silhouette of the jumpsuit.
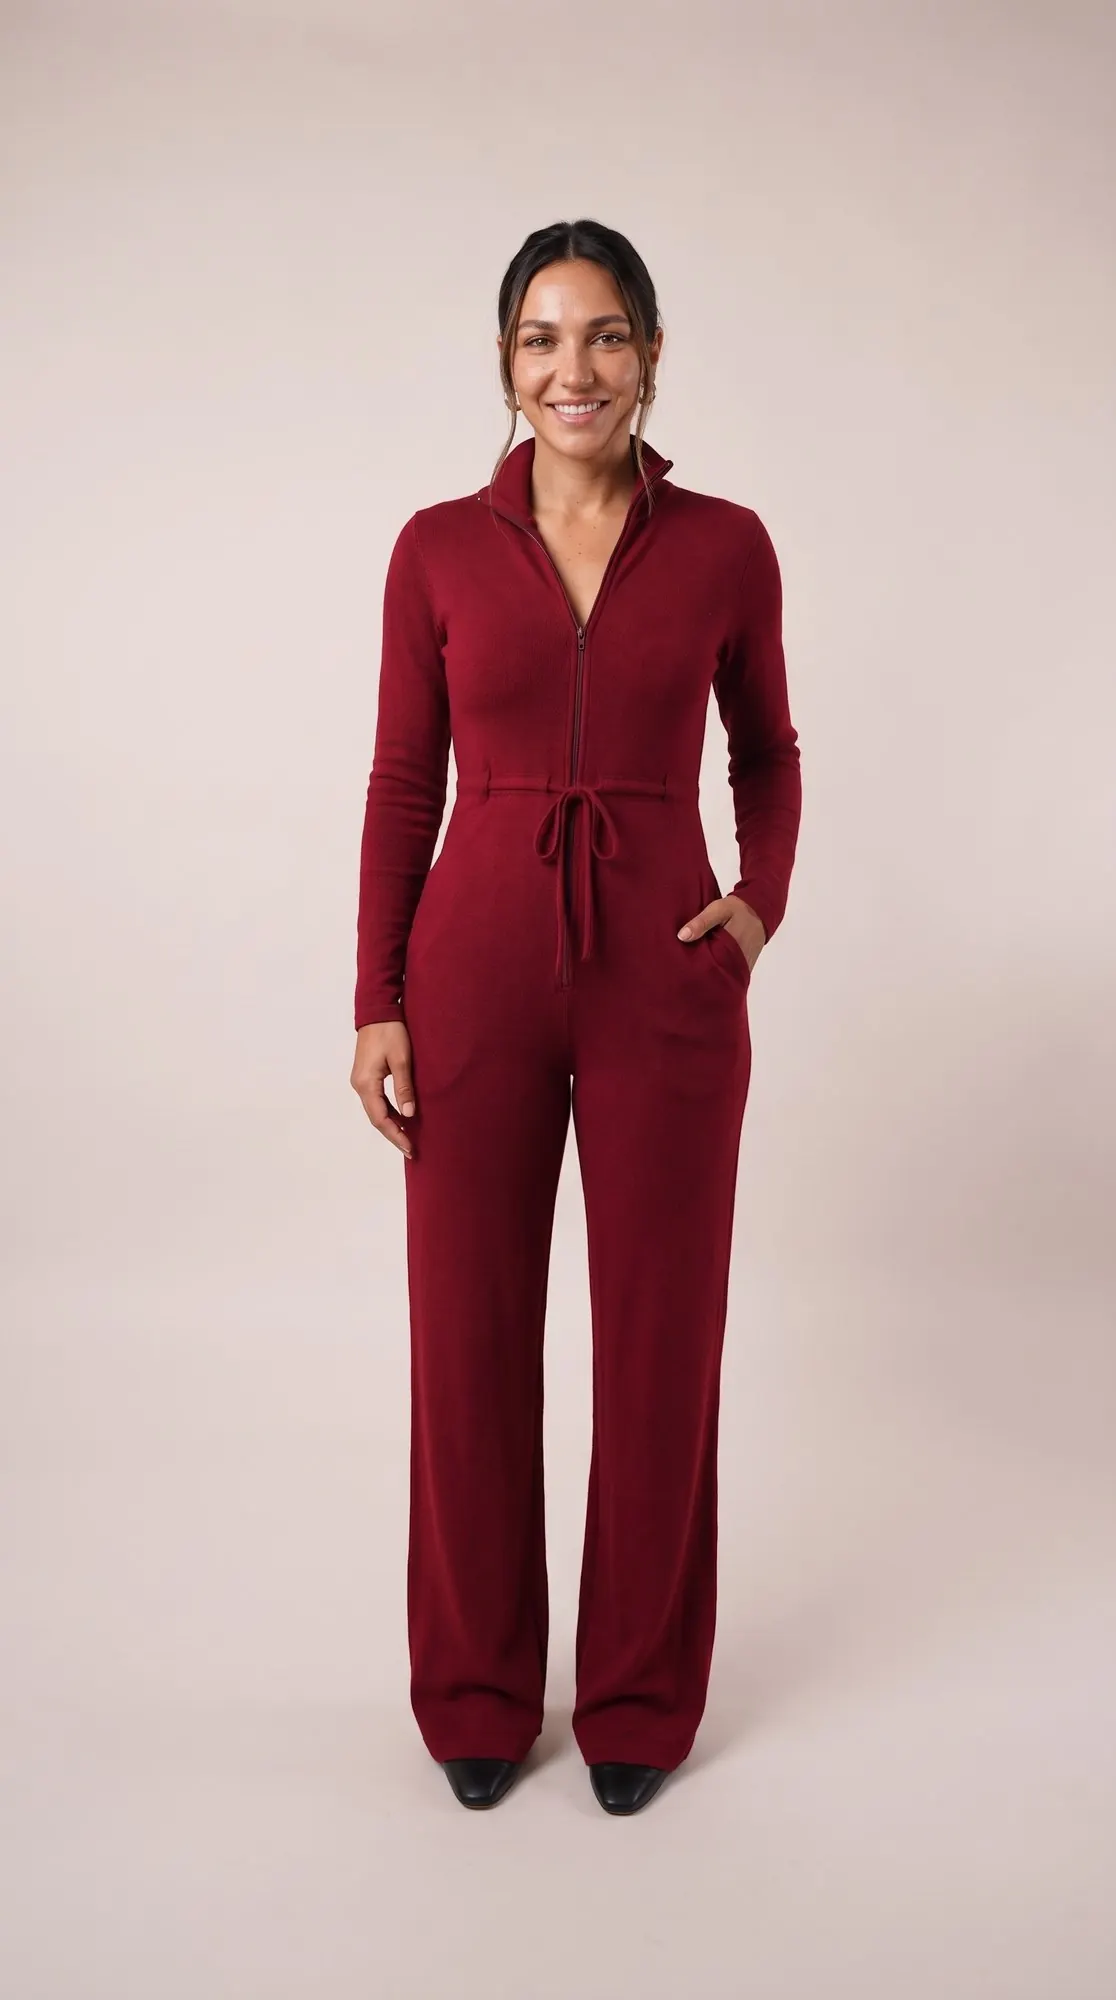
The finished jumpsuit
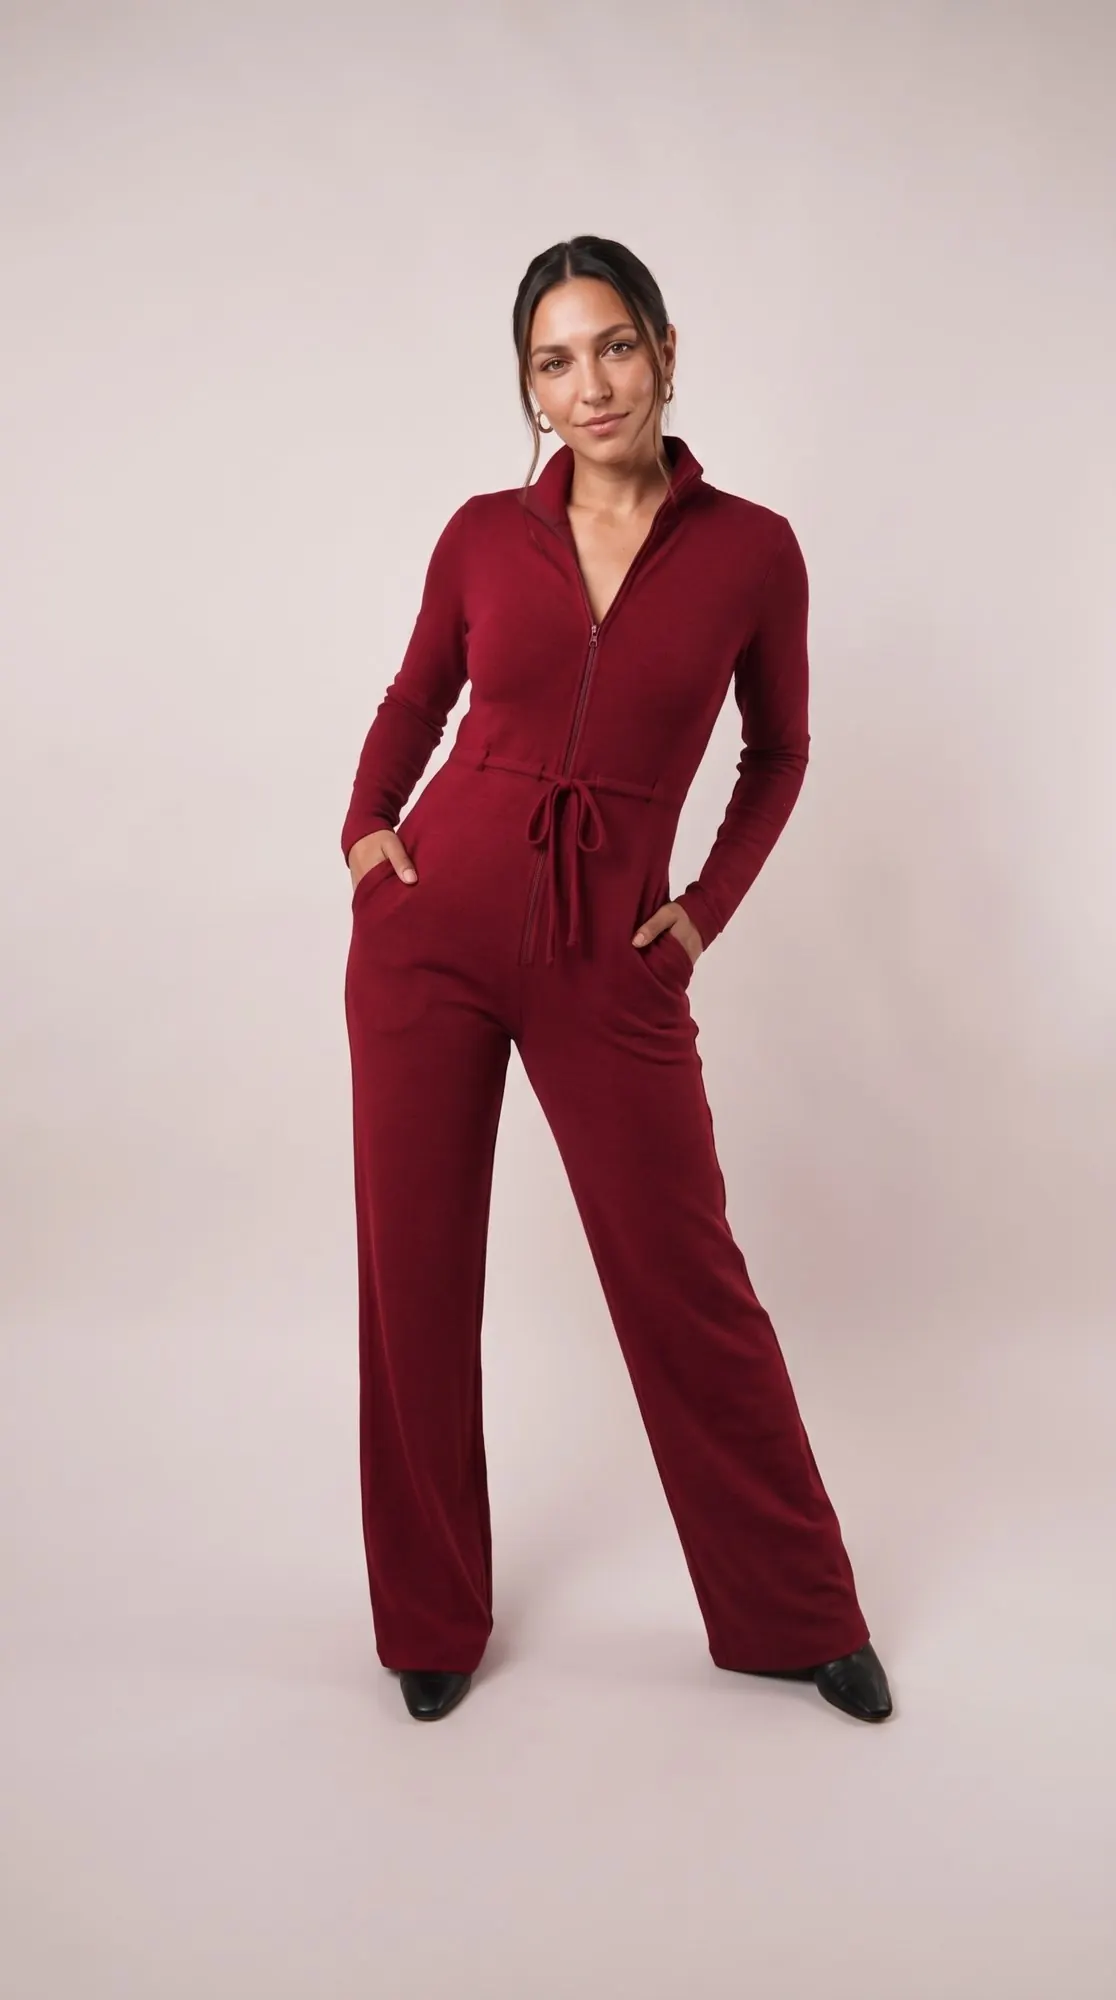
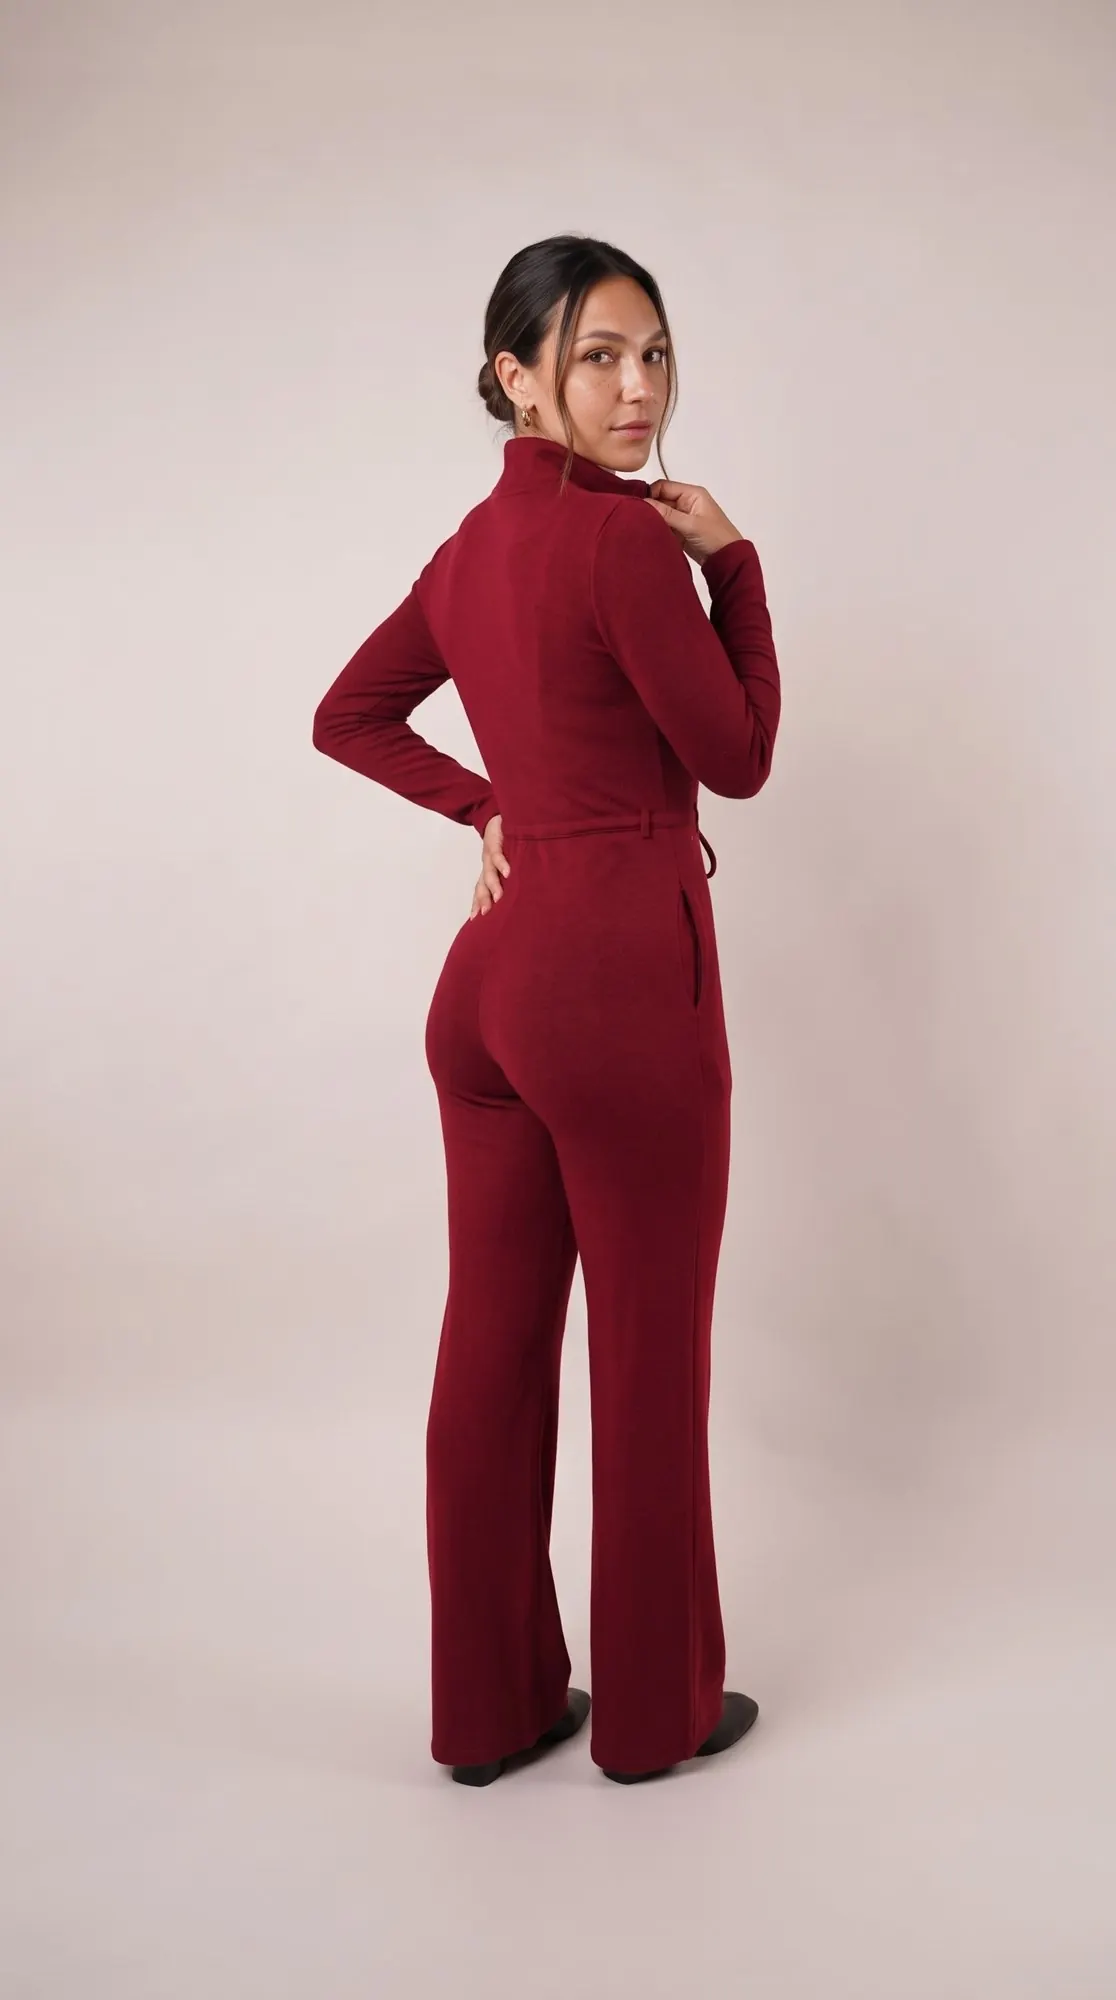
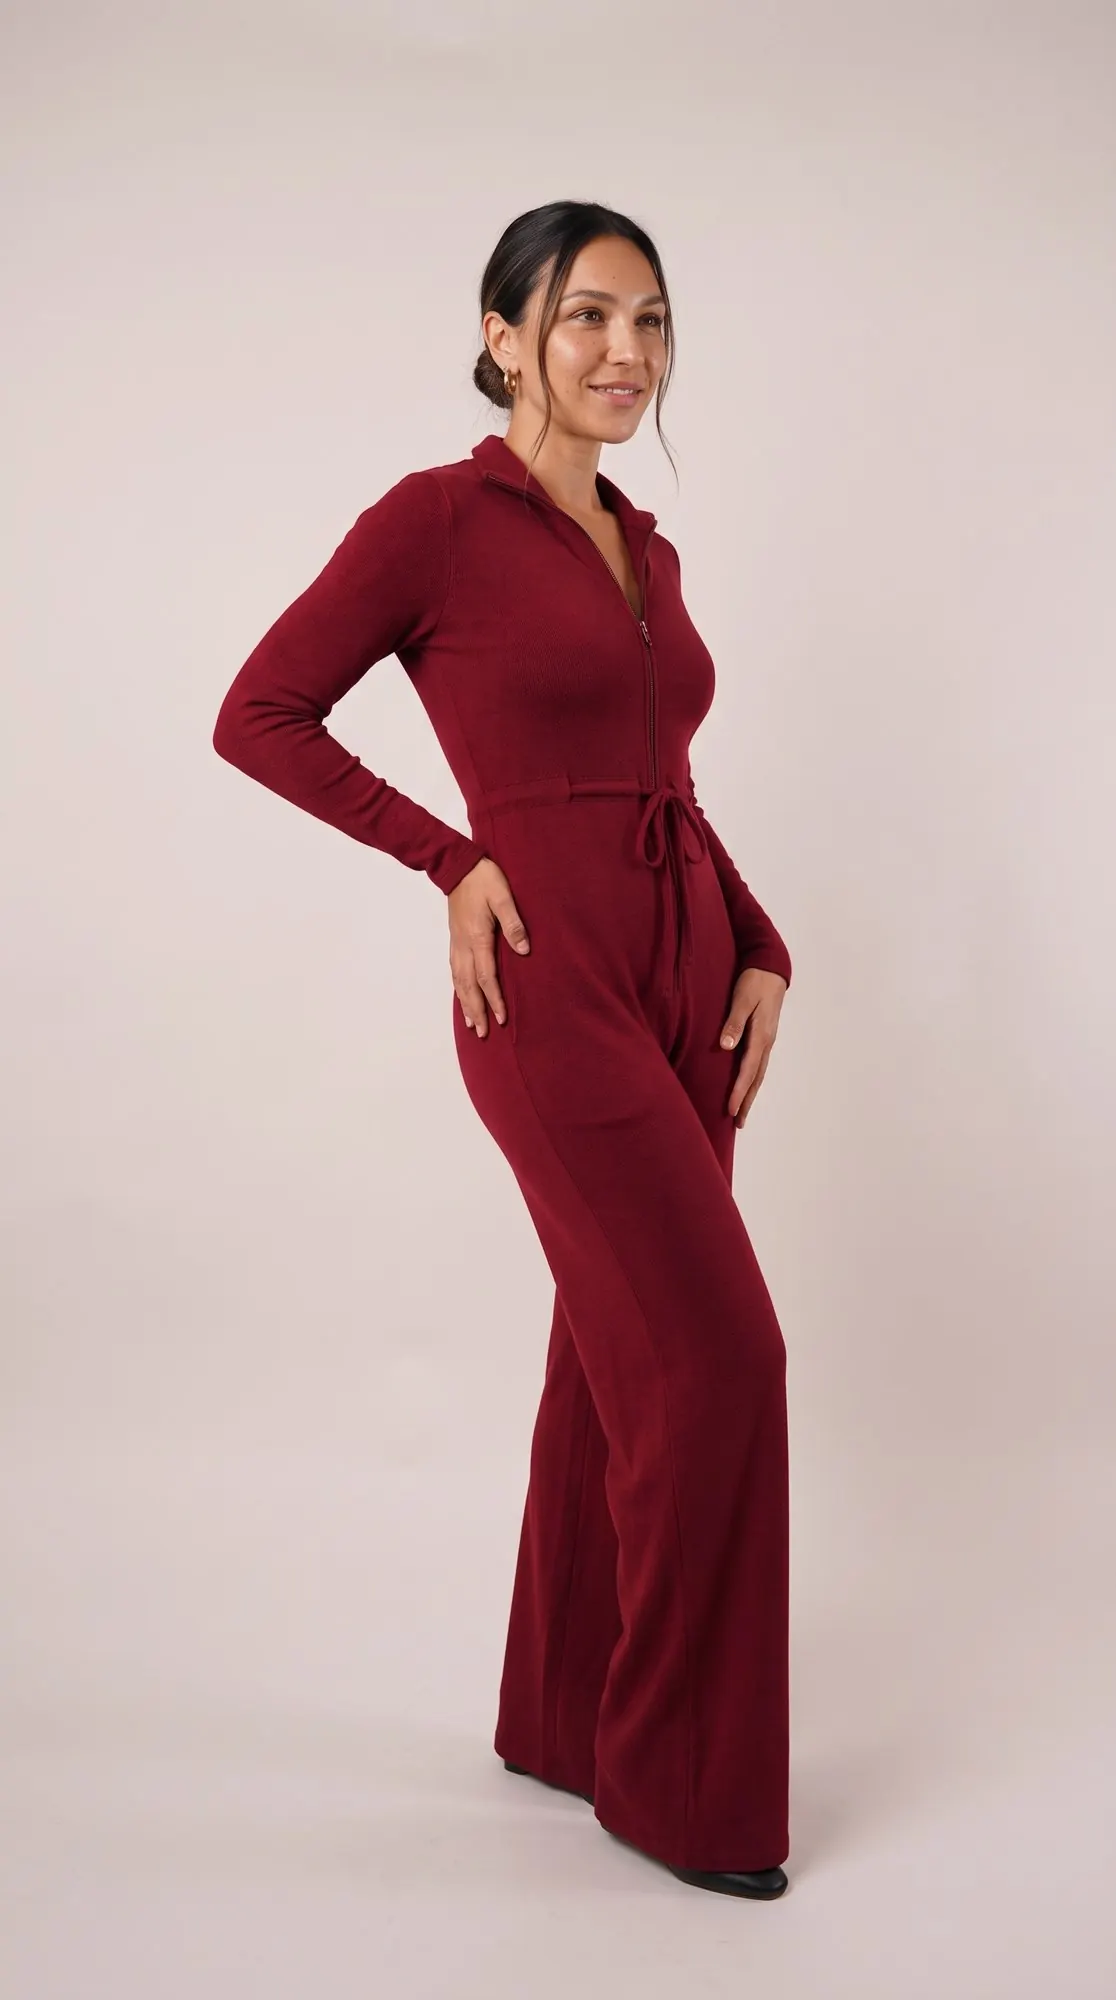
These photos of the finished garment show the result to aim for, from every angle.
Worn
The jumpsuit as worn, with its front zipper, stand-up collar and ties knotted at the waist.
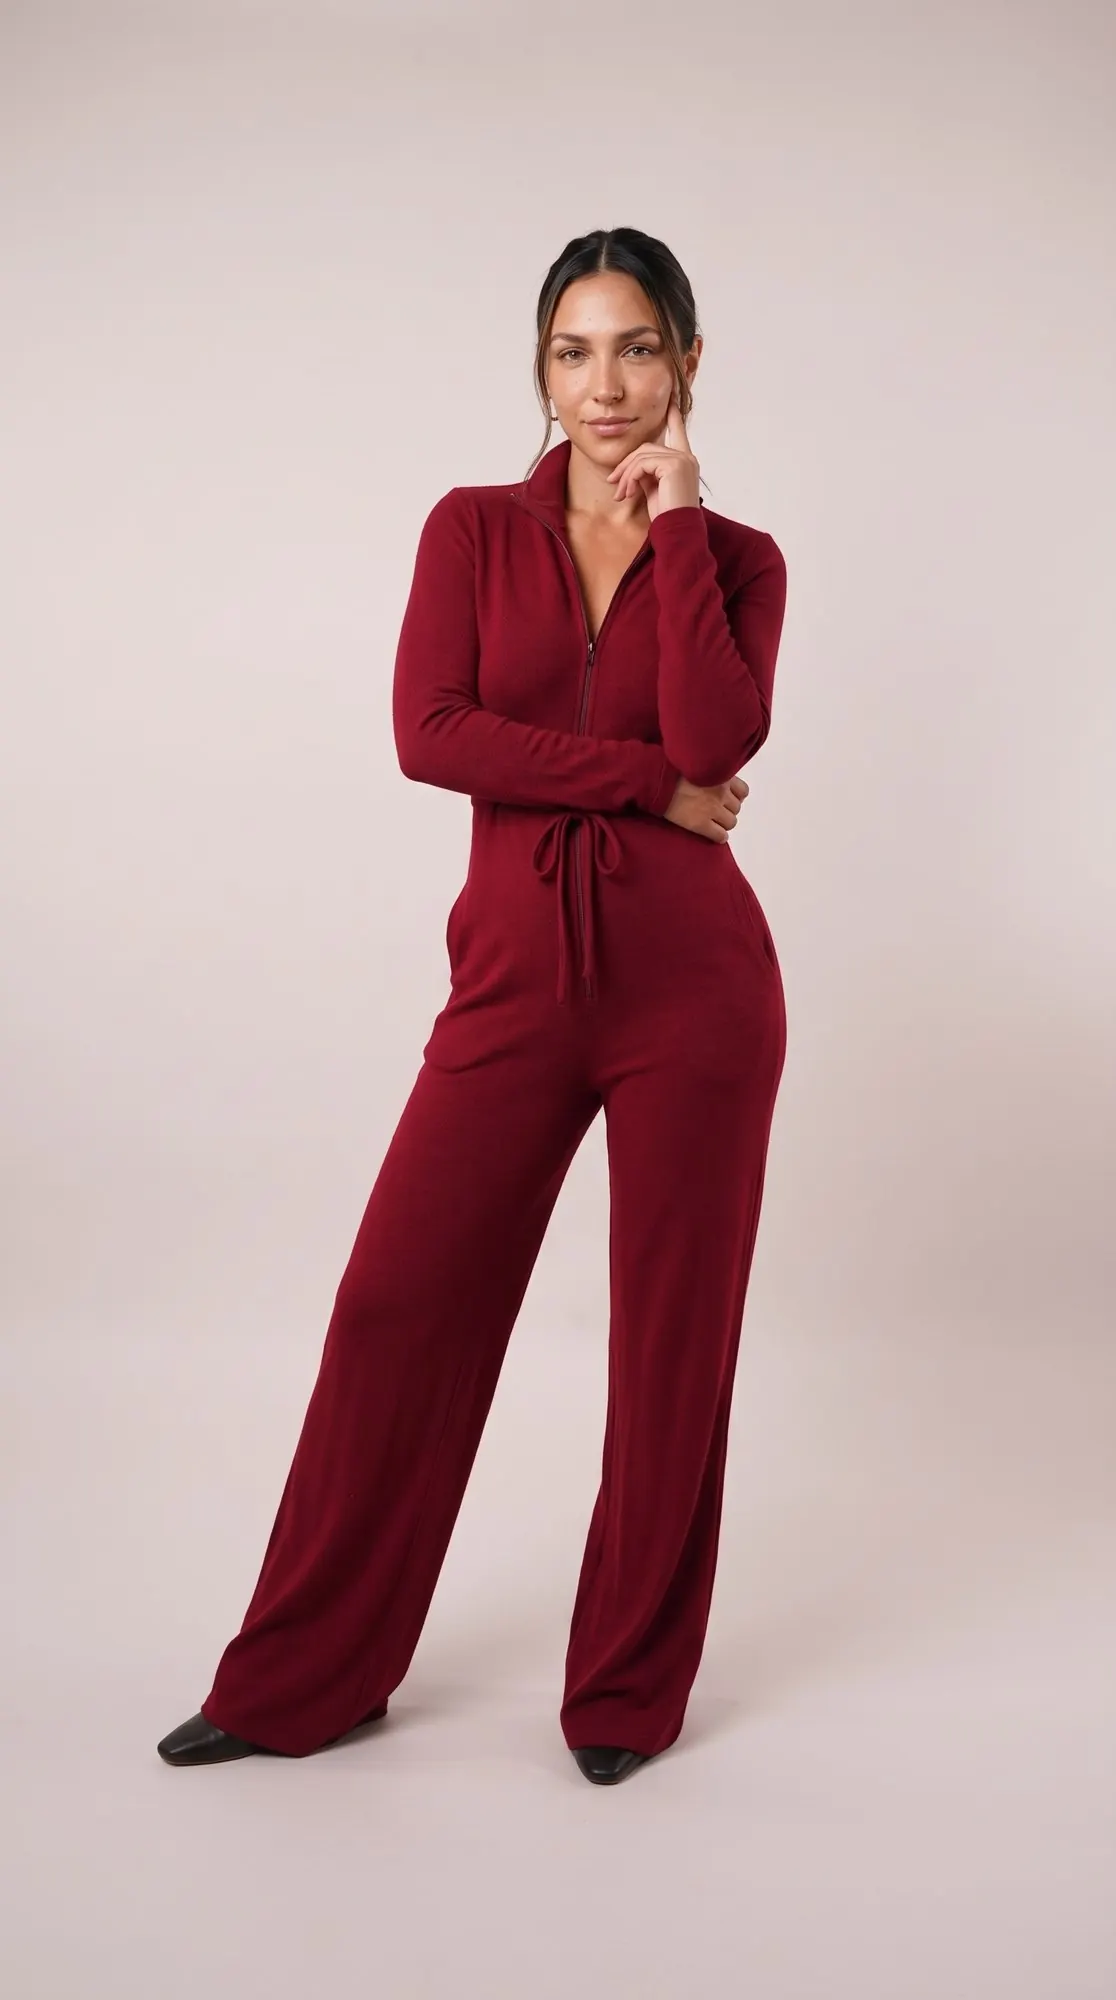
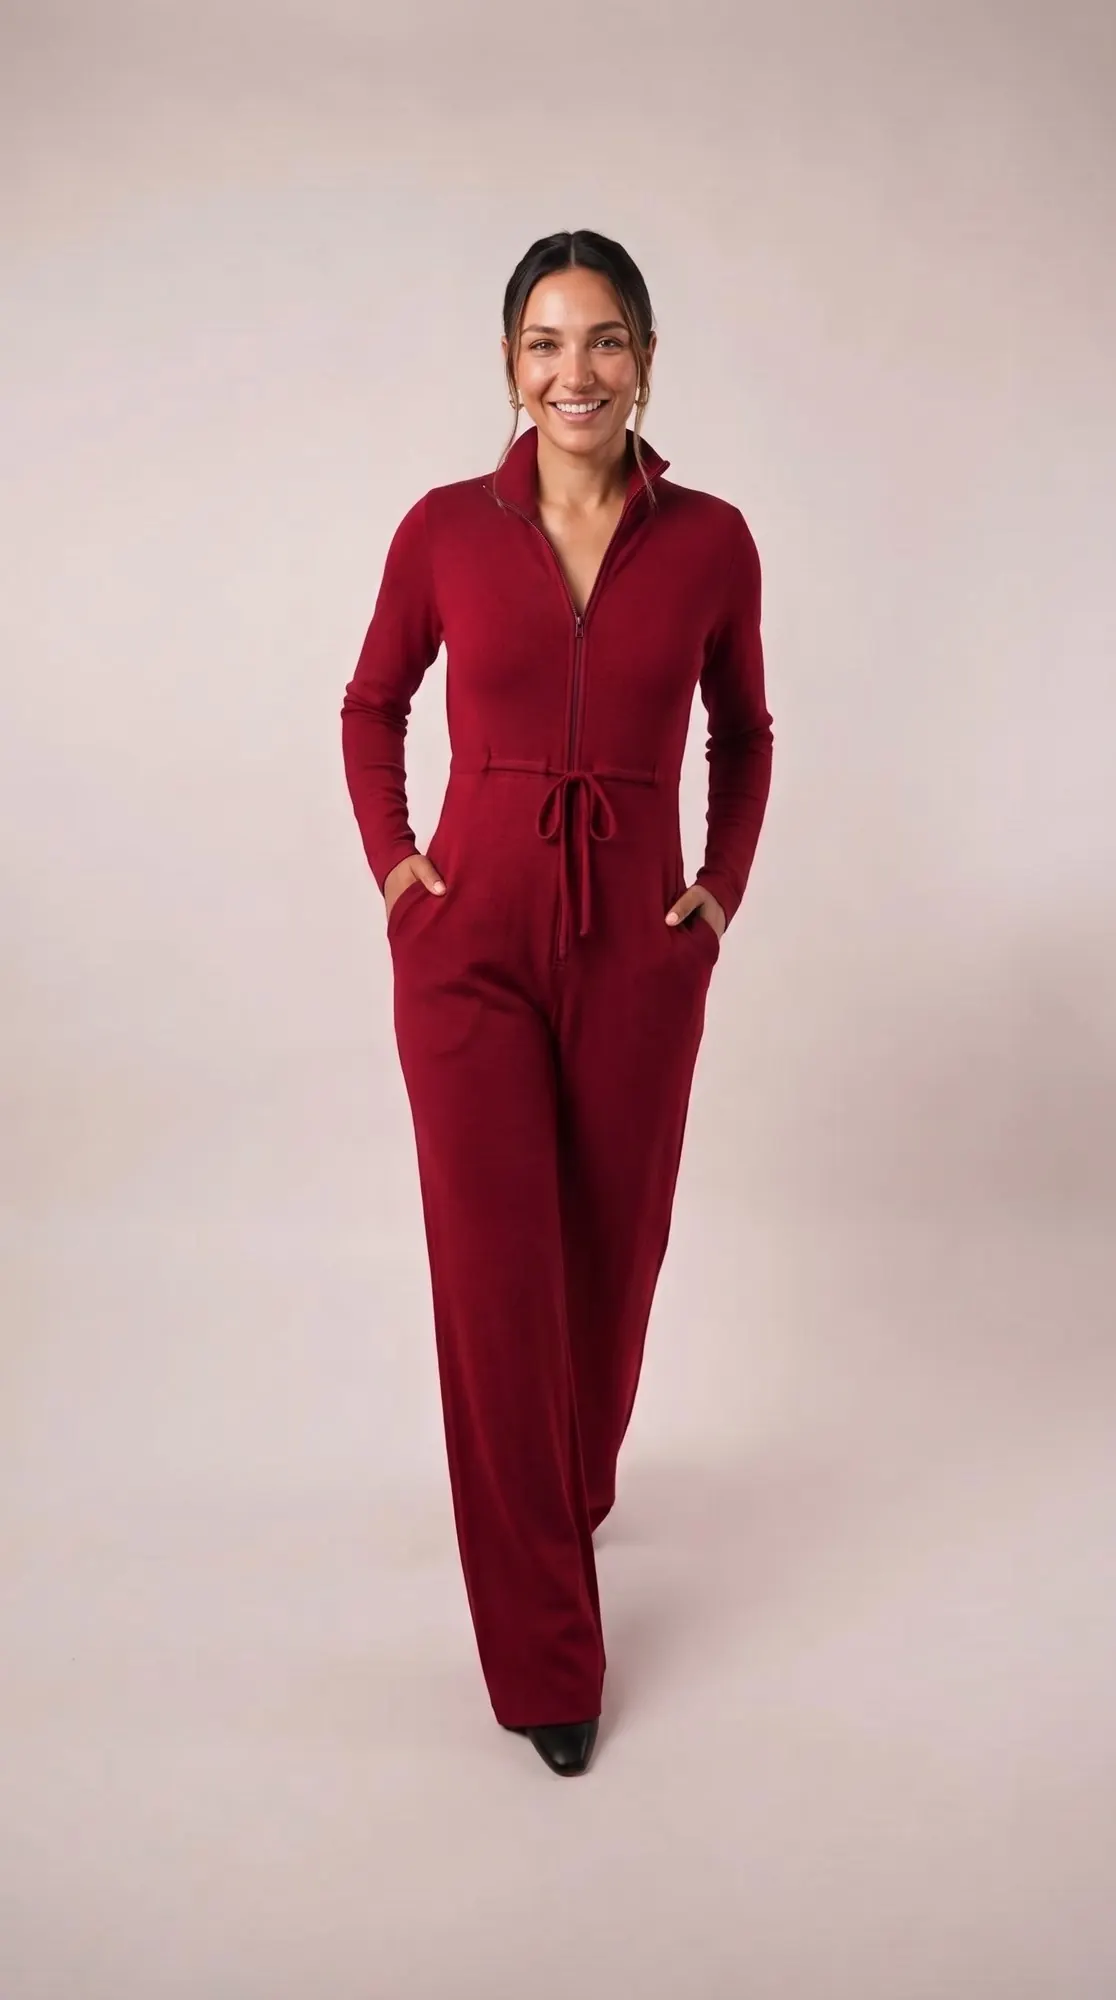
Ways to wear it
The wide, flowing legs move with you.
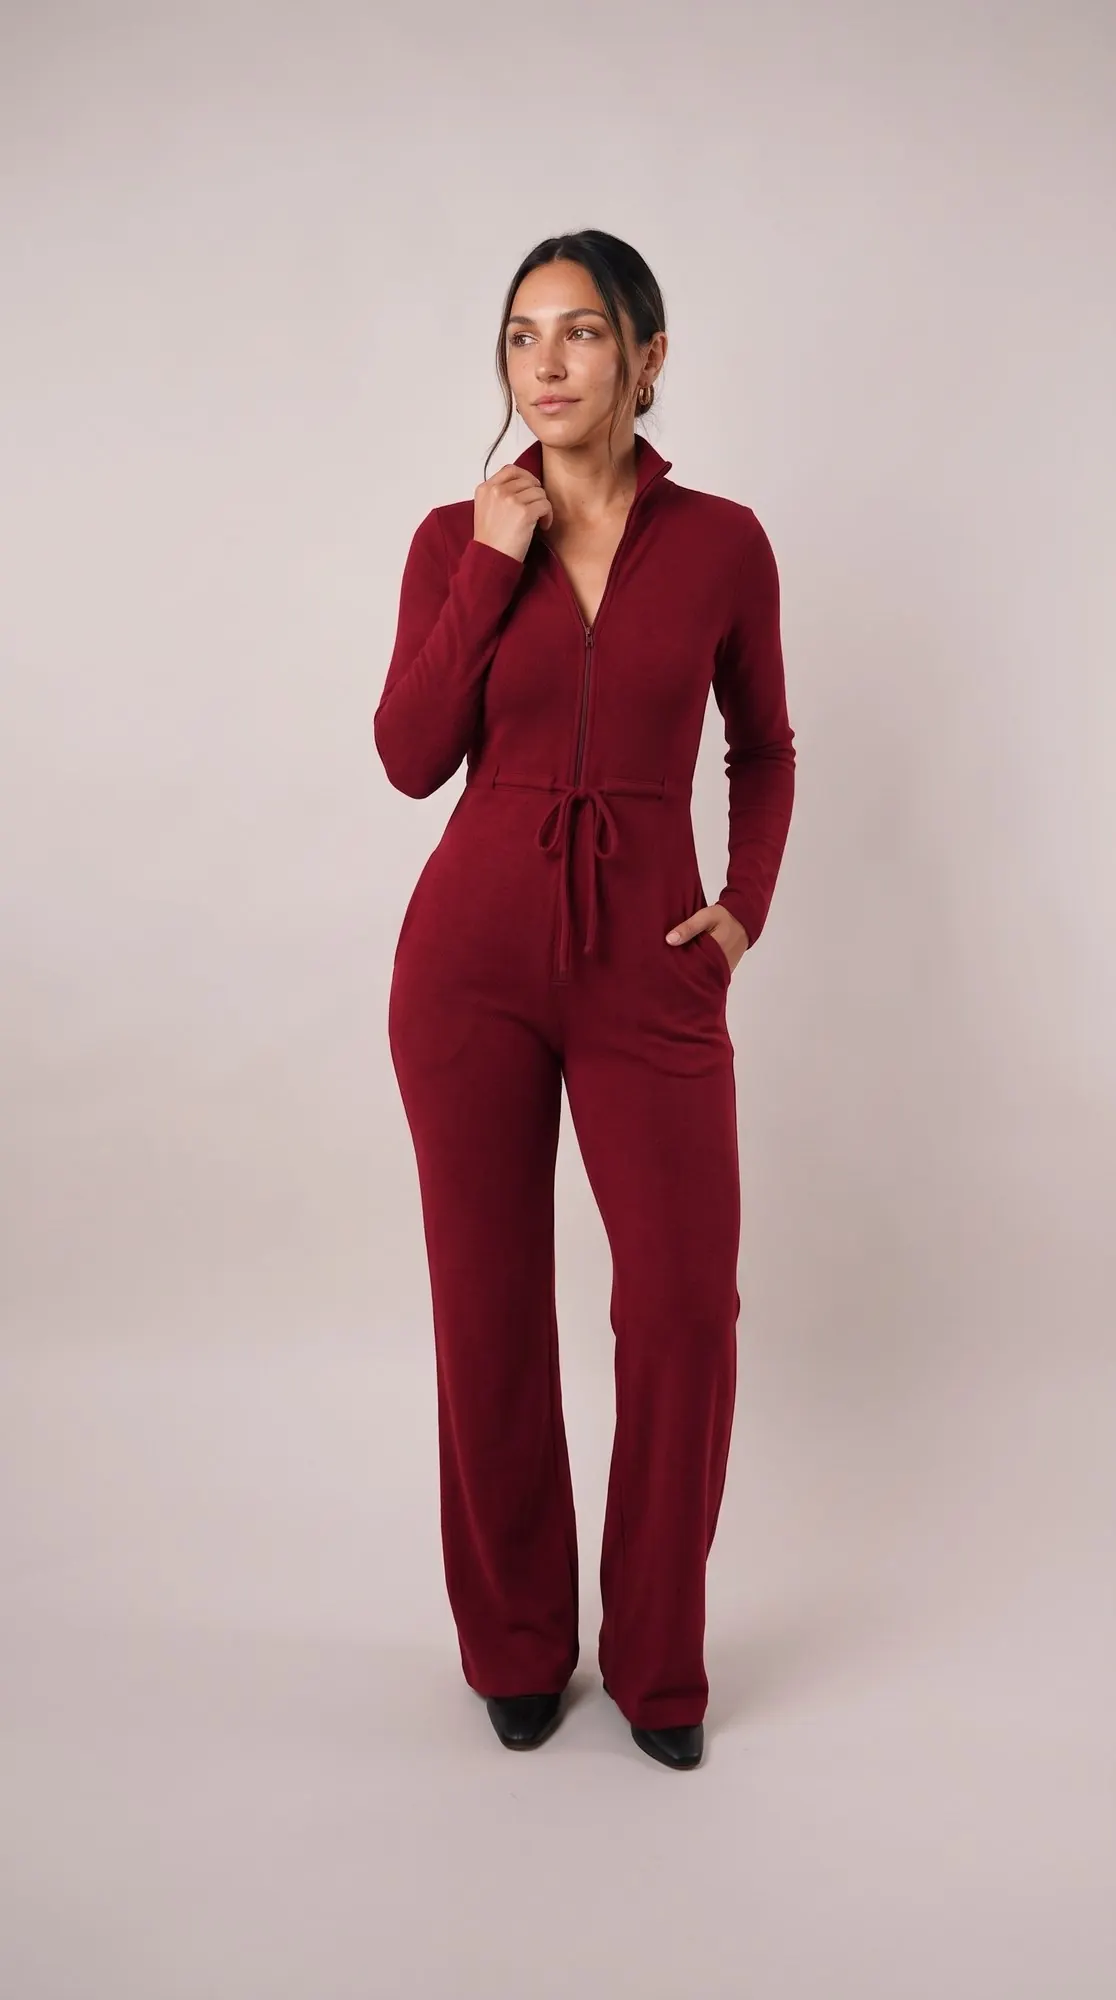
The details
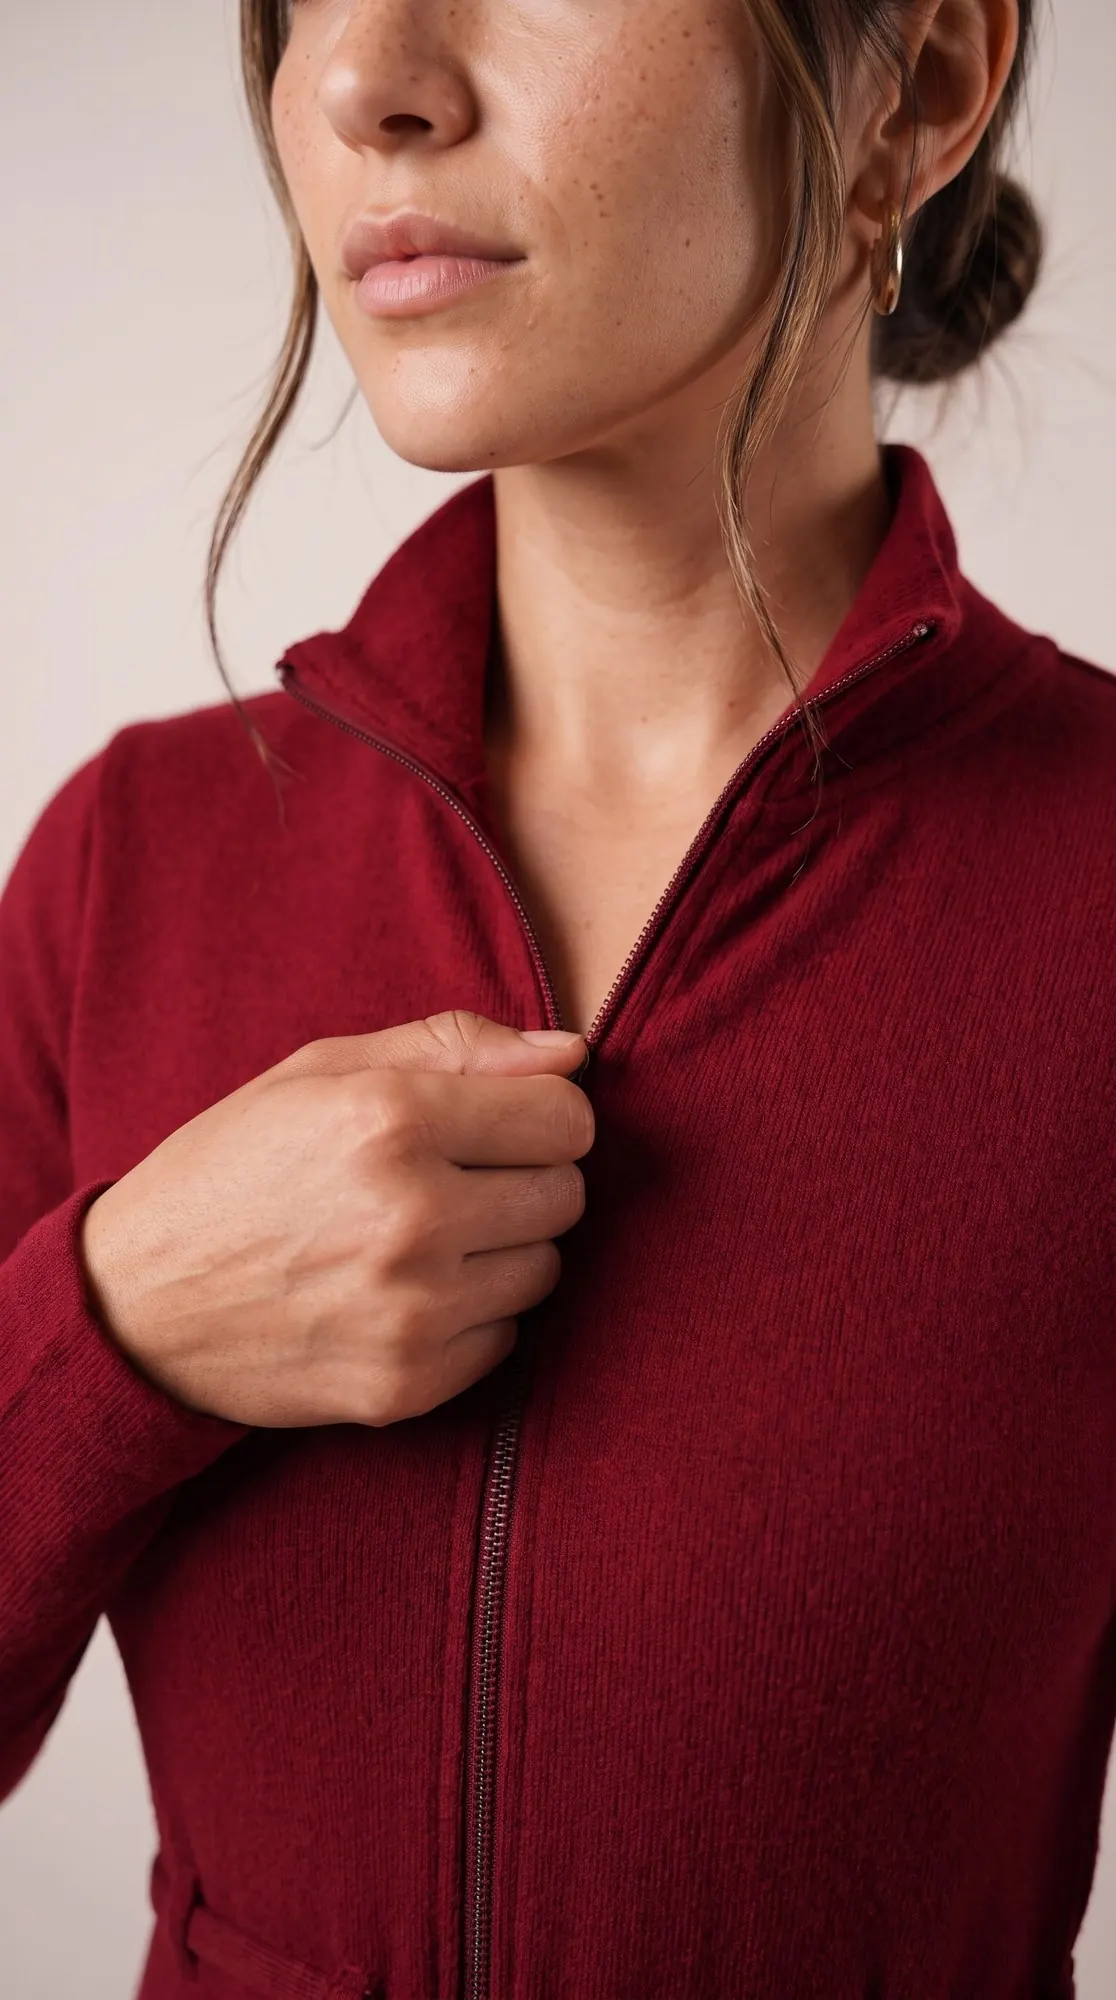
Waist ties, side-seam pockets and stand-up collar.
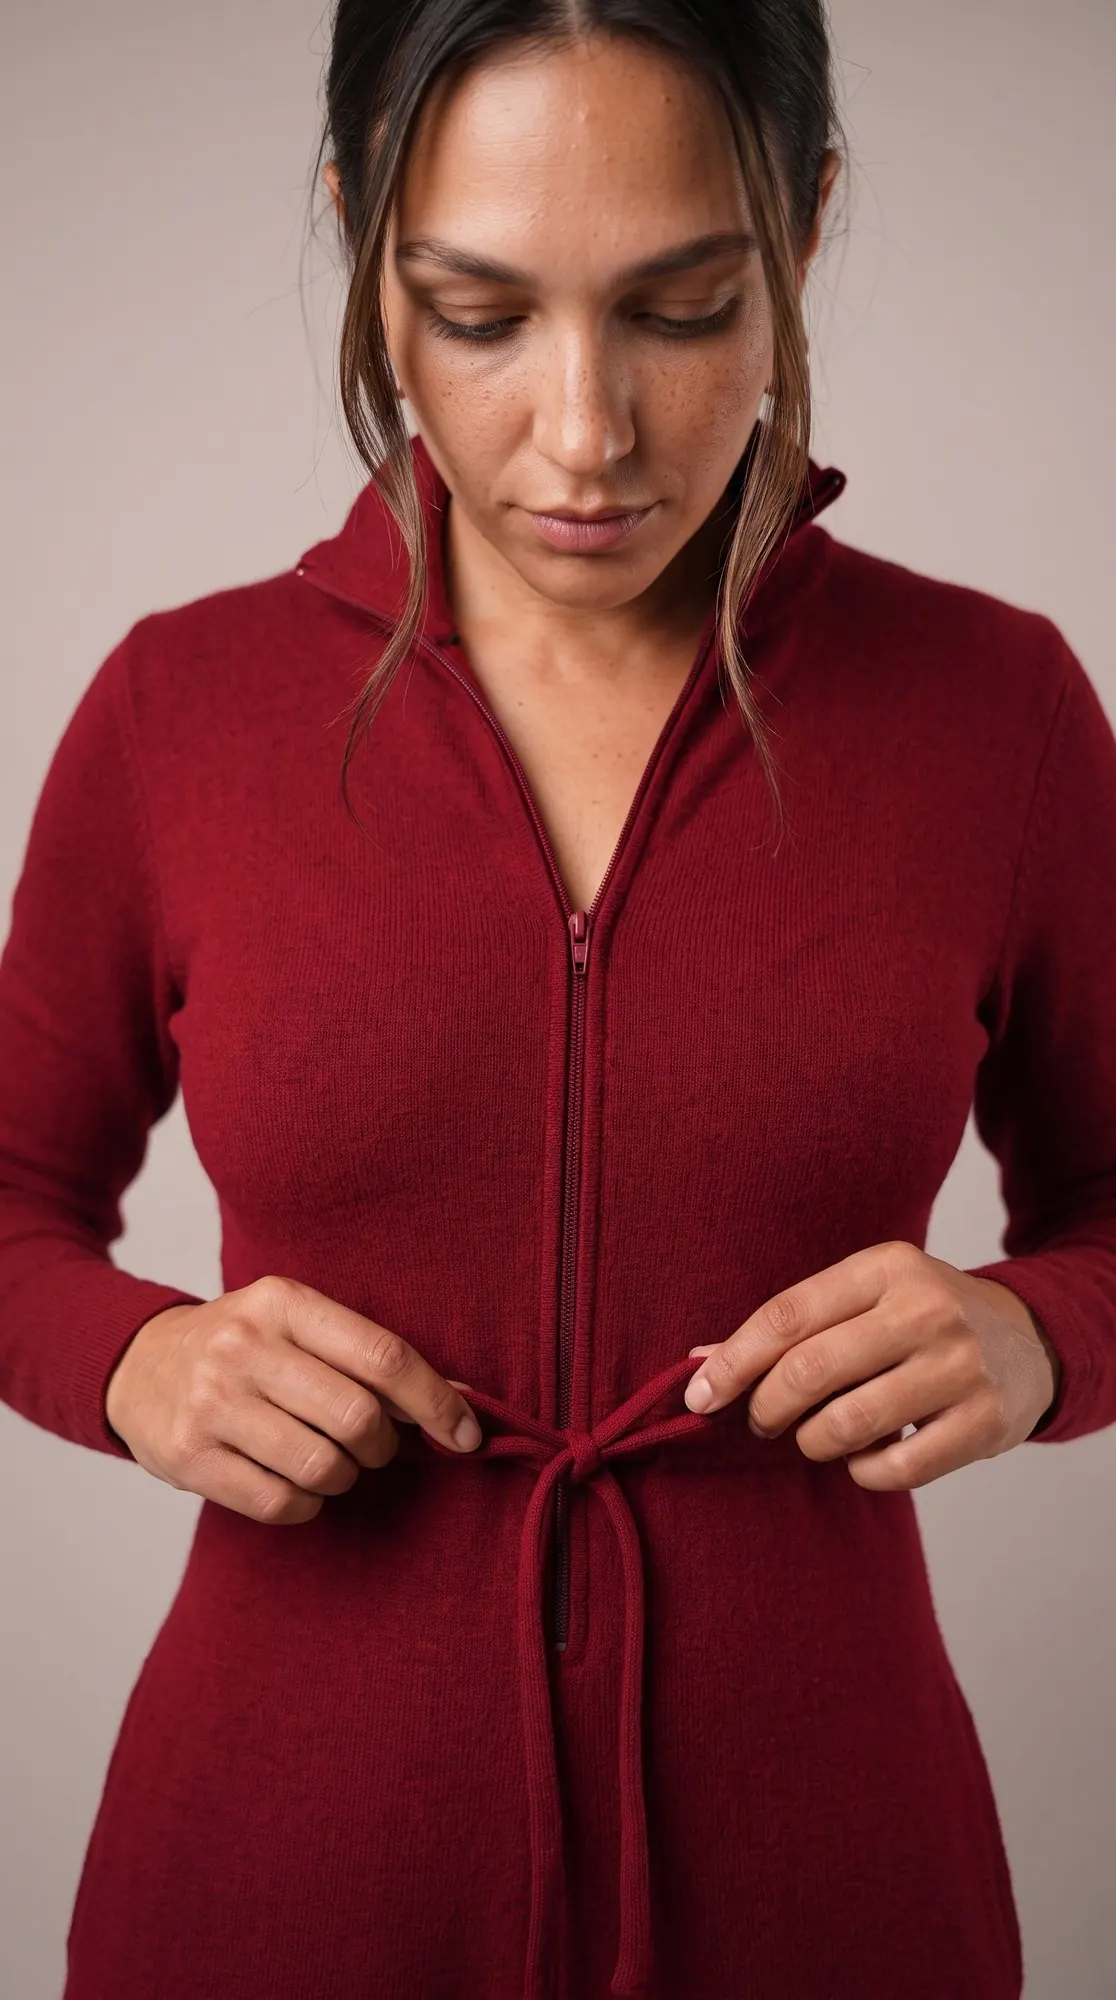
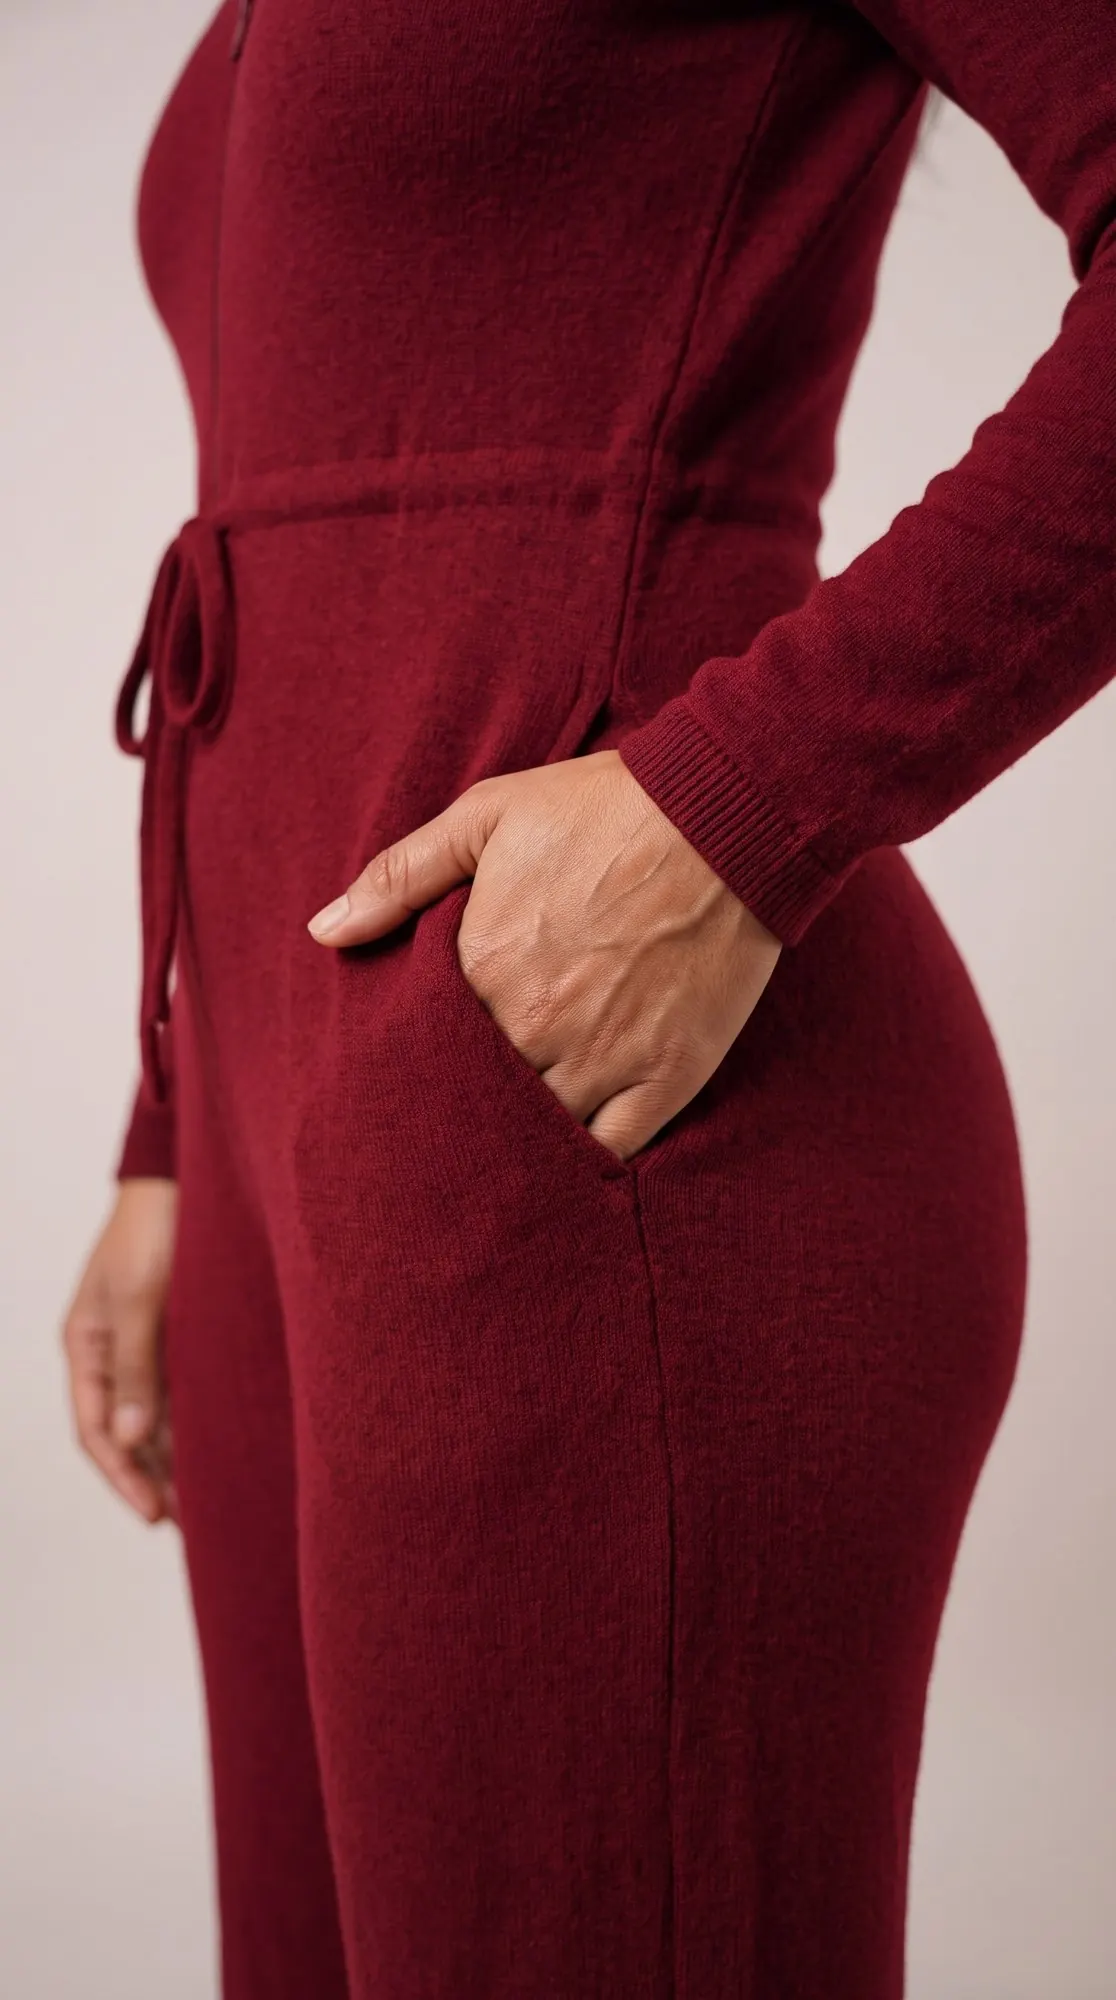
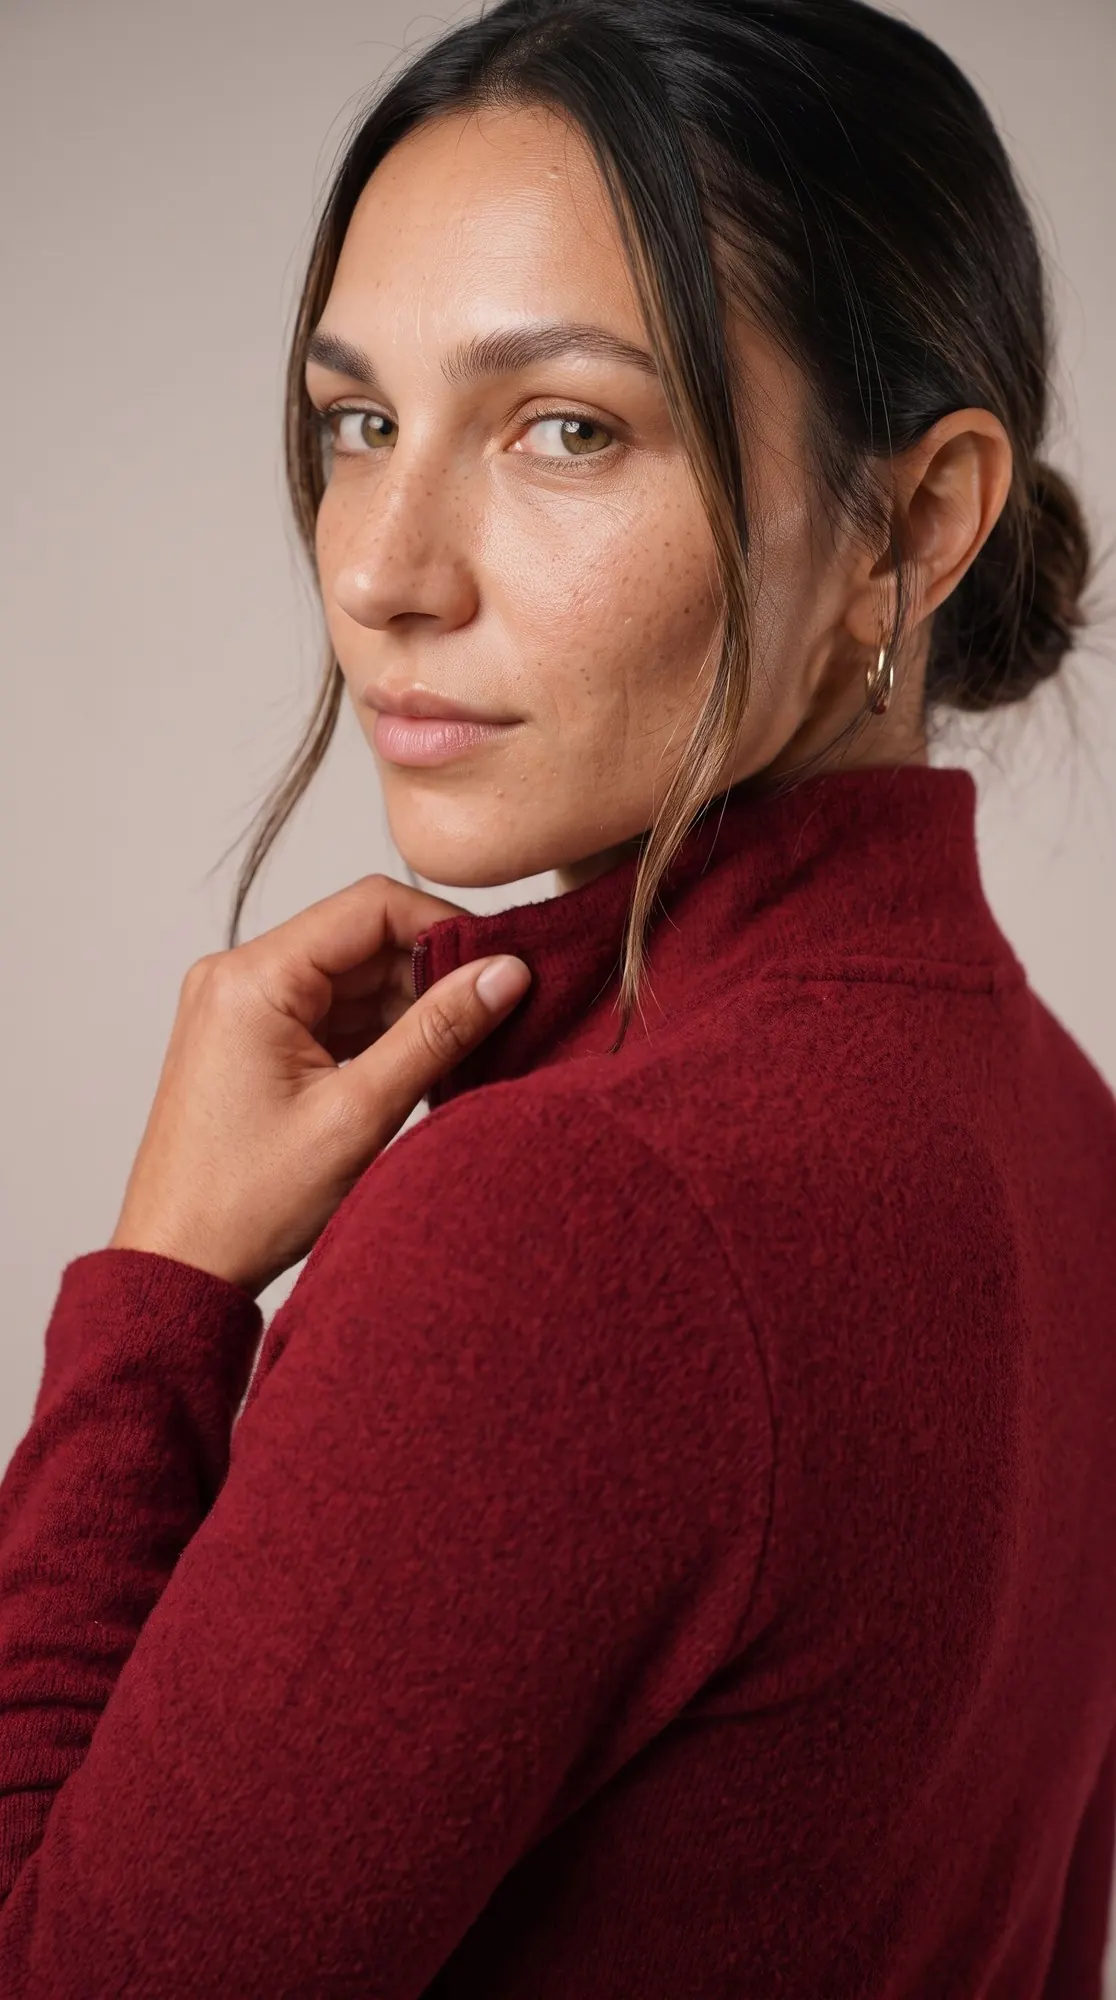
Choosing your size, from XS to 5XL (plus sizes included)
Take your bust, waist and hip measurements, then compare them with the tables below: the jumpsuit comes in women's sizes XS to 5XL. Measurements are in centimeters, with inches in small print below each value.
Table 1 — Body measurements (cm)
| Size | XS | S | M | L | XL | 2XL | 3XL | 4XL | 5XL |
|---|---|---|---|---|---|---|---|---|---|
| Bust | 78.7–81.3 31–32" | 83.8–86.4 33–34" | 88.9–91.4 35–36" | 94.0–99.1 37–39" | 101.6–109.2 40–43" | 111.8–119.4 44–47" | 121.9–129.5 48–51" | 132.1–139.7 52–55" | 142.2–152.4 56–60" |
| Waist | 58.4–61.0 23–24" | 63.5–66.0 25–26" | 68.6–71.1 27–28" | 73.7–78.7 29–31" | 81.3–88.9 32–35" | 91.4–99.1 36–39" | 101.6–109.2 40–43" | 111.8–119.4 44–47" | 121.9–132.1 48–52" |
| Hips | 86.4–88.9 34–35" | 91.4–94.0 36–37" | 96.5–99.1 38–39" | 101.6–106.7 40–42" | 109.2–116.8 43–46" | 119.4–127.0 47–50" | 129.5–137.2 51–54" | 139.7–147.3 55–58" | 149.9–160.0 59–63" |
Table 2 — Approximate finished garment measurements (cm)*
| Size | XS | S | M | L | XL | 2XL | 3XL | 4XL | 5XL |
|---|---|---|---|---|---|---|---|---|---|
| Bust | 78.7 31" | 83.8 33" | 88.9 35" | 96.5 38" | 106.7 42" | 116.8 46" | 127.0 50" | 137.2 54" | 149.9 59" |
| Waist | 58.4 23" | 63.5 25" | 68.6 27" | 76.2 30" | 86.4 34" | 96.5 38" | 106.7 42" | 116.8 46" | 129.5 51" |
| Hips | 99.1 39" | 104.1 41" | 109.2 43" | 116.8 46" | 127.0 50" | 137.2 54" | 147.3 58" | 157.5 62" | 170.2 67" |
| Pant length** | 106.7 42" | 106.7 42" | 108.0 42.5" | 108.0 42.5" | 109.2 43" | 109.2 43" | 110.5 43.5" | 110.5 43.5" | 111.8 44" |
* Allow 2.5 cm (1") of negative ease at the bust for the top of the jumpsuit (recommended). For sizes L to 5XL, if your measurements fall at the upper end of the range (Table 1), use that size as is. If they fall at the lower end of the range, go down one size for the top. Choose the pant size based on your hip measurement, and adjust the waist to match the size of the top.
** The pant length includes an extra 10.2 cm (4") for standard sizes, so the jumpsuit can be worn with heels. You can adjust the length to suit your preferences or needs. To keep the same look, remove 5.1 cm (2") for petite women and add between 7.6 and 12.7 cm (3 and 5") for tall women.
Size guide
The size guide for the Zip-Front Jumpsuit is based on the intended style and ease of this design. You can also choose your size from the finished garment measurements you want, grading between sizes if needed. Measure the printed pieces to check that their dimensions match the fit you want, and adjust if needed before cutting your fabric. For best results, sew a test garment in a similar fabric to fine-tune your pattern.
Measurements may vary after adjustments. If you are using a non-stretch fabric, choose your size from the approximate finished garment measurements (Table 2).
This pattern is designed for stretch fabrics. The size guide is based on the intended style and ease of this design. The ease is negative, thanks to the stretch of the fabric.
Always read all the instructions before cutting your fabric!
Supplies and fabric for your knit jumpsuit
Gather your fabric and supplies before you start. The list below gives the materials used for the sample, with quantities for size S, if you want to follow it exactly. After it comes a selection of other fabric types if you want to personalize your version. The PDF pattern also includes the technical drawings, so you can clearly see the seams and the silhouette, and a size chart to find your size.
Materials used (quantities for size S)
| Item | Quantity |
|---|---|
| Stretch rib knit, color of your choice | 2.5 yards = 2.29 m |
| Fusible knit interfacing, medium weight, single-sided fusible, black | 0.5 yard = 0.46 m |
| Classic nylon coil zipper, 61.0 cm (24"), to match the fabric | 1 |
| All-purpose sewing thread 1000 m, to match the fabric | 1 spool |
| The PDF pattern (sheets to print) | — |
Sew the jumpsuit in the color of your choice. In all the photos, the fabric is burgundy.
Other notions used
Loop turner · tailor's chalk
Which fabric to choose?
This pattern works best with lightweight to medium-weight stretch knits. Recommended fabrics: rib knit, spandex. Other possible fabric types:
- Stretch lace
- Spandex
- Stretch velvet
2 tips for sewing stretch rib knit
- Set your iron to low or medium heat when pressing seams open, so you don't melt or distort the fabric.
- Every seam of the sample was sewn with the sewing machine's stretch stitch (also called the lightning stitch). It lets the fabric stretch without the seams popping.
The pieces of the jumpsuit sewing pattern
Cut pieces A to H from your fabric, following the table and the grainline.
| Piece | Name | Cut |
|---|---|---|
| A | Back bodice | Fabric — 1 on the fold |
| B | Front bodice | Fabric — 2 mirrored |
| C | Sleeves | Fabric — 2 mirrored |
| D | Back pants | Fabric — 2 mirrored |
| E | Front pants | Fabric — 2 mirrored |
| F | Collar | Fabric — 2 on the fold |
| G | Pockets | Fabric — 2 mirrored pairs |
| H | Front ties | Fabric — 2 |
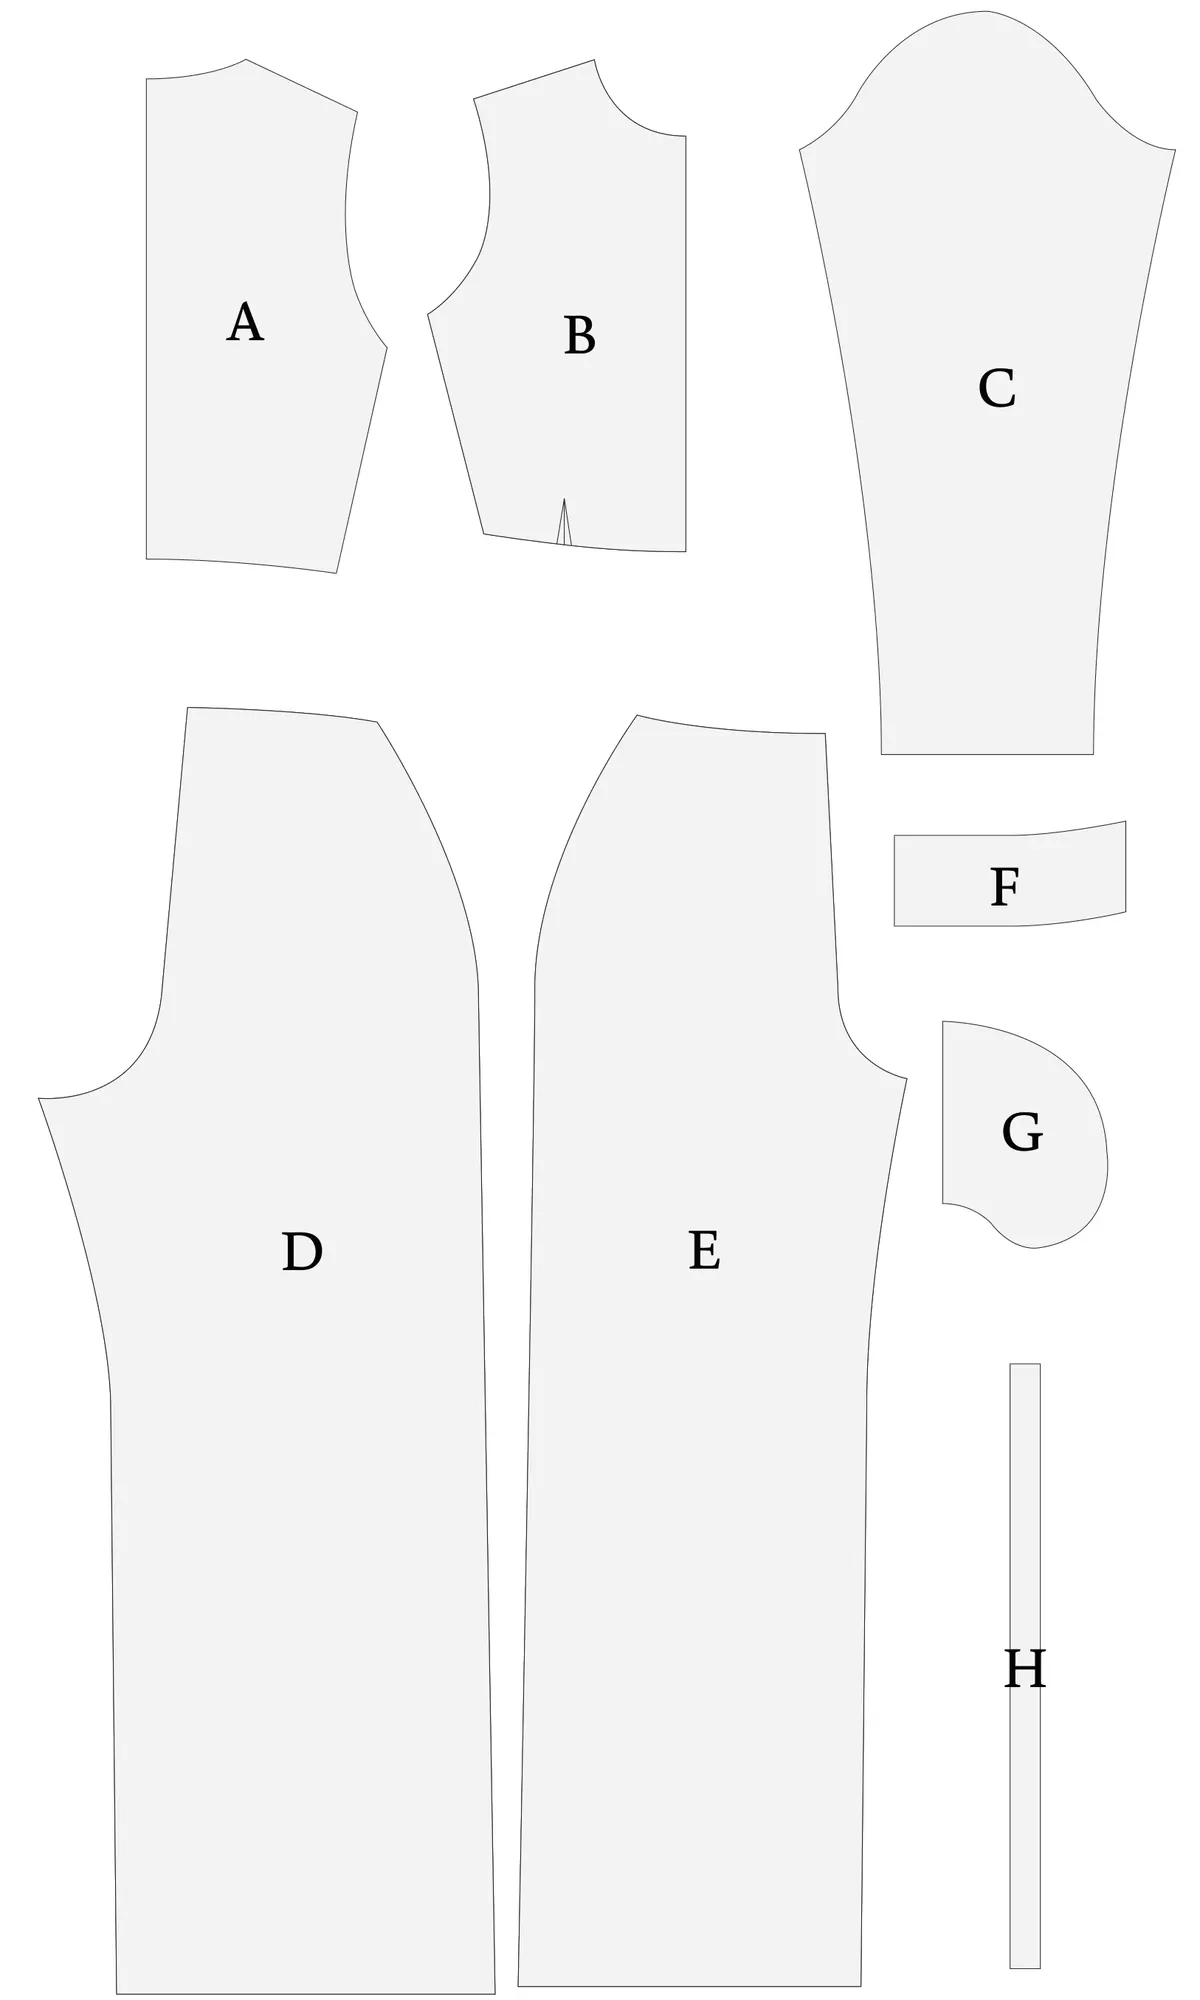
A 1.27 cm (½") seam allowance is included in the pattern, except for the front ties (H): 0.6 cm (¼"). Sew with a 1.27 cm (½") seam allowance for all seams, unless otherwise stated.
Piece G has only 3 cutting lines: XS-M, L-2XL and 3XL-5XL. Place each piece with its "GRAINLINE" arrow parallel to the selvage.
The PDF pattern to print
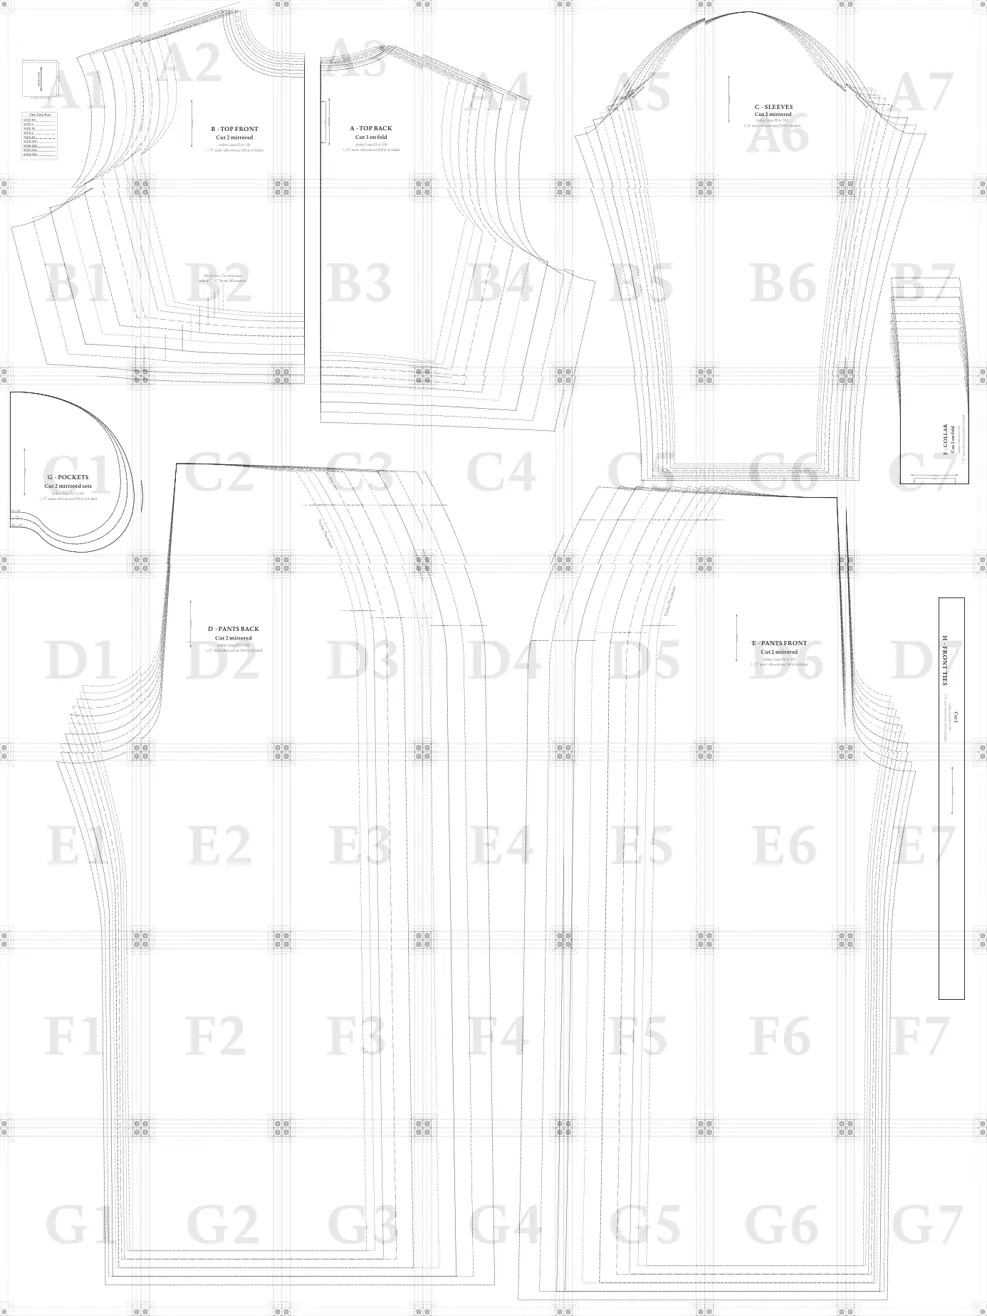 A · Back bodiceB · Front bodiceC · SleevesD · Back pantsE · Front pantsF · CollarG · PocketsH · Ties
The pieces of the Zip-Front Jumpsuit come in the PDF pattern: you print them at home at actual size, on A4 or Letter paper, then assemble the 49 sheets. The pattern covers women's sizes XS to 5XL and includes a test square to check the scale before you print everything. The construction tutorial itself stays free on this page.
Download the PDF patternHow to sew a jumpsuit: step-by-step construction
The 14 steps below take you through sewing the Zip-Front Jumpsuit from start to finish, from the tie slits on the front bodice to the pant hem. Each step gives the instructions, then the construction photos.
Sew with a 1.27 cm (½") seam allowance for all seams, unless otherwise stated.
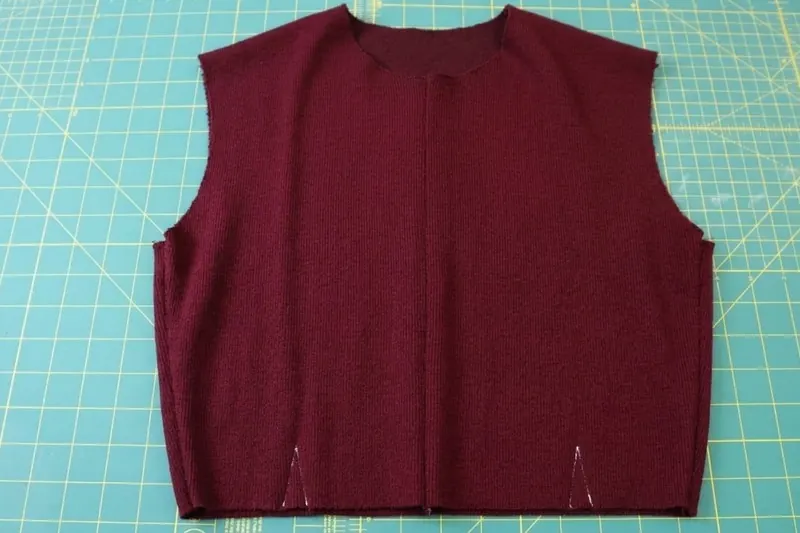
Step 1 — Slits
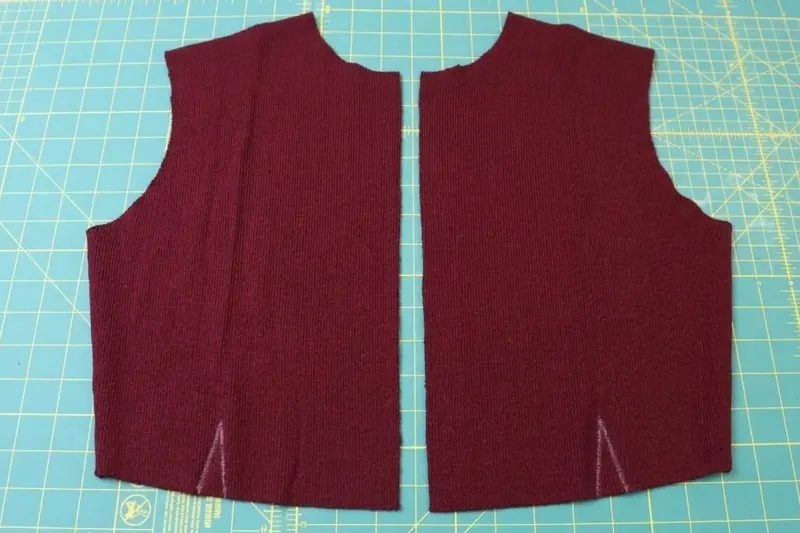
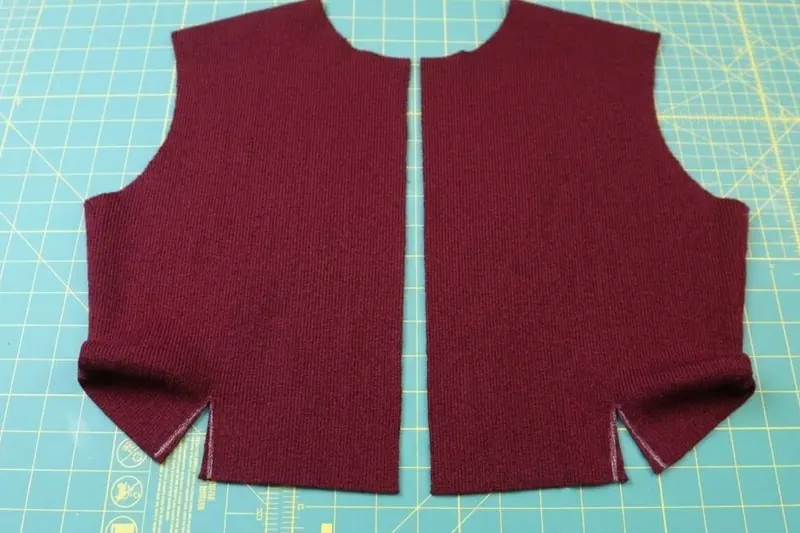
- Mark the slits for the waist ties with tailor's chalk.
- Cut down the middle of the triangular chalk lines. The marking looks like a dart, but technically it isn't one: the waist ties will be inserted into the slits, which is why they are cut open.
Step 2 — Shoulder and side seams
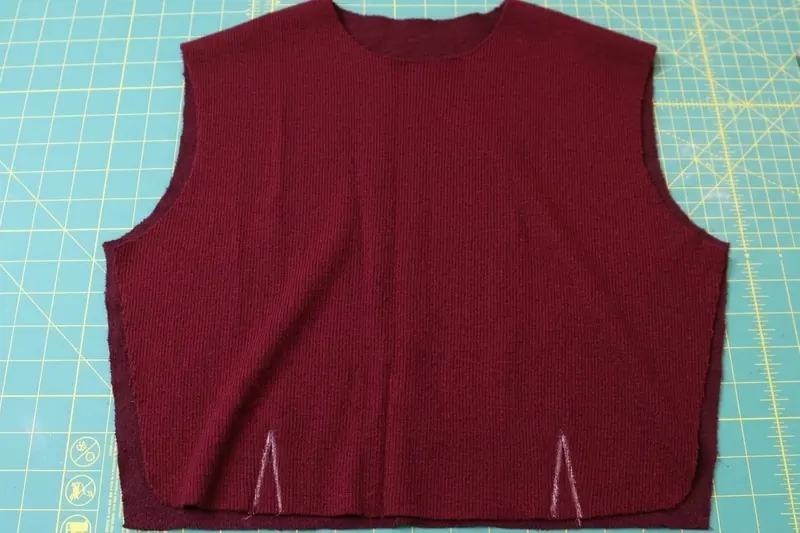
- Place the front pieces on the back piece, right sides together.
- Pin and stitch the shoulder seams and side seams to join the fronts and the back.
Step 3 — Sleeves
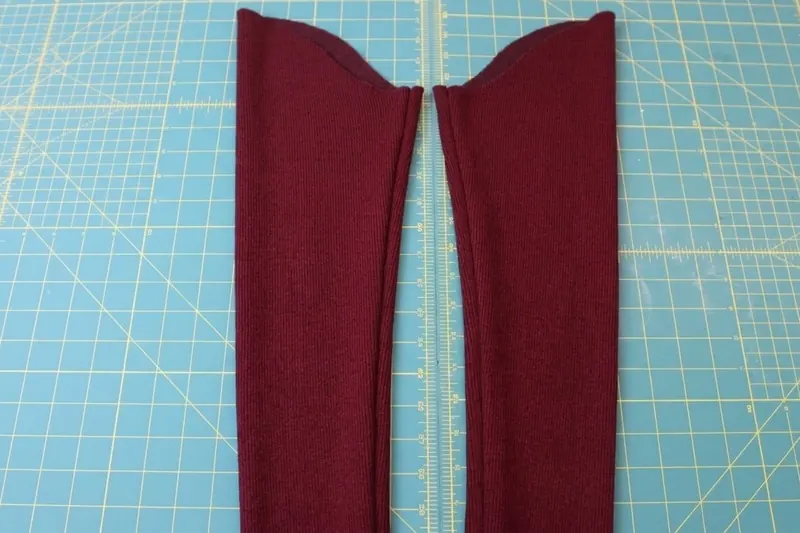
- Fold the sleeves right sides together, with the underarm seams aligned.
- Pin and stitch the underarm seams.
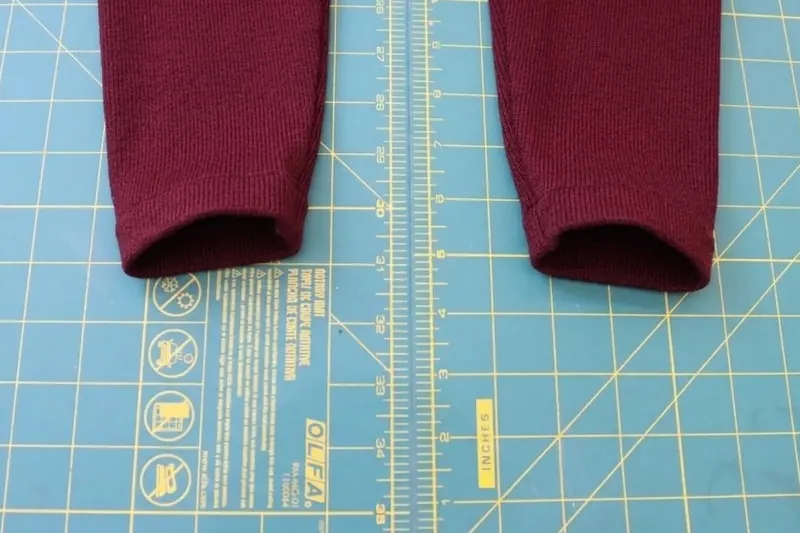
- Fold the sleeve hem edge (wrist opening) 1.27 cm (½") toward the wrong side of the fabric.
- Press the fold.
- Pin and stitch a hem on the sleeves with a 1.0 cm (⅜") seam allowance.
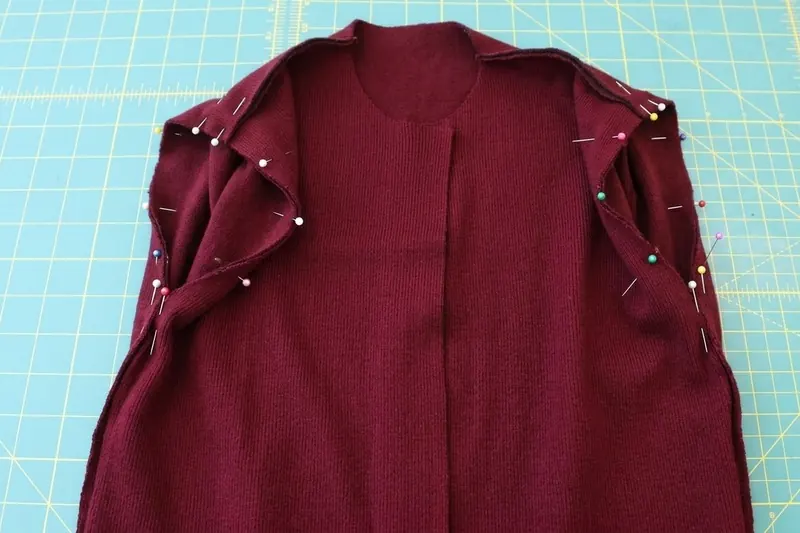
- Insert the sleeve caps into the armholes, right sides together, making sure to match the front of the sleeve with the front of the jumpsuit bodice.
- Pin and stitch the sleeves into the armholes.
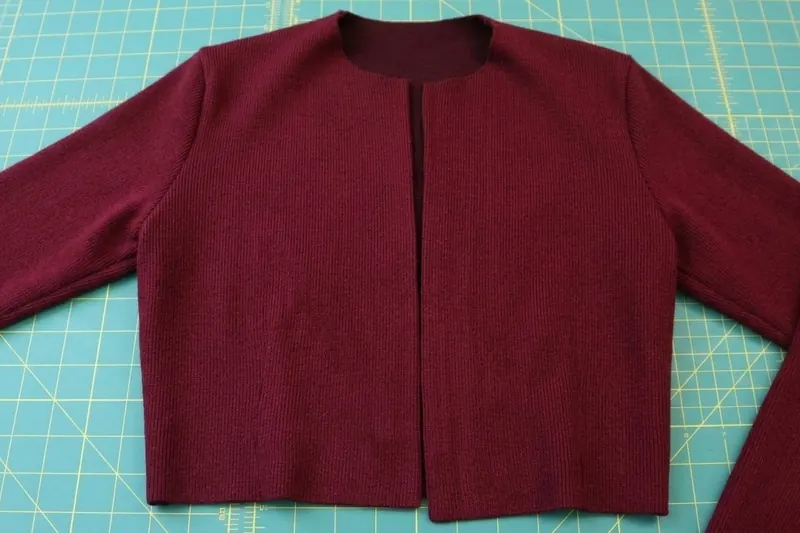
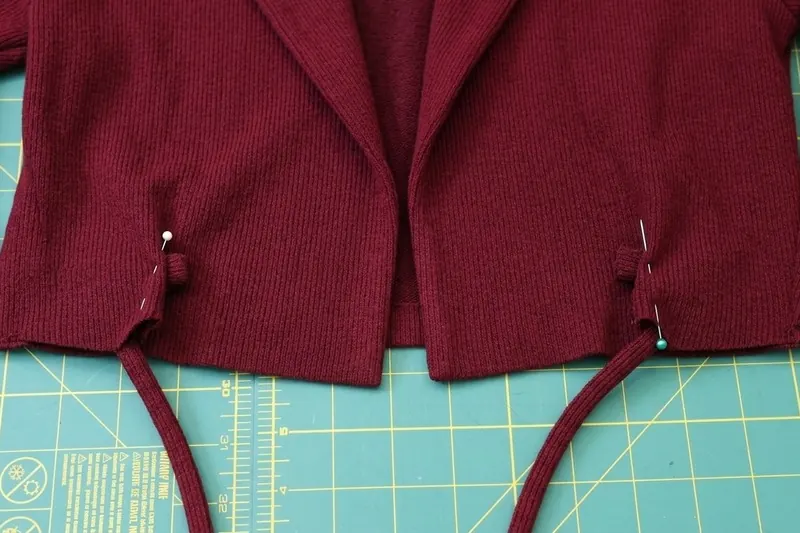
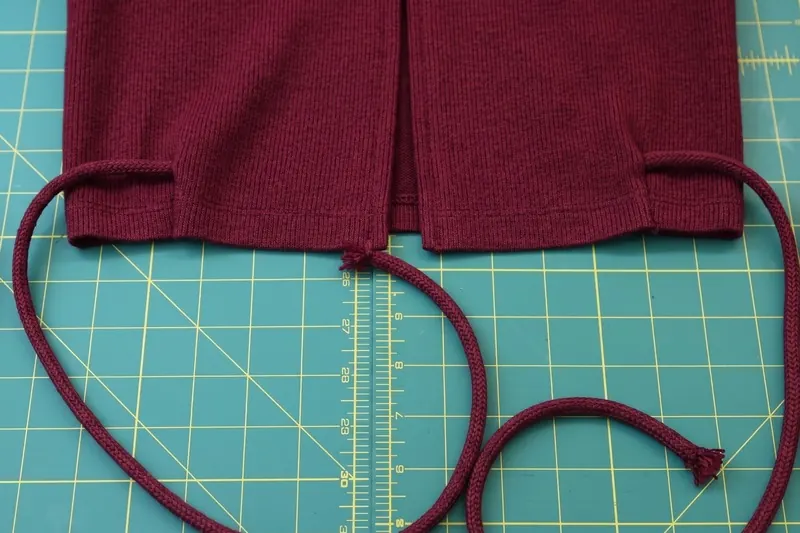
Step 4 — Waist ties
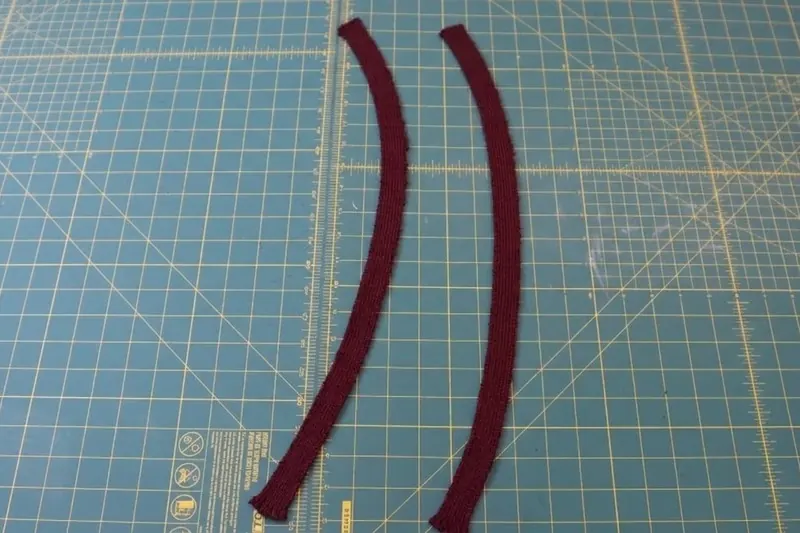
- Fold the waist ties in half lengthwise, right sides together.
- Stitch along the entire length of the folded fabric strip, with a 0.6 cm (¼") seam allowance.
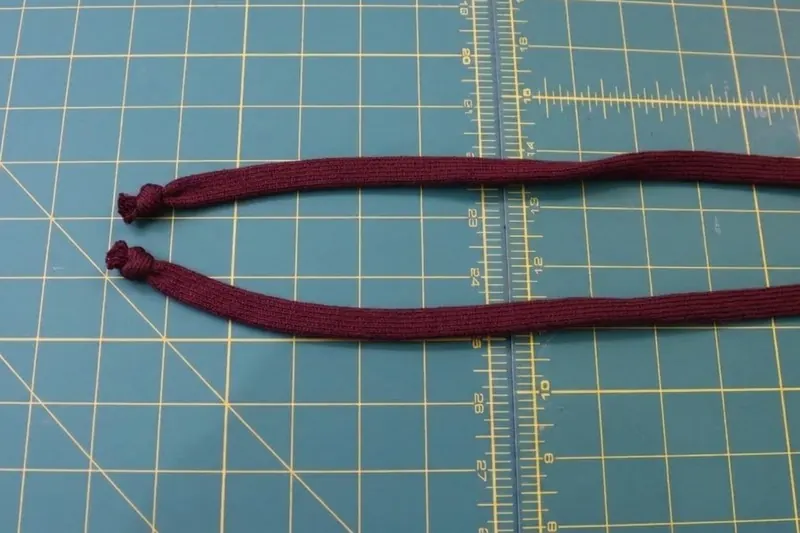
- Turn the waist ties right side out.
- Tie a knot at one end of each waist tie.
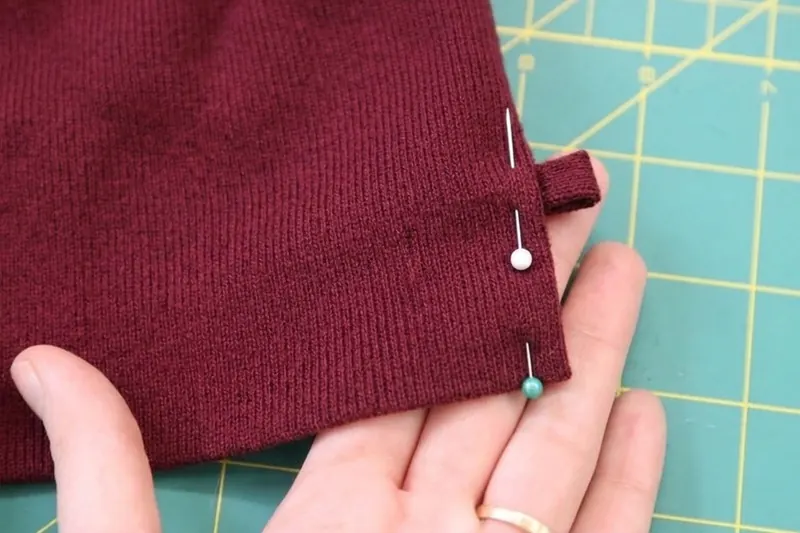
- Insert the unknotted end of the tie into the slit at the waist of the bodice.
- Fold the slit in half, right sides together, with the tie sandwiched between the two sides.
- Pin and stitch along the chalk lines.
- Repeat for both waist ties.
Step 5 — Pockets
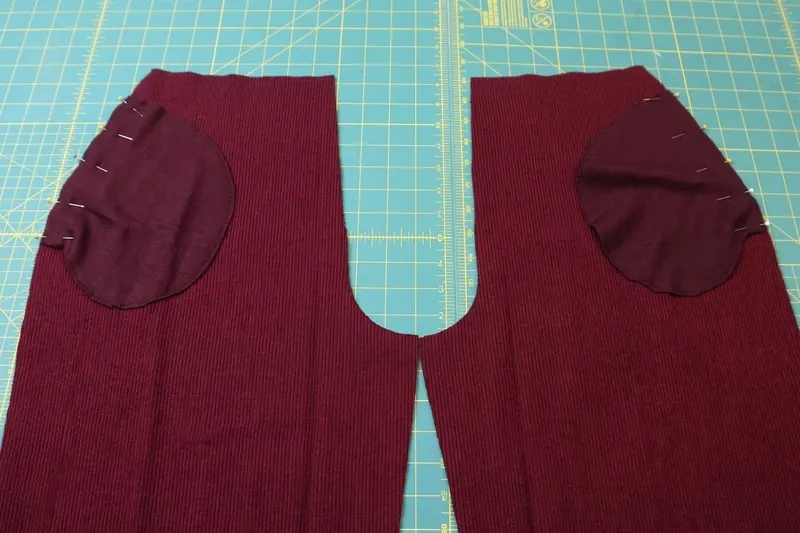
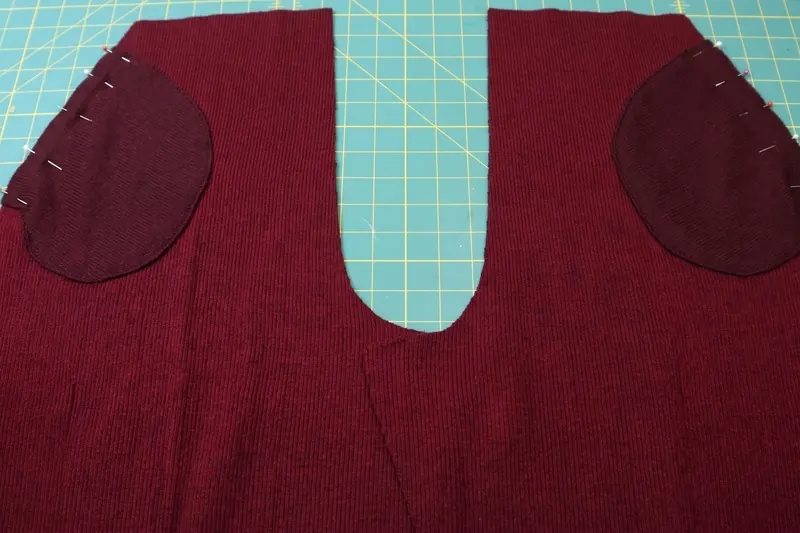
- Cut the notches marking the pocket placement on the front and back pant pieces.
- Place a pocket piece right sides together on each front and back pant leg, aligned with the notches.
- Pin and stitch the pockets to the pant legs.
- Fold the pockets outward and press the seams open, nice and flat.
- Place the front pieces on the back pieces, right sides together.
- Pin the pant side seams, making sure to pin around the pocket and to leave the opening free.
- Stitch the pant side seams, stitching around the pocket bags as well.
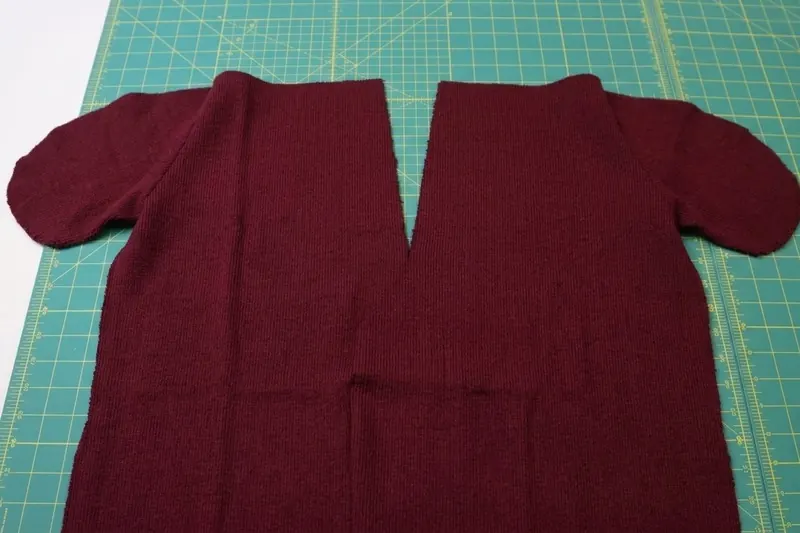
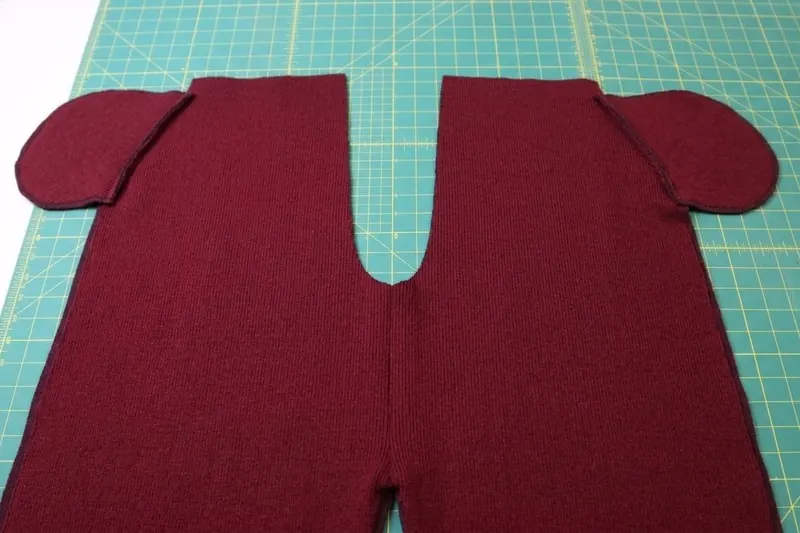
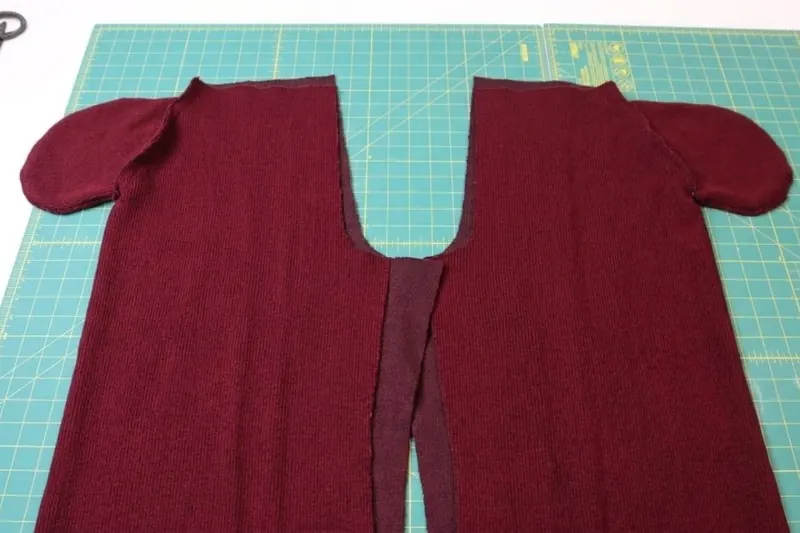
Step 6 — Back crotch seam
- Place the back pant pieces right sides together, with the back crotch seams aligned.
- Pin and stitch the back crotch seam.
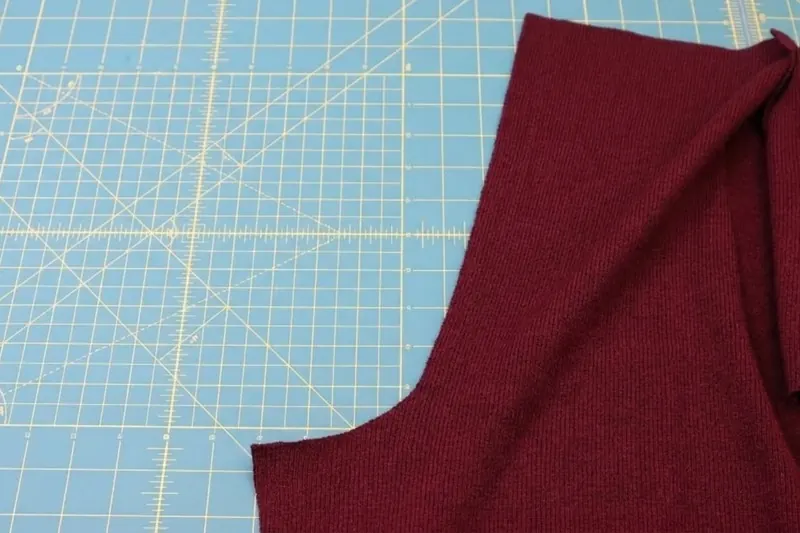
Step 7 — Waist seam
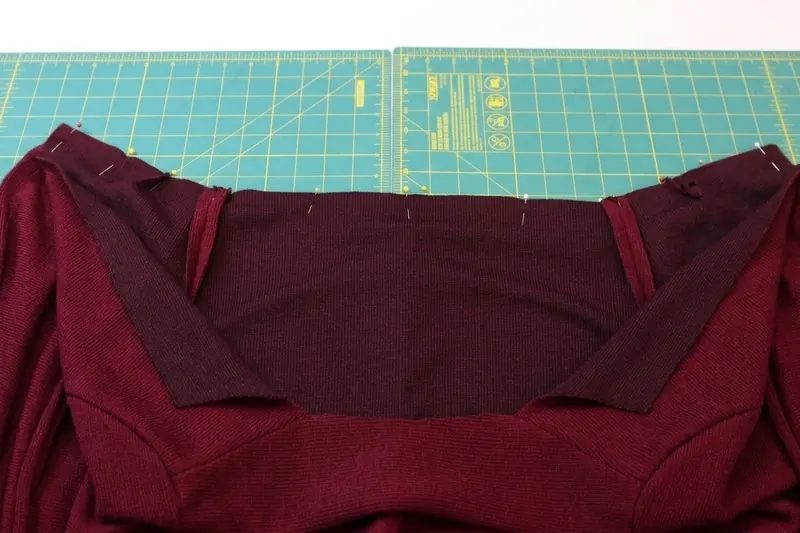
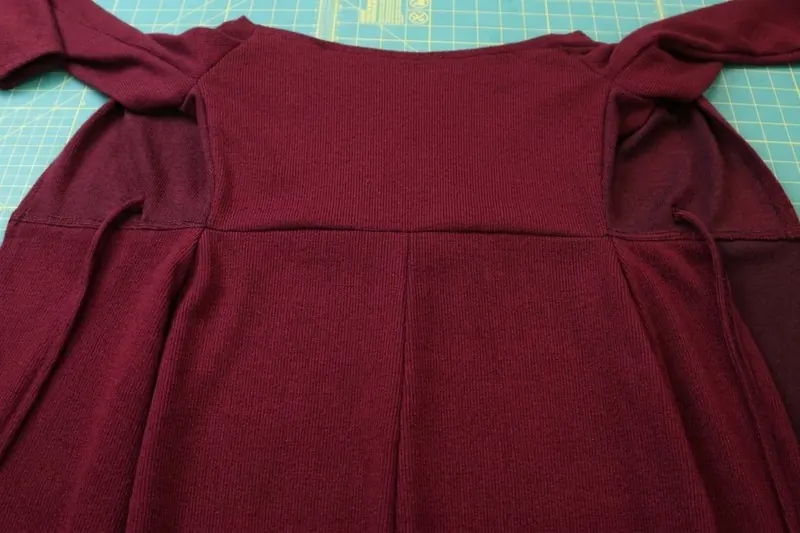
- Place the bottom edge of the bodice right sides together with the top edge of the pants.
- Pin the bodice to the pants, making sure to align the side seams.
- Stitch the bodice to the pants.
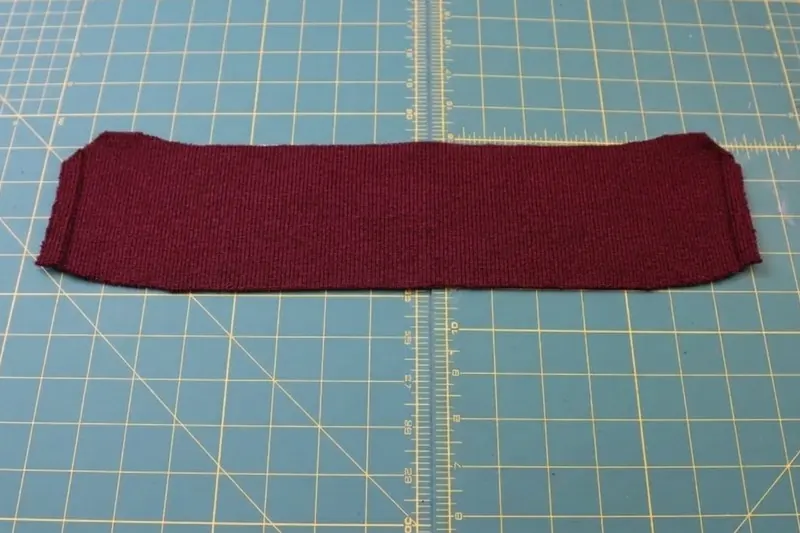
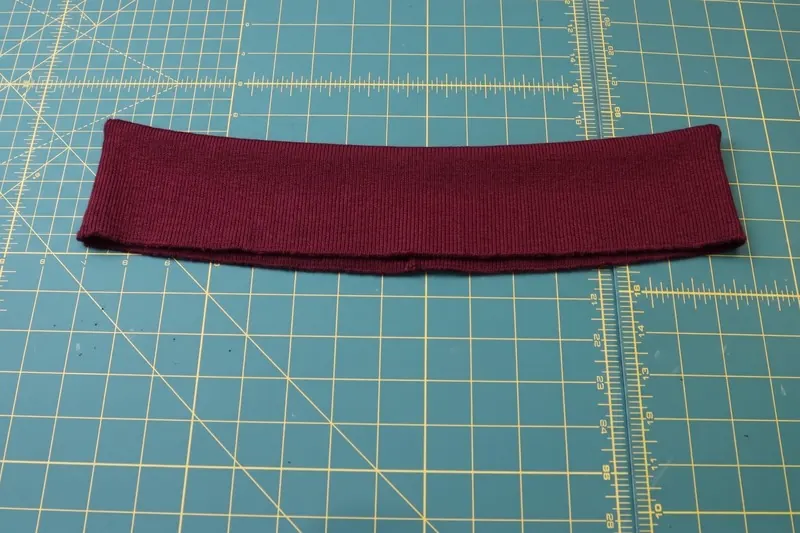
Step 8 — Collar
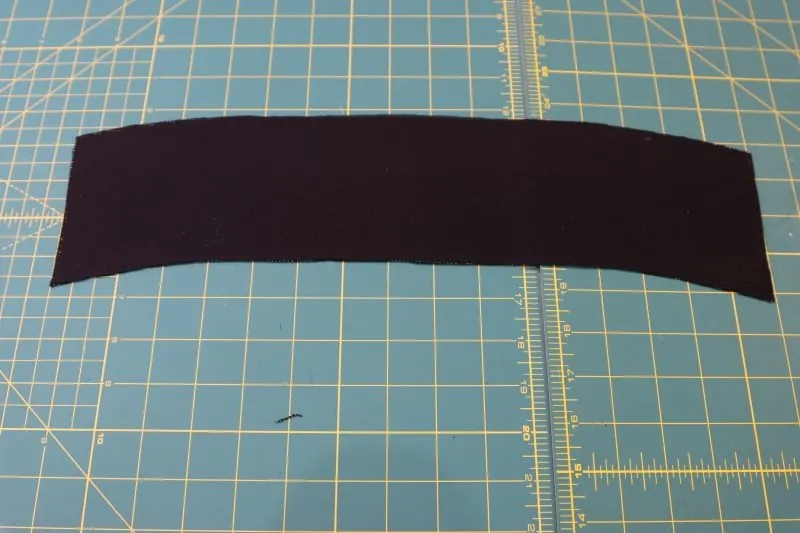
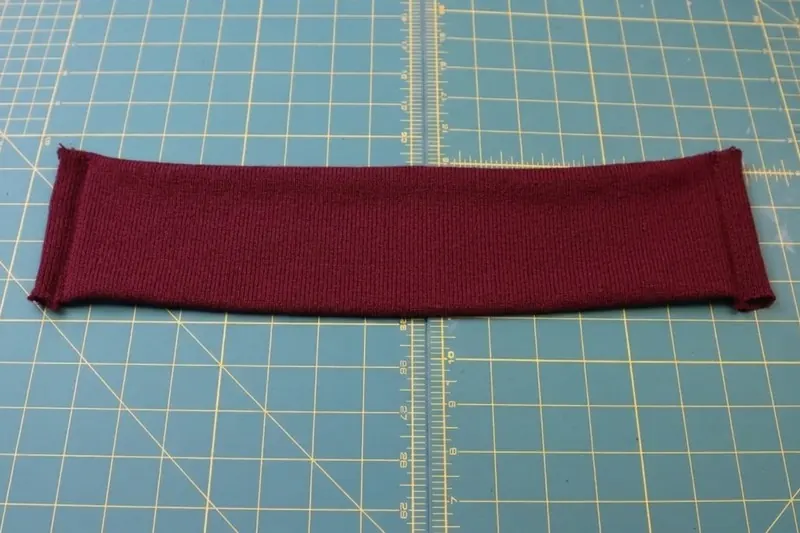
- Iron a piece of fusible knit interfacing onto the wrong side of one of the two collar pieces.
- Place the two collar pieces right sides together.
- Pin and stitch around the top and sides of the collar.
- Trim the corners of the collar.
- Turn the collar right side out.
- Press the seams flat.
Step 9 — Center front interfacing
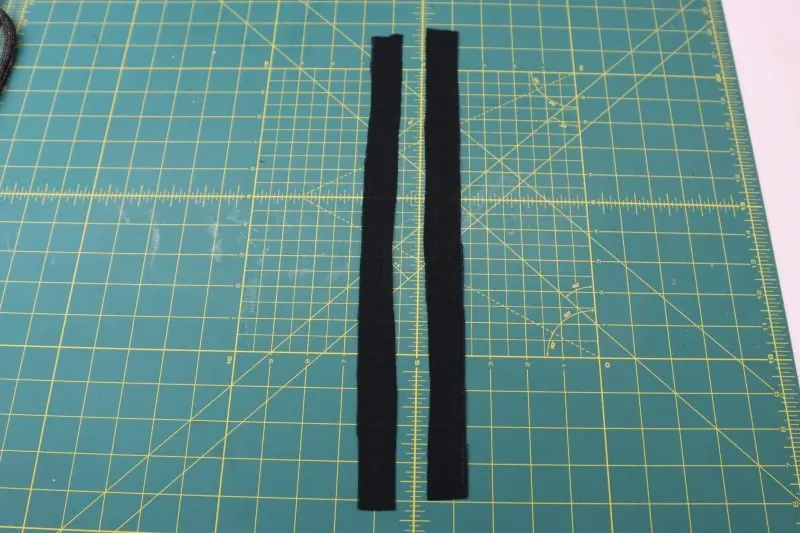
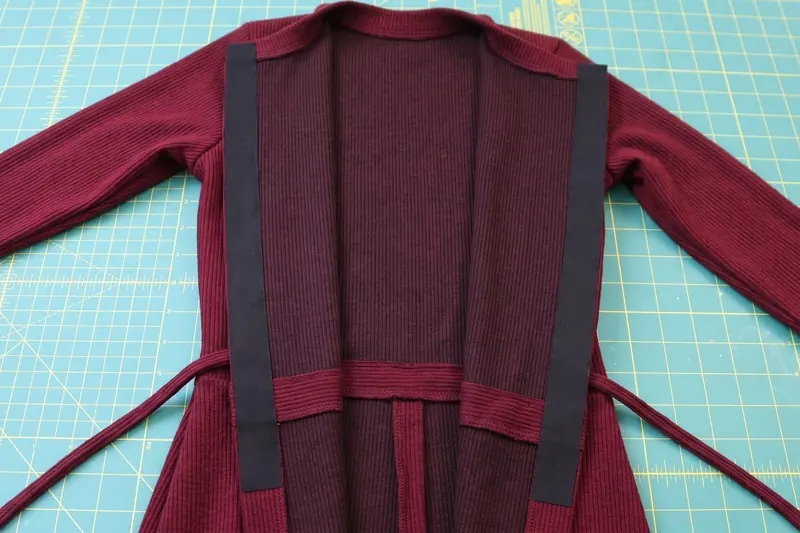
- Cut two strips of fusible knit interfacing 2.5 cm (1") wide and 40.6 cm (16") long, or whatever length you want the jumpsuit's center front zipper to be.
- Place the strips along the wrong side of the center front opening.
- Fuse the strips onto the center front opening.
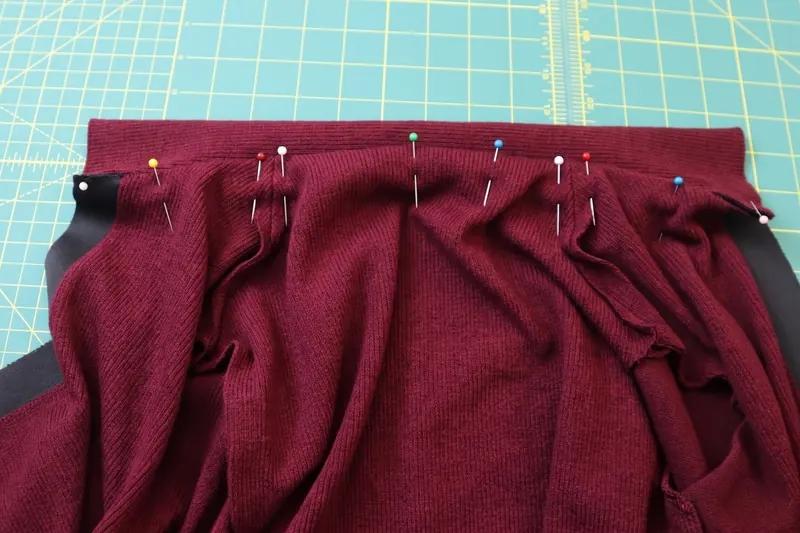
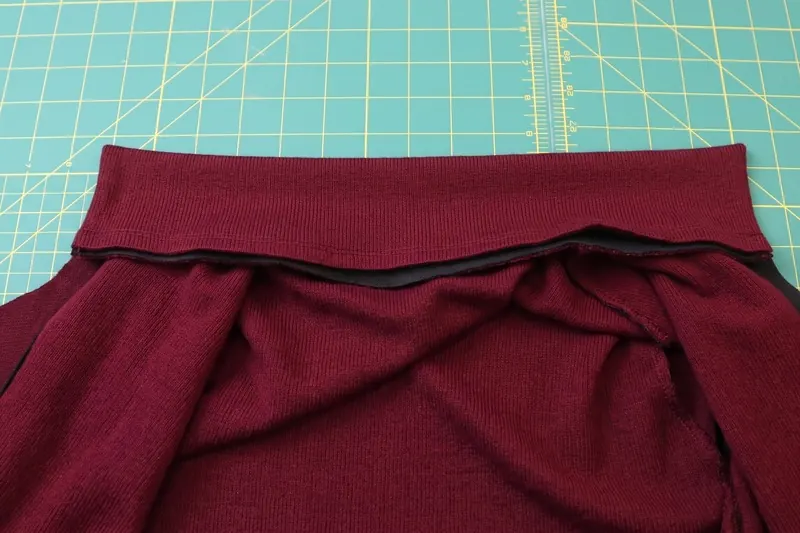
Step 10 — Attaching the collar
- Pin the interfaced side of the collar right sides together to the bodice neckline.
- Stitch the collar to the neckline.
Step 11 — Zipper
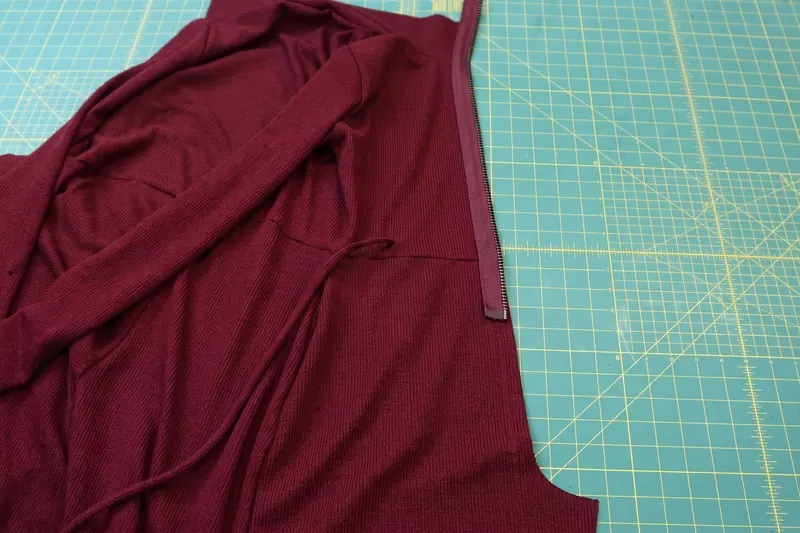
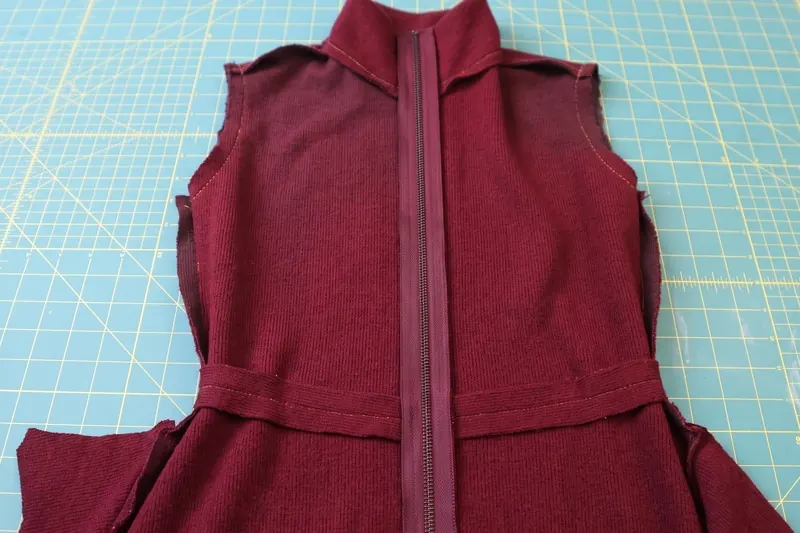
- Place the zipper right sides together on one side of the center front opening.
- Pin and stitch the side of the zipper tape closest to the raw edge of the fabric.
- Turn the jumpsuit wrong side out.
- Pin the other side of the zipper tape to the opposite side of the center front opening, right sides together.
- Stitch the other side of the zipper.
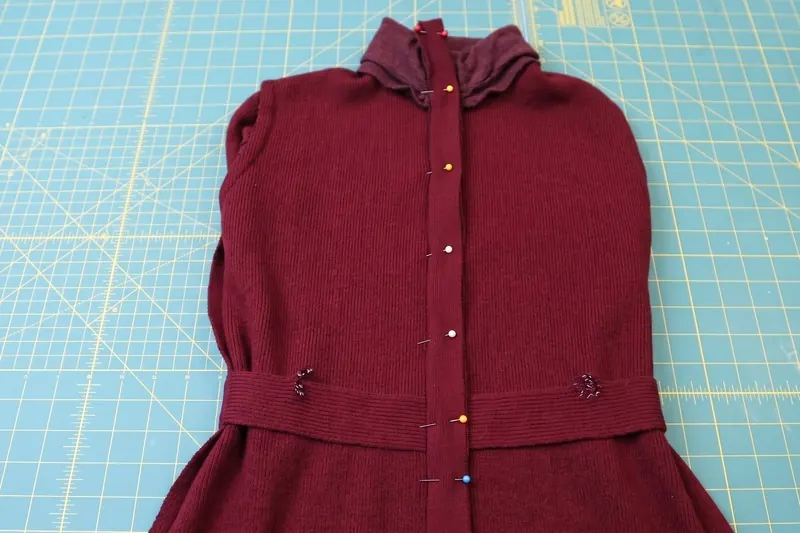
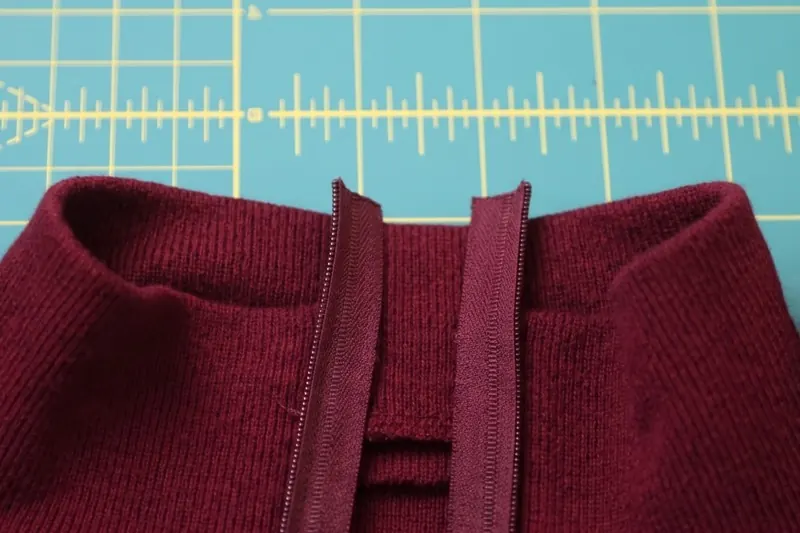
- Trim the zipper tape that extends past the top of the collar.
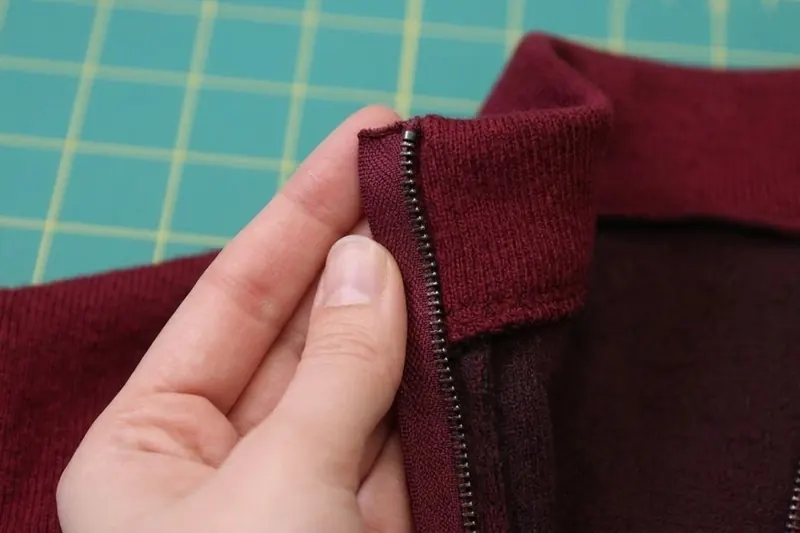
- Tuck the ends of the zipper tape under the zipper seam allowance.
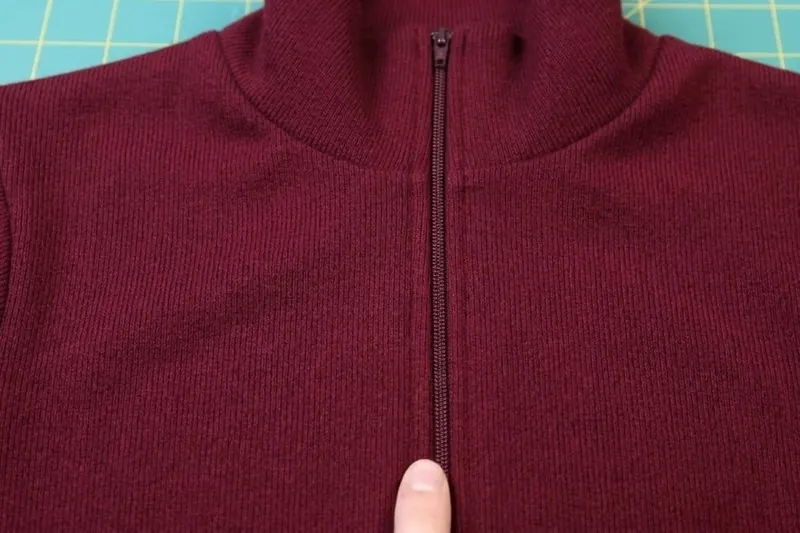
- Topstitch the sides of the zipper, making sure to catch the tape ends at the top of the collar.
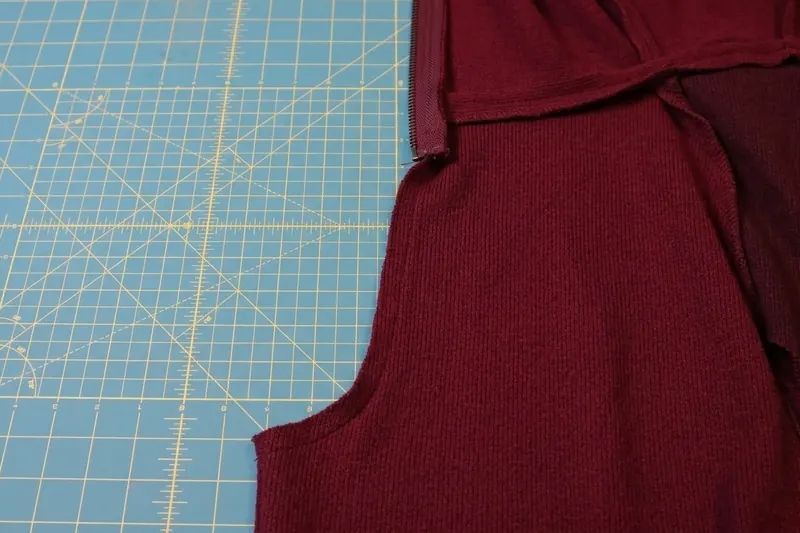
Step 12 — Front crotch seam
- Place the front pant pieces right sides together, with the front crotch edges aligned.
- Pin and stitch the front crotch seam, below the zipper.
Step 13 — Inseam
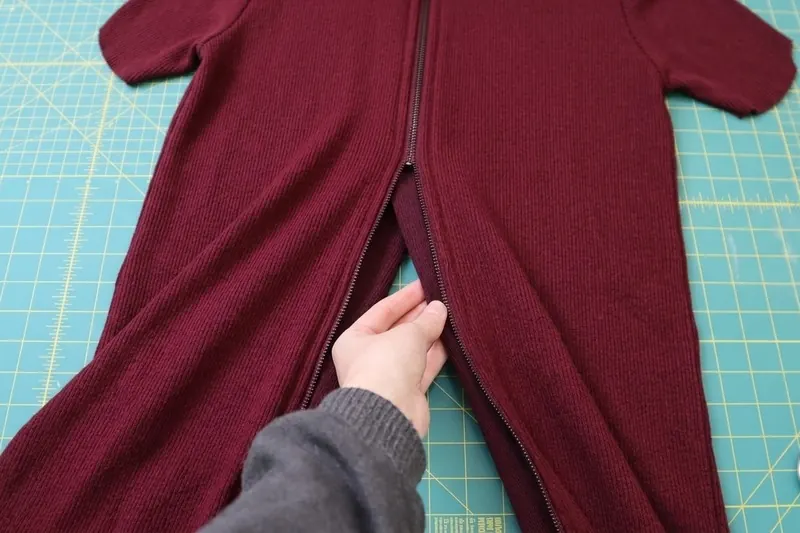
- Place the front and back pant pieces right sides together, with the crotch seams aligned.
- Pin and stitch the inseam.
Step 14 — Hem
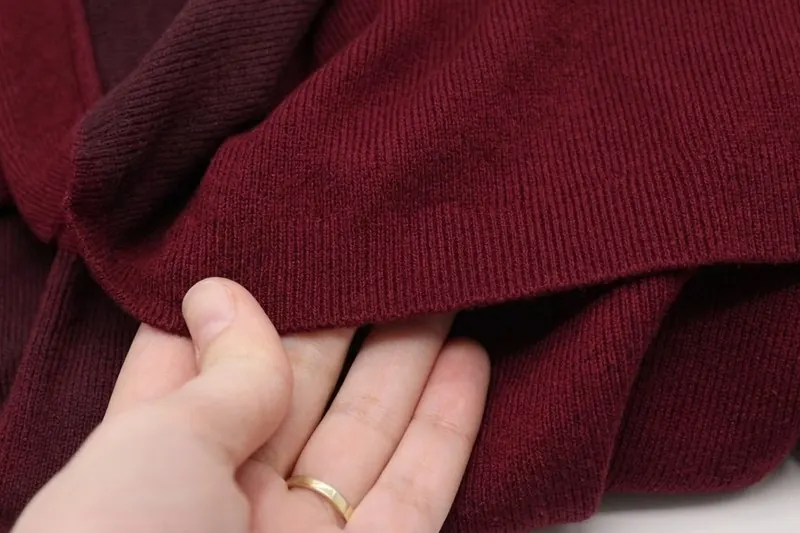
- Fold up a 2.5 cm (1") hem at the bottom of the pants.
- Press the fold.
- Stitch the hem with a 2.2 cm (⅞") seam allowance.
Practical tips for sewing the jumpsuit
These common sewing techniques complement the construction. They change neither the order of the steps nor the measurements in this tutorial.
Before you start
- Test the stretch stitch on a scrap of rib knit, in a double layer, to set the stitch length and tension. A knit needle (ballpoint or stretch) keeps the fabric from running.
- Test your iron on a scrap before pressing the jumpsuit: low or medium heat.
- Transfer the pattern markings to the fabric before removing the paper: tie slits on the front bodice (labeled "Slit for ties"), notches and pocket placement (labeled "Pocket Placement"), armhole marks (labeled "Front Armhole" and "Back Armhole").
Yardage for sizes other than S
- Once the pattern is assembled and cut to your size, lay all the pattern pieces on the floor over an area the width of your fabric. Respect the grainline and the pieces cut "on the fold", and count each piece as many times as it is cut (for example F: 2 on the fold; G: 2 pairs). Measure the length used: that is the minimum yardage.
- Buy a little more than this minimum, so you can test your stitching and pressing on scraps.
Waist ties (step 4)
- A loop turner makes it easy to turn the narrow ties right side out.
- When marking the slits (step 1), check that both slits are at the same height.
Zipper (step 11)
- Pin the zipper tape with pins placed crosswise, so it doesn't slip on the knit.
- Stitch with a zipper foot, without touching the teeth.
- Before stitching the second side, close the zipper and check that the waist seam and the ties line up at the same height on both sides.
Collar (steps 8 and 10)
- Push out the corners of the collar with a fine, non-sharp point before pressing it.
- Press the collar on low or medium heat, like the rest of the rib knit.
Test garment (muslin)
- Cut pieces A, B, C, D and E from an inexpensive knit with a stretch similar to your real fabric, and sew them together with a stretch stitch, without finishing.
- Check the bust, waist and hips (Tables 1 and 2), the length of the pants and sleeves, and that you can move and sit down freely.
- Transfer any changes to the paper pattern before cutting your real fabric.
Enjoyed sewing a front zipper? Try our Cropped Zip Jacket tutorial next, or go sleeveless with our Sleeveless Trench Dress tutorial.
Sewing glossary
This glossary defines the sewing terms used in this tutorial, from "armhole" to "zipper". Keep it handy while you sew.
| Term | Definition |
|---|---|
| Armhole | Opening in the garment where the sleeve is sewn in. |
| Crotch seam | Curved pant seam that runs between the legs, front and back. |
| Dart | Stitched, tapered fold that adds shape to the fabric. |
| Fusible interfacing | Reinforcing fabric ironed onto the wrong side of a piece to stiffen it. |
| Grainline | Direction of the fabric threads, parallel to the selvage. |
| Inseam | Inner seam of the pant leg, from the crotch to the hem. |
| Loop turner | Long, thin tool used to turn narrow fabric tubes right side out. |
| Mirrored | Two pieces that are mirror images: one left and one right. |
| Neckline | Edge of the garment around the neck. |
| Notch | Small cut or mark on the edge of a piece, used as a guide for assembly. |
| On the fold | The piece is placed against the fold of the fabric: once cut and unfolded, it is double and symmetrical. |
| Pocket bag | Inner part of the pocket, where the hand goes. |
| Raw edge | Cut, unfinished edge of the fabric. |
| Rib knit | Stretch knit with fine vertical ribs. |
| Right side / wrong side | The good side of the fabric / the inside. |
| Seam allowance | Distance between the edge of the fabric and the stitching line (here 1.27 cm, included in the pattern). |
| Selvage | Finished edge of the fabric, along its length. |
| Sleeve cap | Rounded top of the sleeve, sewn into the armhole. |
| Stretch stitch | Machine stitch that stretches with the knit (also called the lightning stitch). |
| Tailor's chalk | Flat chalk used to draw markings on fabric; it rubs off afterward. |
| Topstitching | Stitching visible on the right side, parallel to an edge or a seam. |
| Underarm seam | Seam that closes the sleeve, from the wrist to the underarm. |
| Zipper | Closure with two tapes fitted with teeth (here a nylon coil) that open and close with a slider. |
In the PDF pattern, the sheets to print are pages 27 to 75. Print them at actual size. You'll find the Zip-Front Jumpsuit PDF pattern in the shop, and for colder days, our Shawl Collar Coat tutorial.
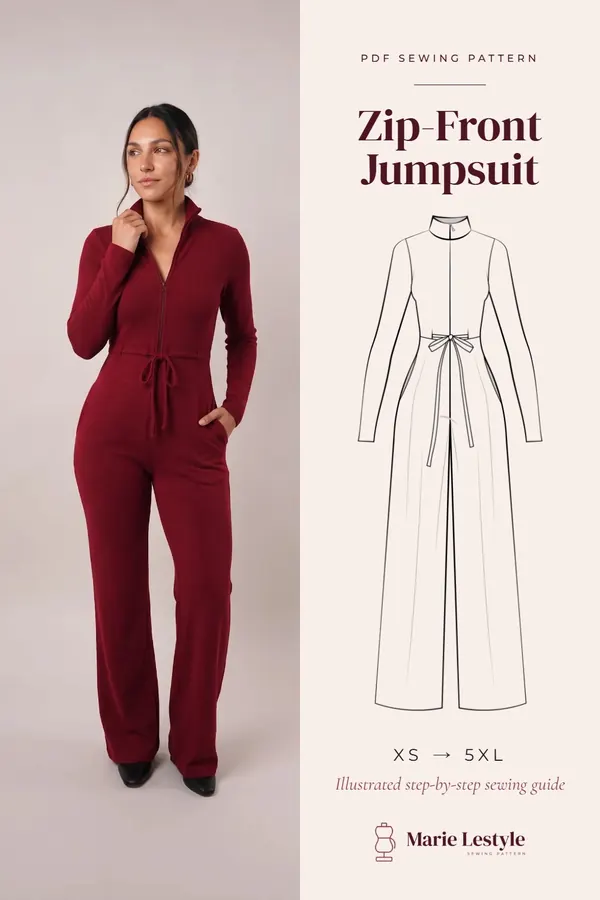
PDF · XS – 5XL
The PDF pattern for this design : Zip-Front Jumpsuit
Every piece to print at home at full size, with this guide as a PDF.
Download the PDF patternPDF pattern sold in the Marie Lestyle shop.
Frequently asked questions : Zip-Front Jumpsuit
What sizes does this jumpsuit sewing pattern come in?
The pattern covers women's sizes XS to 5XL, plus sizes included. The bust measurement goes from 78.7–81.3 cm (31–32") in XS to 142.2–152.4 cm (56–60") in 5XL. Compare your bust, waist and hip measurements with the tables in the “Choosing your size” section, and choose the pant size based on your hip measurement.
How much fabric do I need to sew the Zip-Front Jumpsuit?
For size S, you need 2.5 yards (2.29 m) of stretch rib knit. For another size, lay all the pieces on the floor over an area the width of your fabric, counting each piece as many times as it is cut, and measure the length they take up: that is the minimum yardage. Buy a little more so you can test your stitching and pressing on scraps.
What fabric works best for this jumpsuit?
The pattern is designed for stretch fabrics and works best with lightweight to medium-weight stretch knits. Rib knit and spandex are recommended; stretch lace and stretch velvet are other possible fabric types. The sample is sewn in a burgundy rib knit.
What supplies do I need besides fabric?
For size S: 0.5 yard (0.46 m) of black fusible knit interfacing, medium weight and single-sided fusible; 1 classic nylon coil zipper, 61.0 cm (24"), to match the fabric; and 1 spool of 1000 m all-purpose sewing thread, to match the fabric. You'll also use a loop turner and tailor's chalk.
Is the Zip-Front Jumpsuit a good project for beginners?
Yes. The jumpsuit was designed with beginners in mind: the stretch of the rib knit means fewer fitting headaches, and there is no complicated closure hidden in tricky seams. The exposed zipper is sewn in step 11, with photos for each stage.
Can I adjust the pant length for petite or tall women?
Yes. The pant length includes an extra 10.2 cm (4") for standard sizes, so the jumpsuit can be worn with heels. To keep the same look, remove 5.1 cm (2") for petite women and add between 7.6 and 12.7 cm (3 and 5") for tall women.